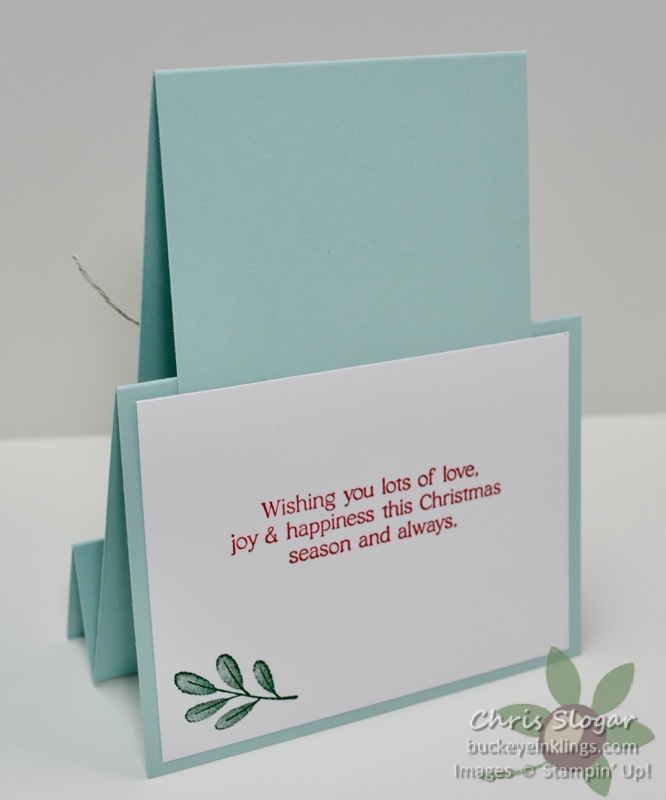
I think the faux version is easier because it uses simple rectangular pieces. I also like the fact that the designer paper pieces measure 3″ x 4″, so you can substitute Memories & More cards if you wish. I also used a 3″ x 4″ piece of Basic White on the back for my greeting.
Dimensions are as follows…
Pool Party 3 1/4″ x 8 1/2″, scored at 5 1/2″
Pool Party 4 1/4″ x 9″, scored at 1 1/4″, 2 1/2″, 5 3/4″
Designer Paper (2) 3″ x 4″ and (1) 1″ x 4″
Real Red (2) 3 1/8″ x 4 1/8″ and (1) 1 1/8″ x 4 1/8″
Basic White 3″ x 4″
The video from last night’s Facebook Live shows complete assembly instructions. Please join the Buckeye Inklings Stampers Group on facebook to get notice of all of my live videos.
If you need any of our fabulous products, I would very much appreciate your business. Please click here for the online store, or use the carousel below to be directed to a specific product used today.
Place a $35 order with Host Code CZ9ECBDM in October and I will send you a package of Adhesive-Backed Stars and a handmade card. This is my way of sharing the Stampin’ Rewards with you – I appreciate your business!!
I learned this fun project from my upline Mindy Gray at a team event this week, and I had to share – so it was the subject of this week’s Facebook Live. I should also mention that Mindy gives credit to our friend Candy Michael for showing her how to make it – very typical that we are all sharing and CASE-ing each other!
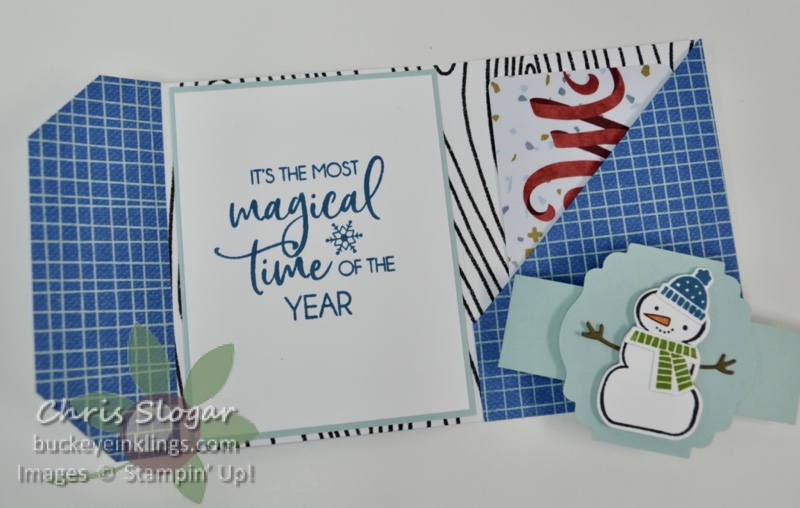
The version I made last night (shown above) uses Celebrate Everything designer paper with the Snowman Magic Bundle and a greeting from Brightest Glow. I have put that Facebook Live on my YouTube channel, and you can view it here…
Please join the Buckeye Inklings Stampers group on Facebook to catch my videos live. I appreciate any help you can give me in Likes and Shares, as well as purchases in my online store!
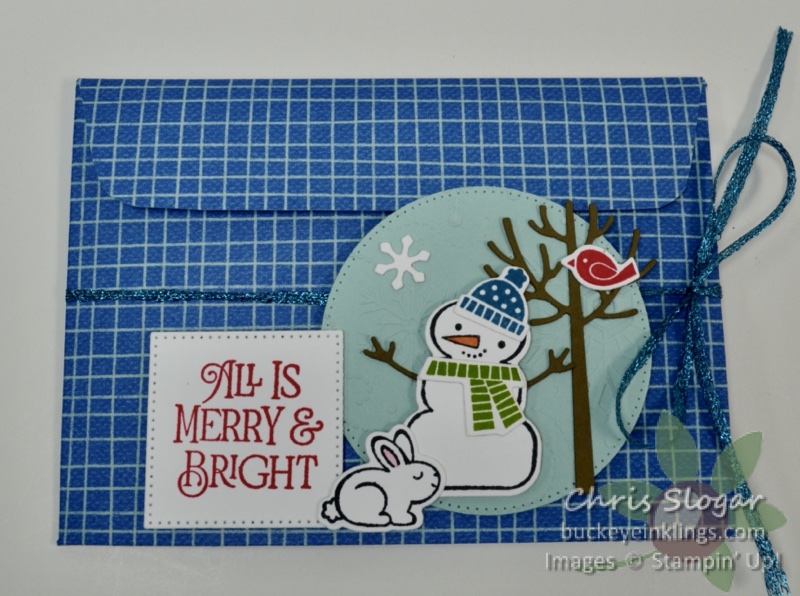
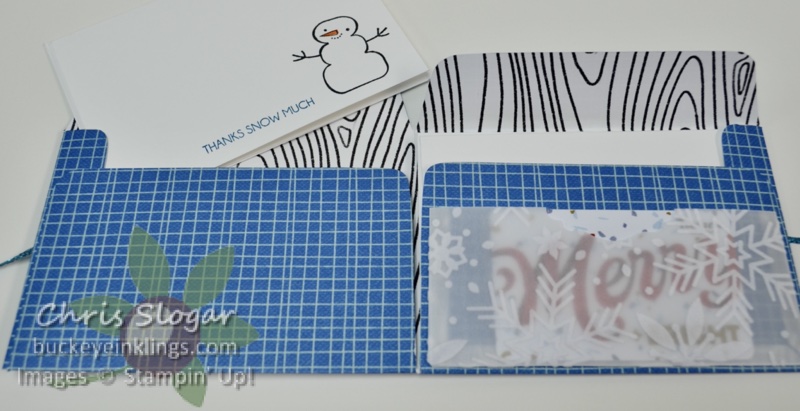
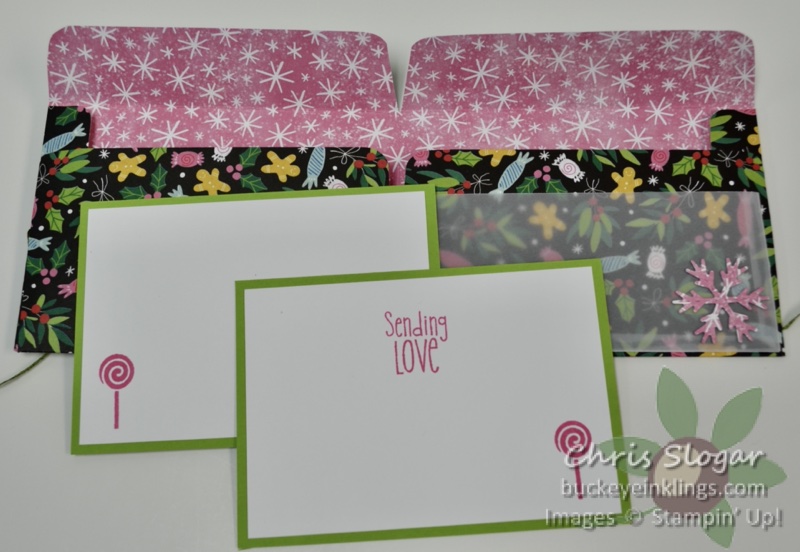
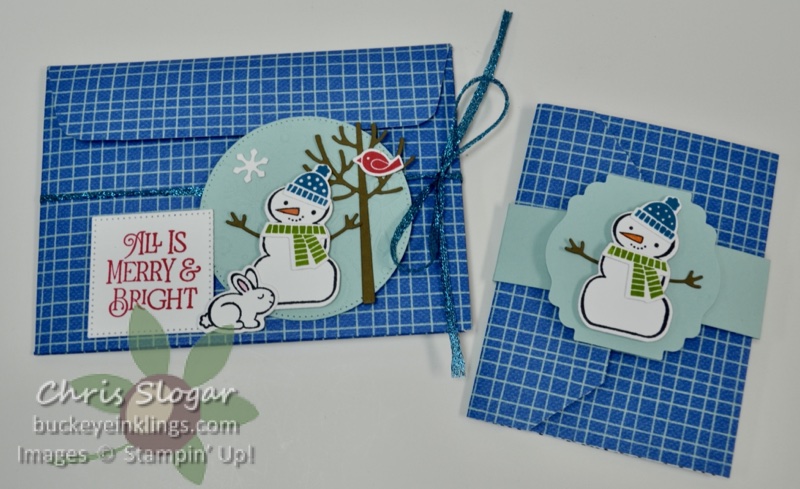
The gift wallet opens as shown above, and each side can hold a note card or any type of flat gift, like a hot cocoa pouch. I have put one of our precut and scored note cards in each pocket. There is also a vellum pocket that is perfect for a little gift tag or a gift card.
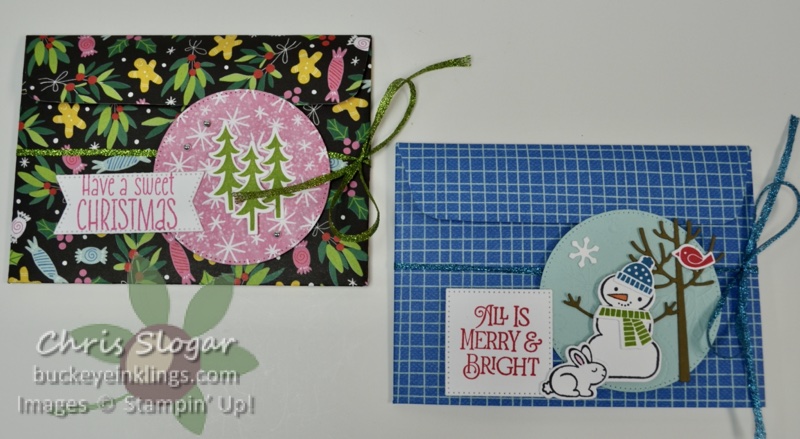
The one on the left is the version we made at our team event, also made from a print in the Celebrate Everything designer paper collection. The stamps are from Sweet Gingerbread. It holds pocket cards as shown below…
The wallet itself is easy to make from a 8″ x 12″ piece of designer paper. The paper is scored along the 12″ side at 3/4″, 6″ and 11 1/4″, and along the 8″ side at 1 1/4″ and 5″. Watch directional prints, and keep in mind that the 1 1/4″ dimension is for the flap at the top of the pouches. You may need to refer to the video to see how to use these score lines as a guide to cut the base shape.
The vellum pocket is made from vellum measuring 5 1/2″ x 2 1/2″, and scored at 1/4″ on three sides.
The pocket cards in the black and pink version are made from 3 1/2″ x 5″ cardstock mats with 3 1/4″ x 4 3/4″ Basic White stamped layers.
I made a coordinating gift card holder with the leftover 4″ x 12″ strip of designer paper. This is my all-time favorite (and easiest!) design for gift cards.
The 4″ strip was scored at 3″, 6″ and 9 1/8″. The 3″ section is the one that creates the pocket with the diagonal fold. The 2 7/8″ section is folded back on itself to create the end flap (at left in the above picture). The greeting is stamped on 2 7/8″ x 3 3/4″ Basic White, matted on 3″ x 3 7/8″ cardstock.
These are really fun designer paper projects. Our designer paper is so perfect for these because of its weight, and the fact that it is two-sided! I hope you’ll give these projects a try! The products used are on a carousel at the end of this post.
And if you are still reading…I would like to repeat some thoughts from a post I made last fall. They are even more applicable this year as I consider the changes I need to make in my business.
My favorite part of the job is creating and sharing new projects. I welcome visits from Teammates, Customers, Demonstrators, and Customers of other Demonstrators 🙂 It has always been my intent to freely share ideas.
My following has increased by all measures, and I really do appreciate that! Unfortunately, like many Demos, my sales are down, and that does have me questioning the time I can devote to sharing my projects.
I am opposed to offering big discounts and freebies that entice Customers away from my own Teammates and other Demonstrators. The vast majority of Demonstrators cannot provide big discounts and excessive freebies. I offer a modest gift for my customers from the Stampin’ Rewards that are collected from our combined orders.
I know there are many factors currently affecting sales. However, if you are a Customer, you can help – please do not choose your Demonstrator by the discounts and freebies. Instead, consider where you get your ideas and who you would like to support. This is a thoughtful PSA from me today, and I thank you for considering it! It may be a losing battle, but I say it for the sake of my Team and all of the other Demonstrators who share so freely!
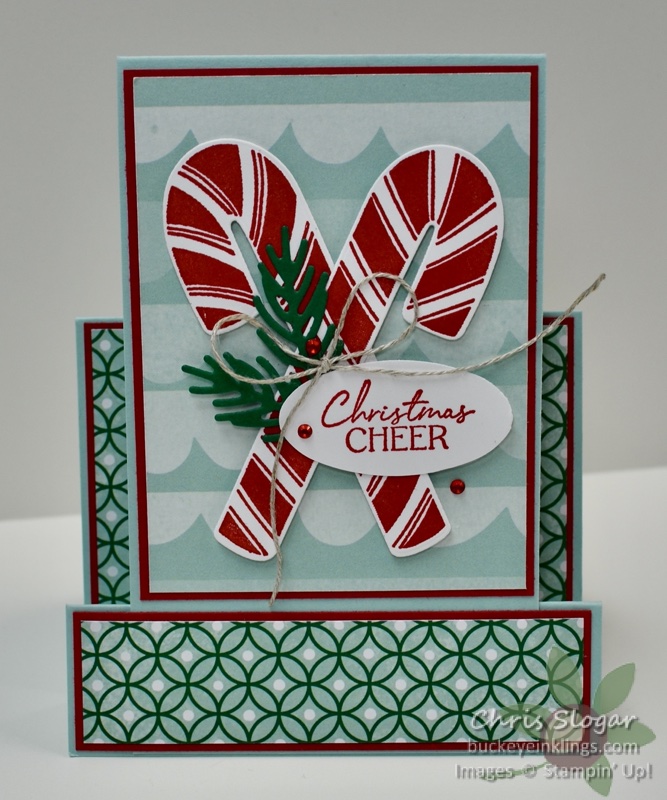
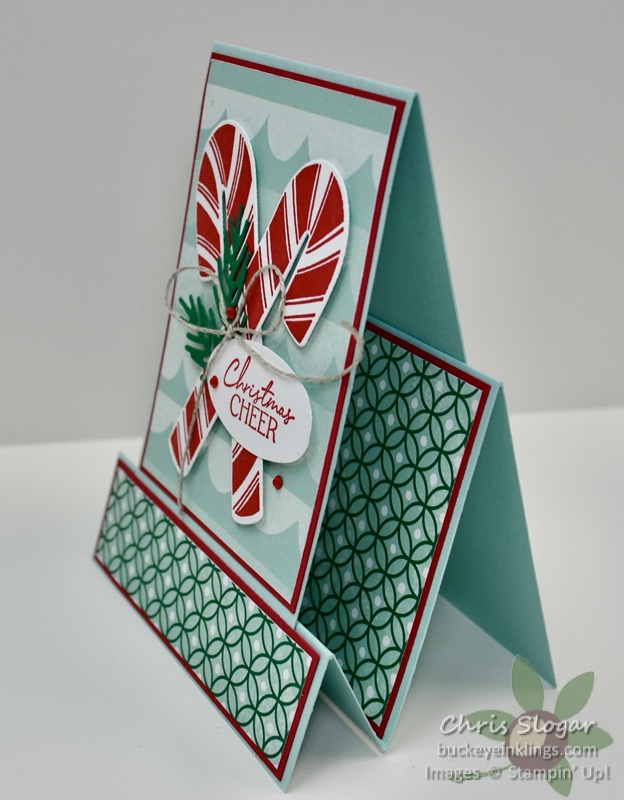
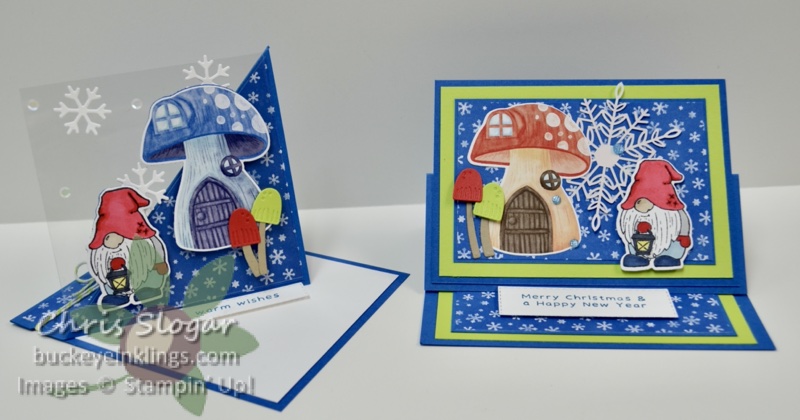
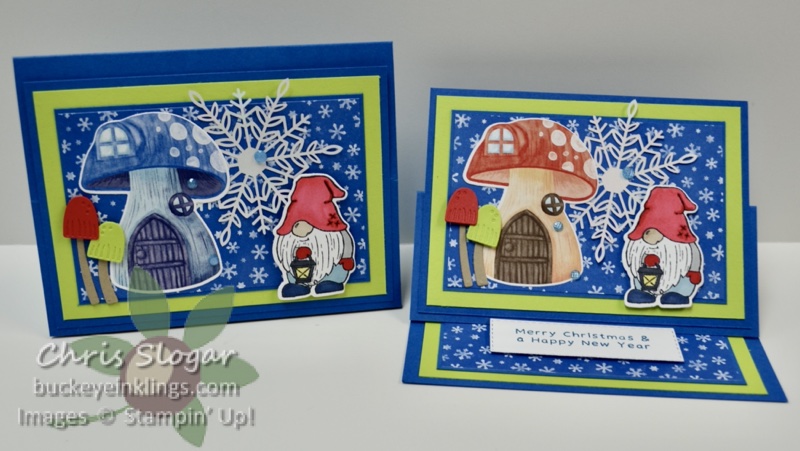
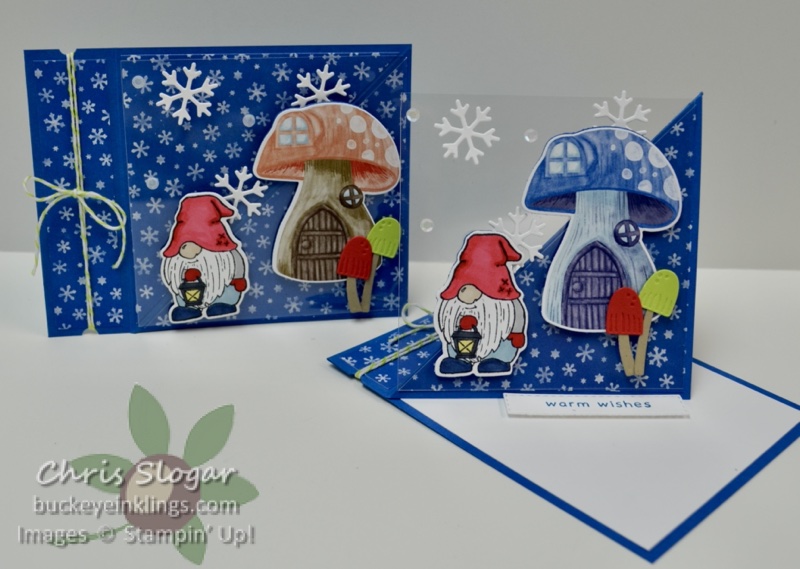
Last night on Facebook Live, I showed how to make these two types of easel cards – a twisted easel and a more traditional easel, using the Kindest Gnomes bundle and coordinating designer paper. I am showing pictures and dimensions here, but click here for full details in the video.
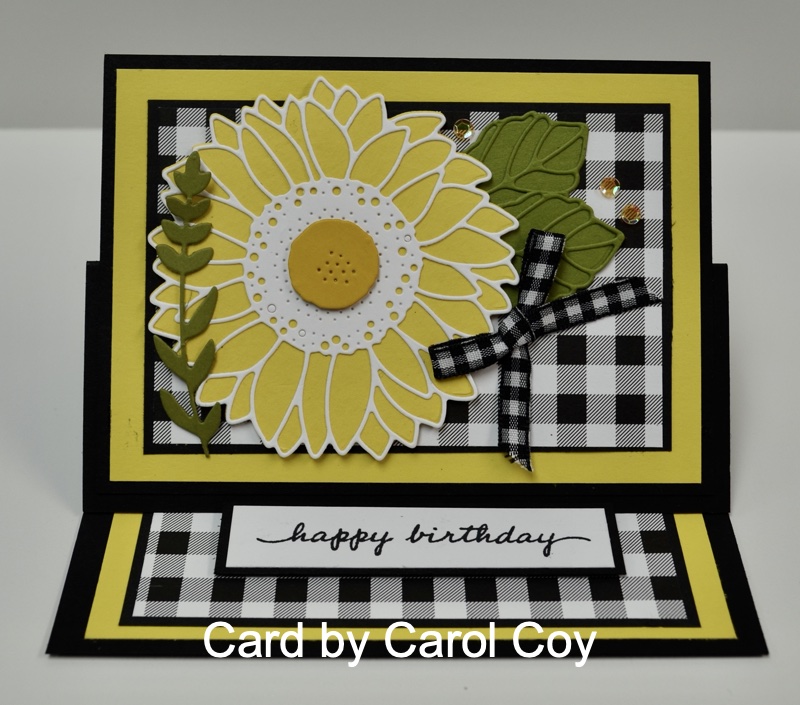
I CASEd the layout of a card I received from Carol Coy to make the first easel, though mine looks quite different made with the Kindest Gnomes. (See Carol’s beautiful sunflower card below.)
Dimensions are as follows…
Pacific Point card base 5 1/2″ x 8 1/2″, scored at 2 1/8″ and 4 1/4″
Pacific Point mat 3 3/4″ x 5 1/4″
Parakeet Party 4″ x 5″ and 3 1/2″ x 5″
Pacific Point 3″ x 4 1/2″ and 1 3/4″ x 4 1/2″
Designer Paper 2 7/8″ x 4 3/8″ and 1 5/8″ x 4 3/8″
Note that you could change the size of the Pacific Point mat and focal point pieces to accomodate whatever you would like to prop up on the easel.
I am showing Carol’s gorgeous card below. How different it looks with the sunflowers and plaid, right?! I think it would also be a lovely card in Christmas colors, perhaps with poinsettias. It’s such a lovely card to display!
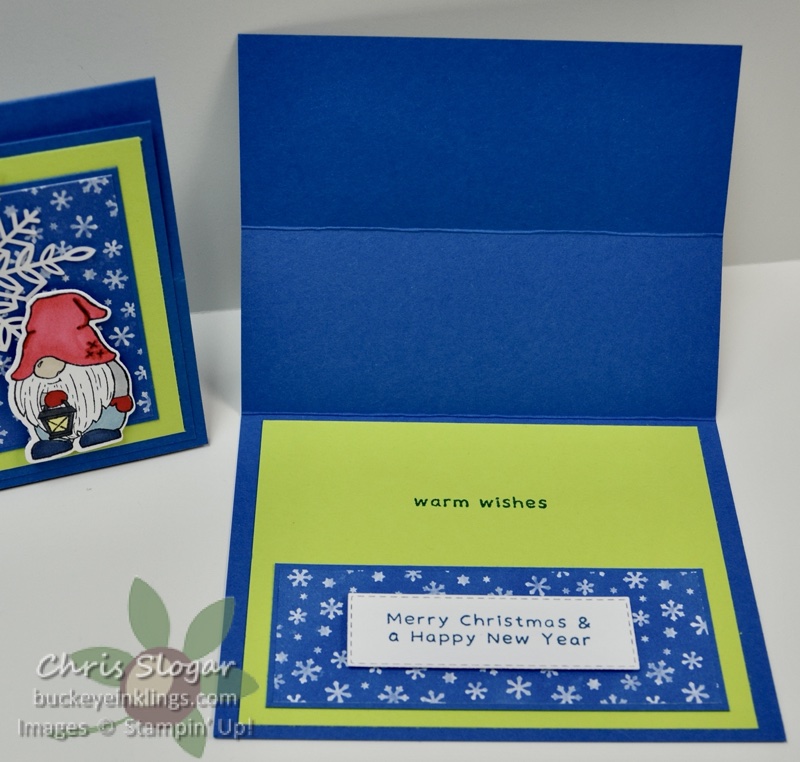
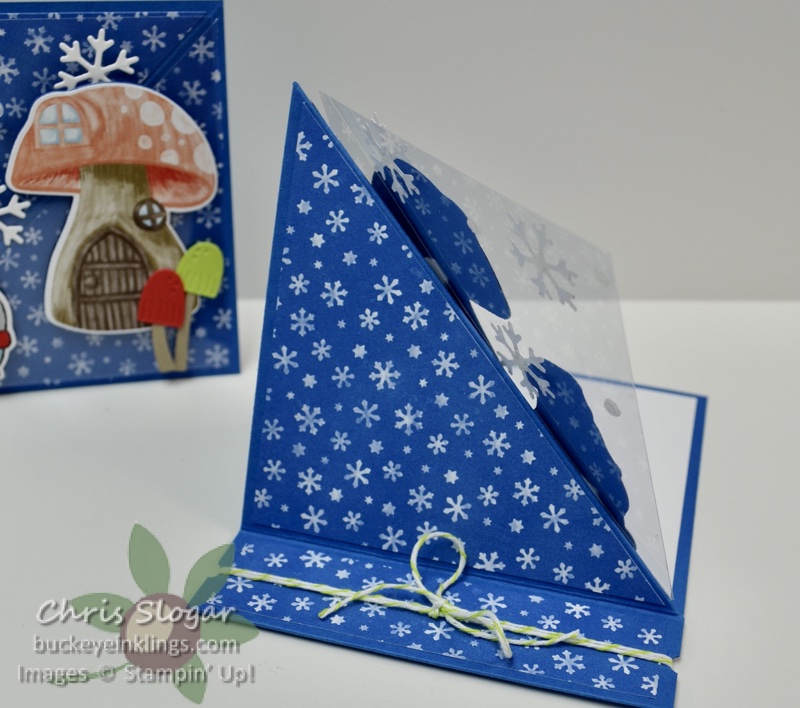
The second card is a twisted easel with a bookbinding edge – I have shown some fun variations of this before (click here), but I used a Window Sheet instead of a cardstock panel for my gnome scene.
Dimensions are as follows…
Pacific Point card base 4 1/4″ x 11″, scored at 5 1/2″ and 6 3/4″
Designer Paper 1″ x 4″ and 4″ x 4″, cut diagonally
Basic White and Window Sheet 4″ x 4″
These are fun to make, and great for a recipient to display – I hope you will give them a try with your favorite papers and stamps!
If you need any of our fabulous products, I would very much appreciate your business. Please click here for the online store, or use the carousel below to be directed to a specific product used today.
Place a $35 order with Host Code CZ9ECBDM in October and I will send you a package of Adhesive-Backed Stars and a handmade card. This is my way of sharing the Stampin’ Rewards with you – I appreciate your business!!
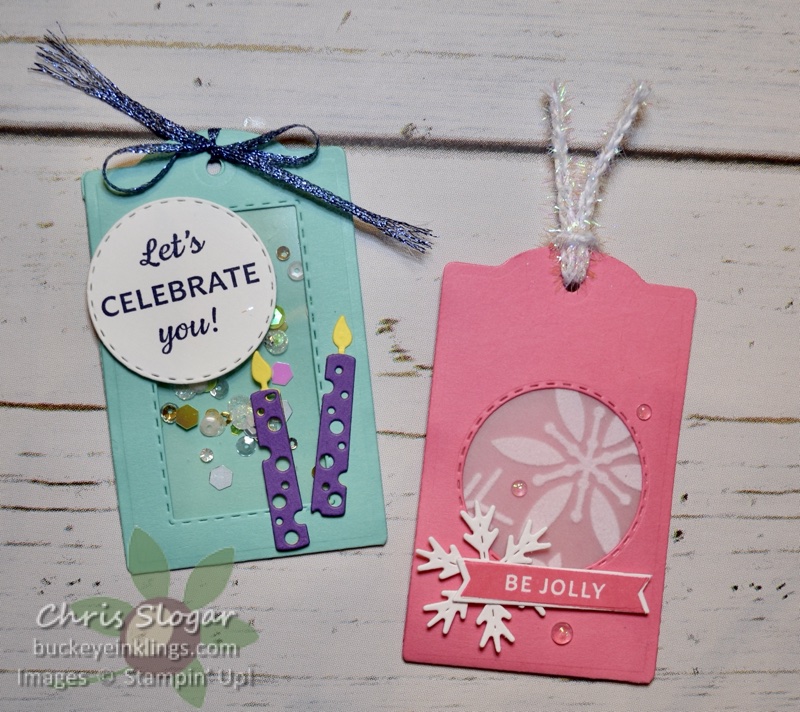
Last night on Facebook Live, I featured our fun tag bundle, Celebrate with Tags. I love the versatility of these tags! I also showed a fun fold card that can be made in any theme. I am showing pictures and dimensions here, but click here for full details in the video.
The tags shown above are made with the die that creates a pocket tag. I sealed one up to create a shaker with sequins, and the other is a true pocket – a gift card can slide in from the top before the trim is tied through the holes.
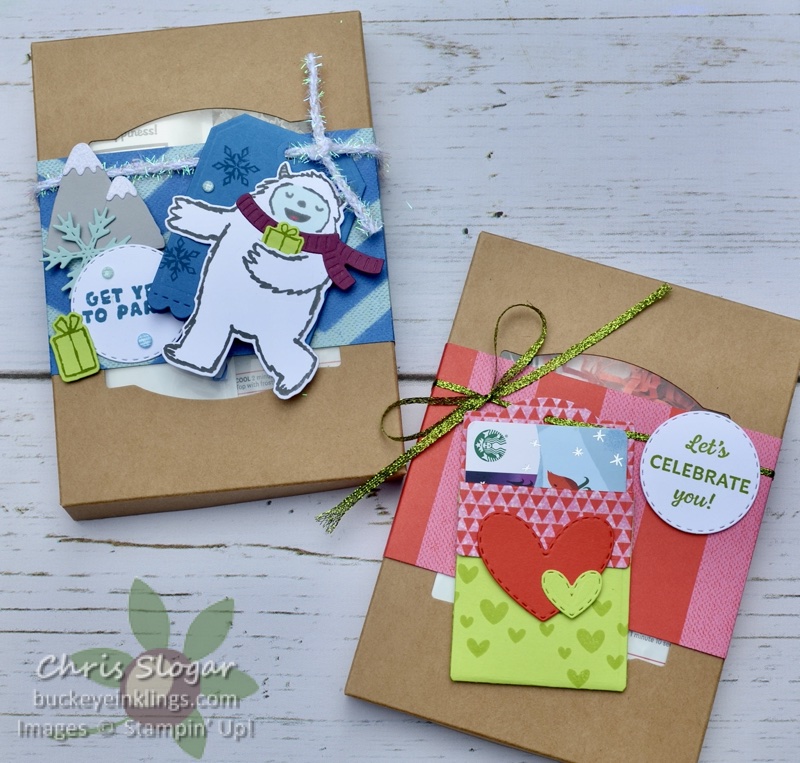
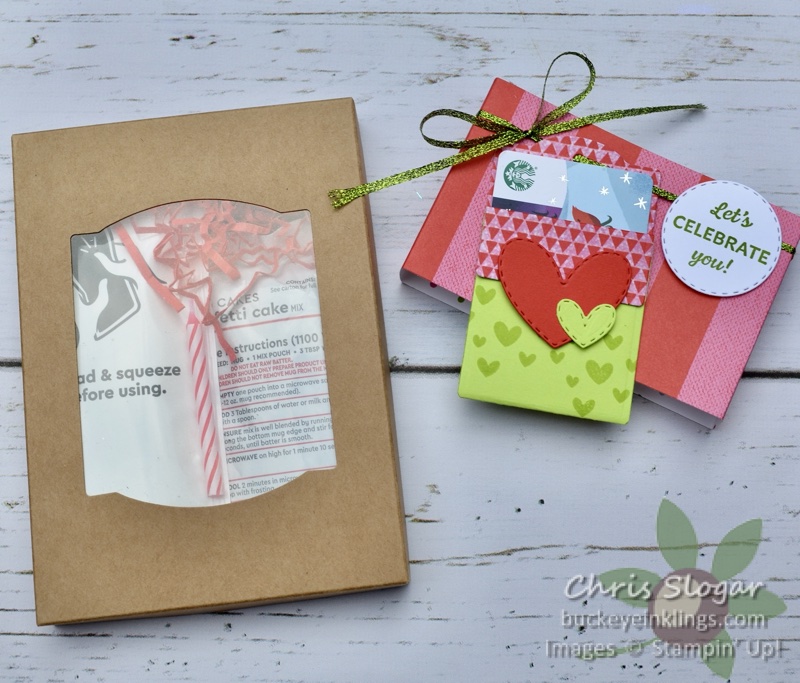
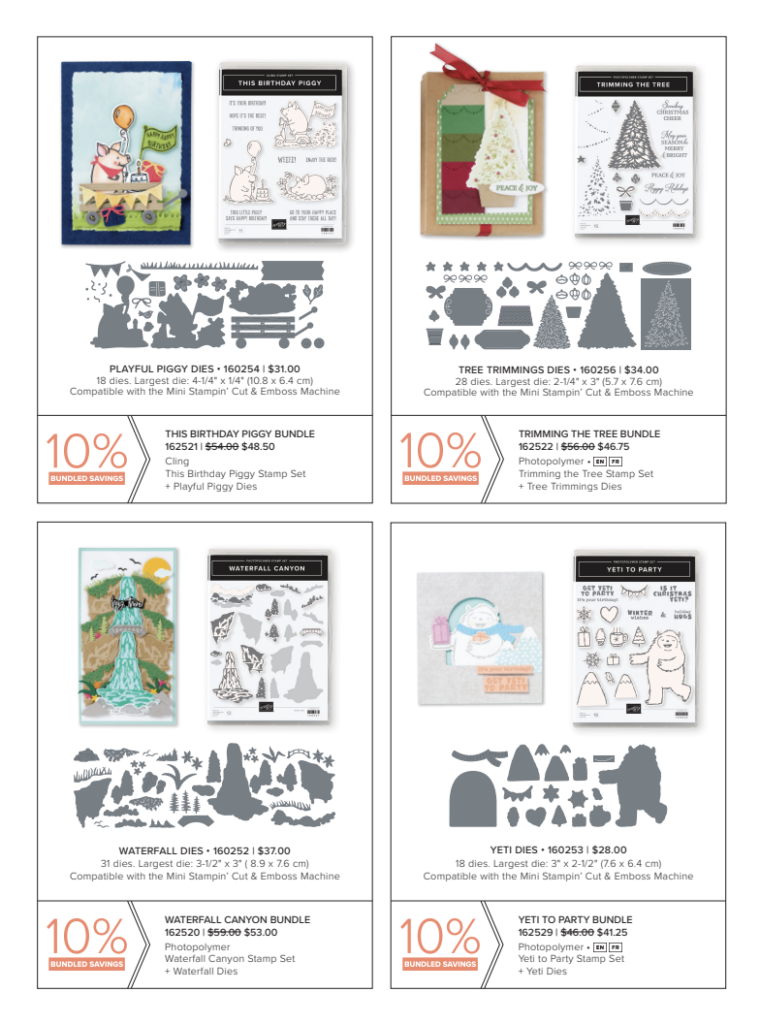
I also used these tags to decorate Kraft Gift Boxes. I wrapped the boxes with a 3″ width of Celebrate Everything designer paper. The one on the left uses the foldover tag from the die set along with the Yeti to Party bundle. The one on the right shows another version of the pocket tag, and it is decorated with more stamps and dies from the Celebrate with Tags bundle.
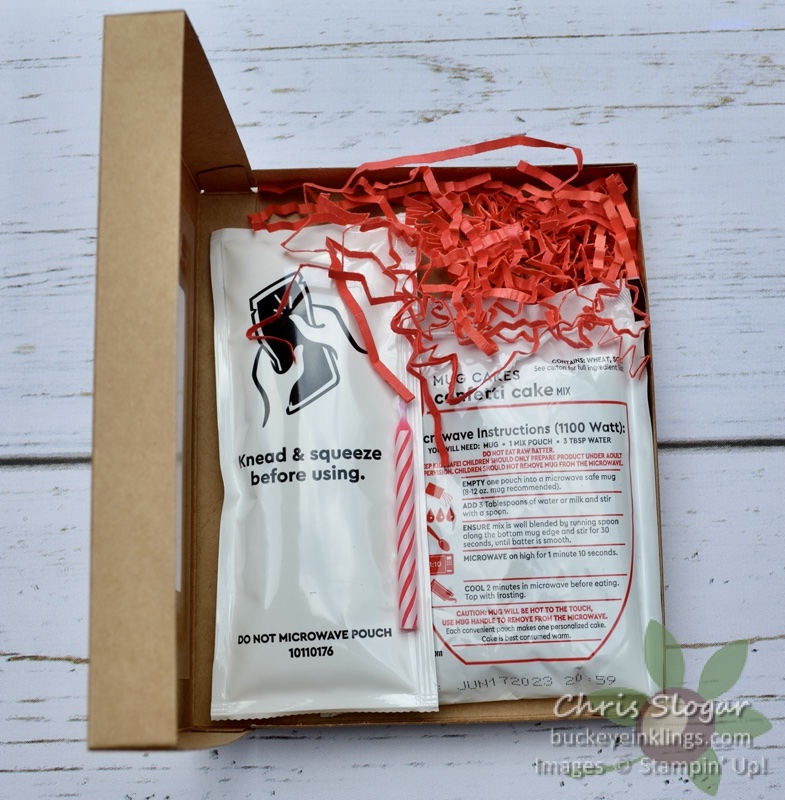
The boxes hold a mug cake & frosting packet and a birthday candle. The pocket version of the tag can also hold a gift card.
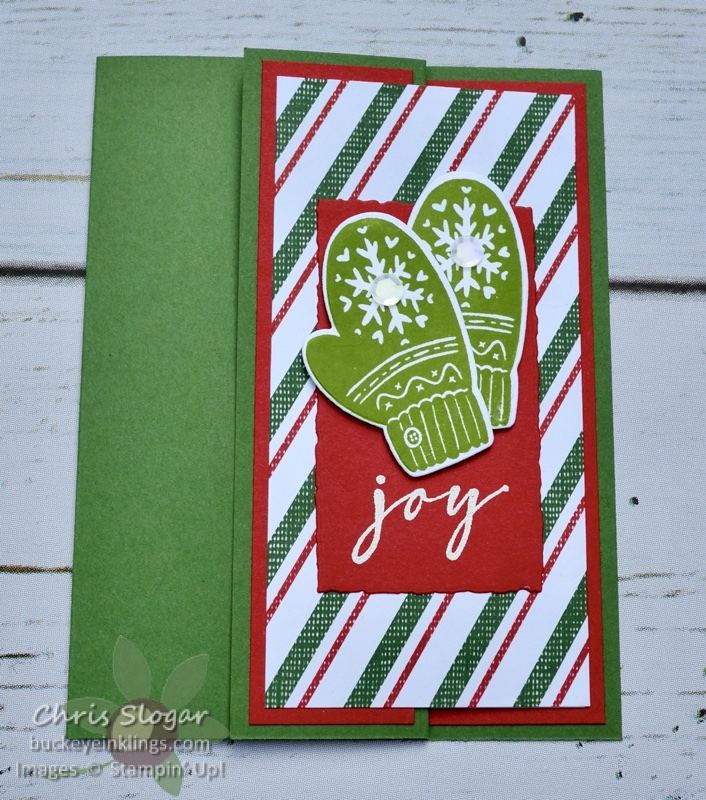
I also used stamps from the tag bundle and from Brightest Glow on this fun fold card. The paper is from the Sweetest Christmas collection. I learned this card fold from my upline Mindy Gray. The card base is a z-fold, and I love how it pulls open to show the front and inside at the same time.
Dimensions are as follows:
Garden Green Card Base 5 1/2″ x 8 1/2″, scored at 4 1/4″, 7″
Real Red 4″ x 5 1/4″ and 1 1/4″ x 5 1/4″
Designer Paper 2 1/2″ x 5″ and 7/8″ x 5″
Basic White 2 3/4″ x 5″
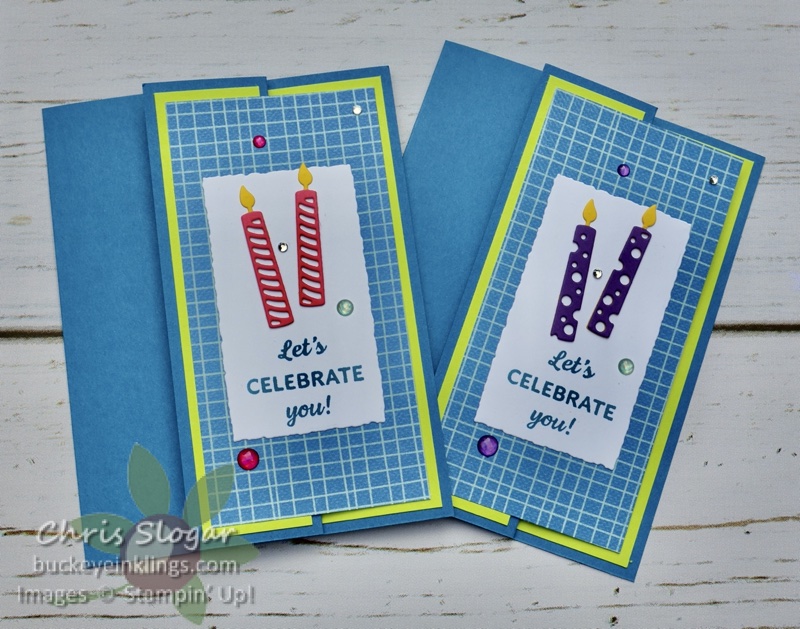
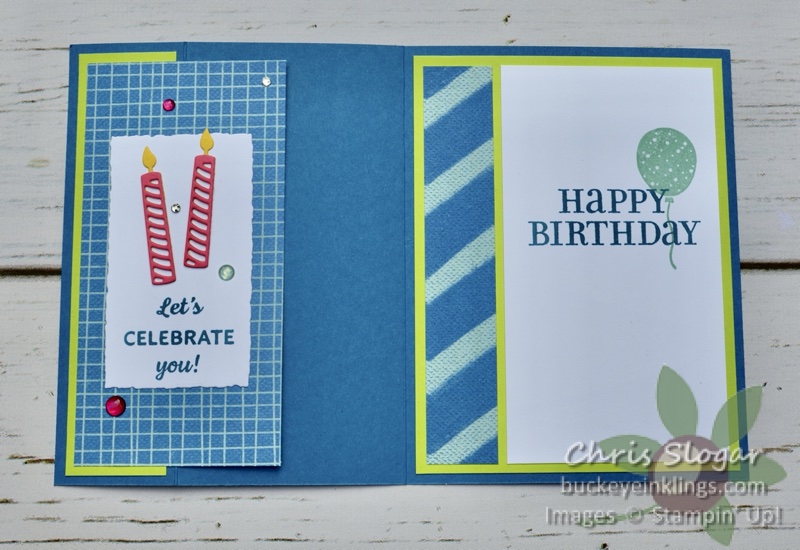
You can highlight anything on the front panel. I also made some birthday cards with the Celebrate Everything paper.
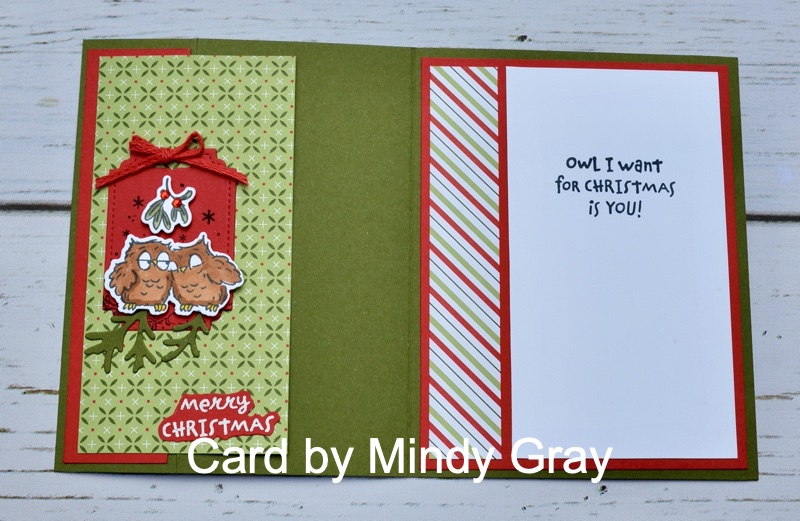
And I know you will want to see Mindy’s version too…
I received this in a card swap at least one year ago – the papers and stamps are retired, but it is a super-cute example of how to feature a little image on a regular-sized card.
Thank you so much for checking out my projects! If you need any of our fabulous products, I would very much appreciate your business. Please click here for the online store, or use the carousel below to be directed to a specific product used today. Due to the wide variety of themes covered, cardstock and ink are not included in the carousel.
Place a $35 order with Host Code KS4KANB3 in September and I will send you a package of Adhesive-Backed Seasonal Sequins and a handmade card. This is my way of sharing the Stampin’ Rewards with you – I appreciate your business!!
Please click here for the online store. Place a $35 order with Host Code KS4KANB3 in September and I will send you a package of Adhesive-Backed Seasonal Sequins and a handmade card. This is my way of sharing the Stampin’ Rewards with you – I appreciate your business!!
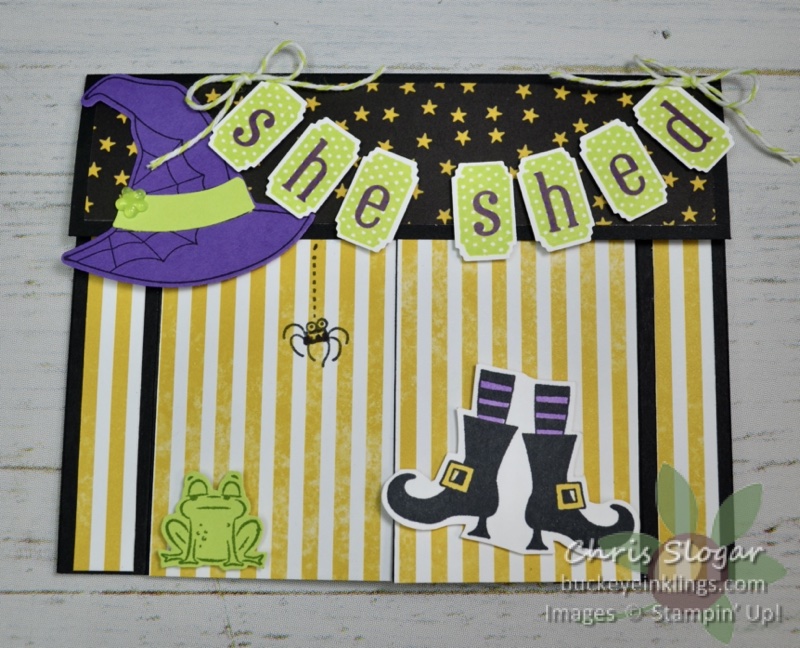
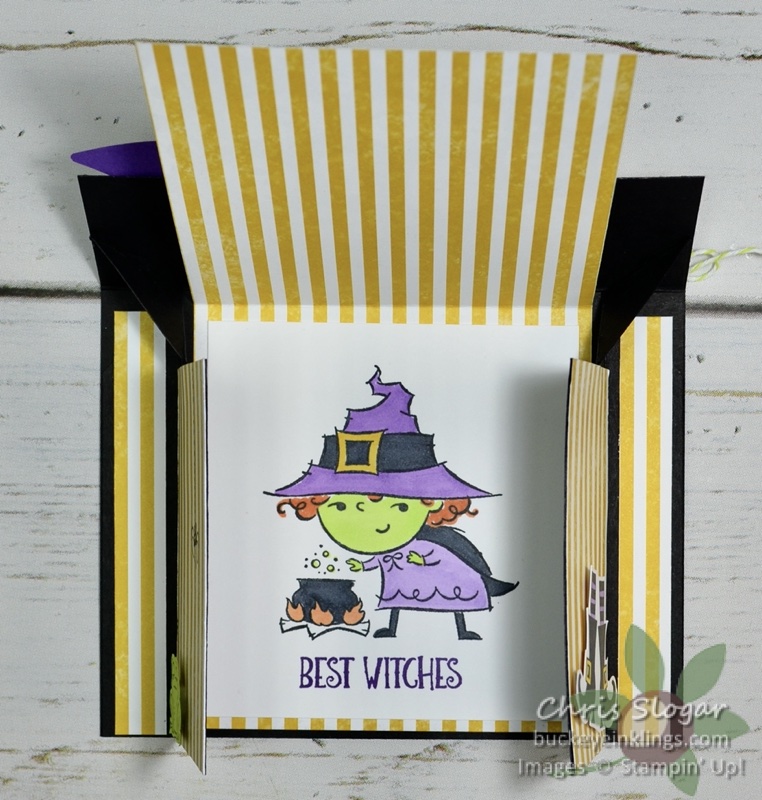
Last night’s Facebook Live project was this Double Door Pop-Up card. I have seen this all over the internet in various forms – it can be a shed, a garage, or any other structure. My next version will be a gingerbread house. This one started as a Haunted House, but I ended up turning it into a She Shed for a witch.
I am presenting pictures and details here as a quick reference, but you may need to see the video for full details. Click here for the Facebook Live video, and please join the Buckeye Inklings Stampers Group on Facebook to get notice of my live videos.
I always appreciate any help you can give me in Likes, Shares and purchases – I am really close to earning this year’s Incentive Trip, just $4700 short (LOL, I know that’s a lot!), and every order helps!
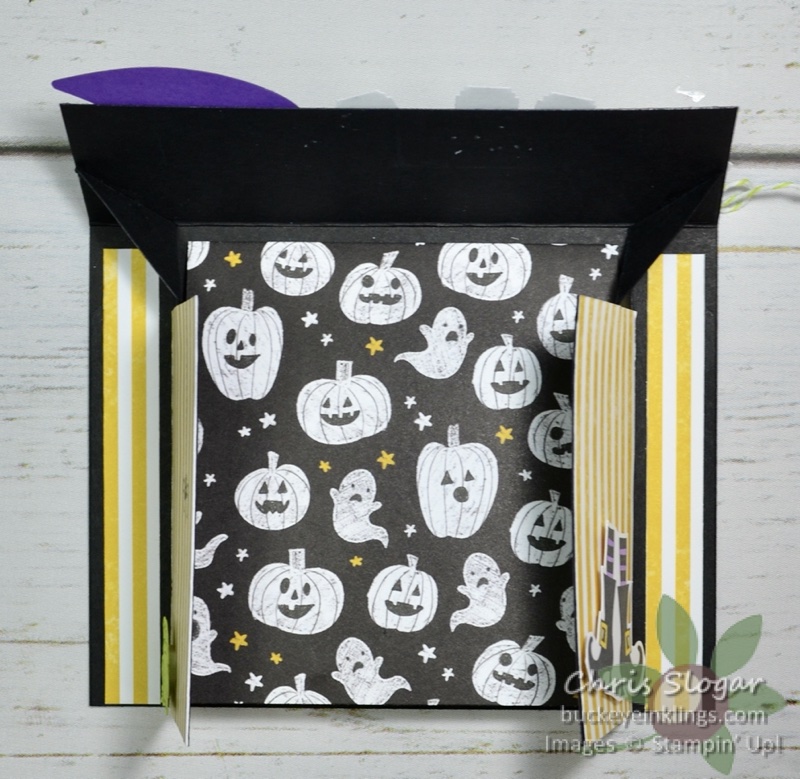
When the roof of the shed is lifted, the doors also open.
I used a folded panel of our beautiful Celebrate Everything designer paper and a witch in my shed – you can hide anything you like behind those doors! It’s a really fun card to decorate – and as you can see in the video, it’s not hard to create the hinges.
Dimensions are as follows…
Basic Black 5 1/2″ x 5 3/4″, scored at 4 1/4″
Basic Black (2) 1 1/2″ x 5″ and (2) 2″ x 3 1/2″
Basic White or Designer Paper 3 3/4″ x 8″, scored at 4″
Designer Paper 5 1/4″ x 1 1/4″, (2) 1/2″ x 4″, (2) 2″ x 3 1/2″
I encourage you to get together with a friend to reach the Stampin’ Rewards level of $150 if you want the Celebrate Everything designer paper that is only available as a Host Reward. If you live in different places, I can set up a Host Code for your orders so that you can each have shipping to your own addresses, and the “Host” can collect the benefits. Please don’t hesitate to ask me questions about this – I love to see my Customers get the most out of the rewards! Email me at stampyourworld@gmail.com – we can set up a call to discuss.
Thank you so much for checking out my card! If you need any of our fabulous products, I would very much appreciate your business. Please click here for the online store, or use the carousel below to be directed to a specific product used today.
Place a $35 order with Host Code KS4KANB3 in September and I will send you a package of Adhesive-Backed Seasonal Sequins and a handmade card. This is my way of sharing the Stampin’ Rewards with you – I appreciate your business!!
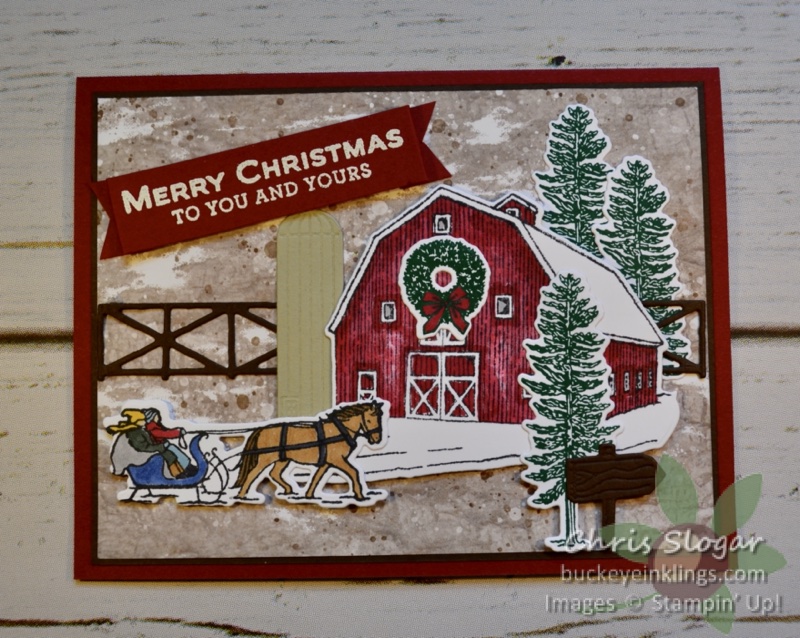
Last night’s Facebook Live was a mix of cards, starting with this CASE of my teammate Carol Rulli’s beautiful swap card! I am presenting pictures and details here as a quick reference, but you may need to see the video for full details. Click here for the Facebook Live video, and please join the Buckeye Inklings Stampers Group on Facebook to get notice of my live videos.
The Christmas Barn bundle is perfect for a detailed scene like this. I loved Carol’s designer paper choice (from Boughs of Holly) and layout, and I essentially duplicated her card.
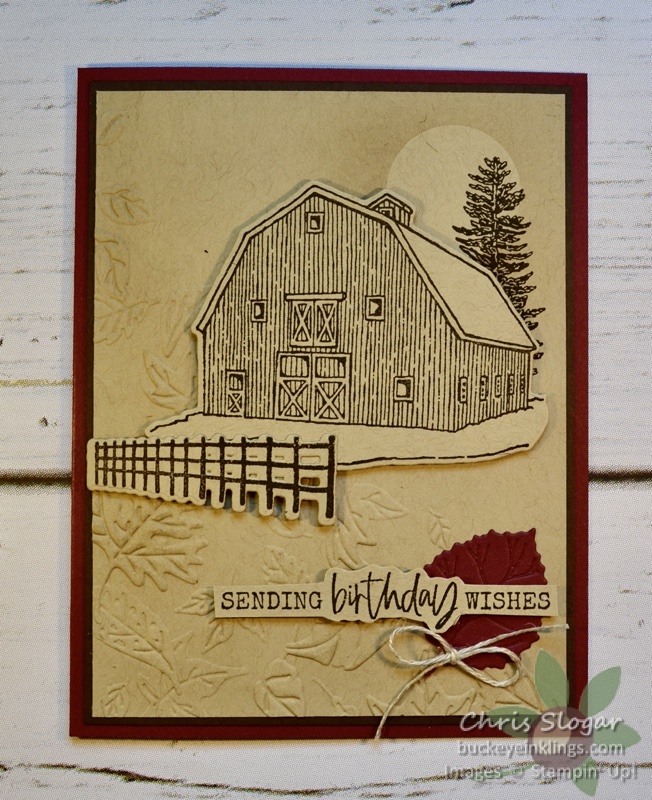
While I love a detailed card, I also need some options that are not so labor-intensive, so I created a couple of monochromatic Christmas Barn cards.
The first uses Crumb Cake, Early Espresso, and Merry Merlot, along with the Leaf Fall 3D embossing folder. I also used a greeting from Wildlife Wonder and a leaf from the Aspen Tree Dies.
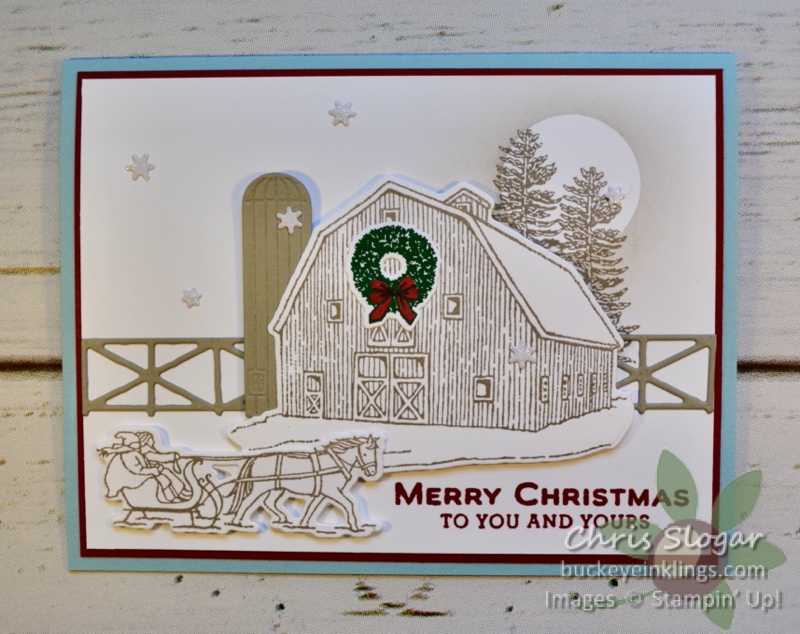
I added a pop of color with the wreath on this option. The scene is stamped in Gray Granite. There are six Shimmer White snowflakes on this card – fabulous embellishments that you can create with the dies in this bundle! The dies allow you to cut nine snowflakes at a time – and this picture does not do them justice! They are so pretty and delicate!
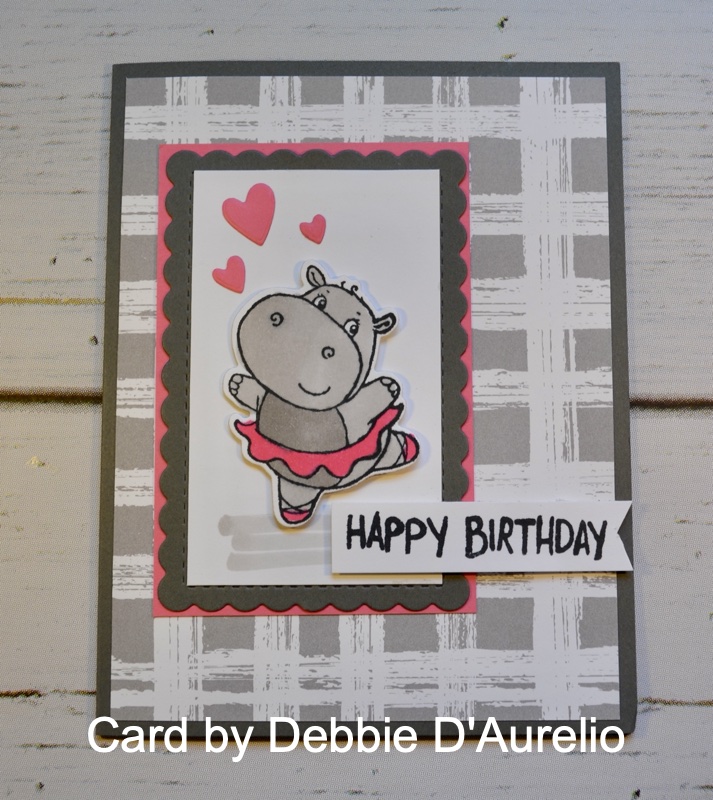
Moving on, I wanted to show some other fun cards with a pop of color. I was inspired by this fun card made by my teammate Debbie D’Aurelio…
Isn’t this the cutest?! It uses Gingham Cottage designer paper, the Hippo bundle from Sale-a-bration, and Polished Pink pops of color. Love it!!
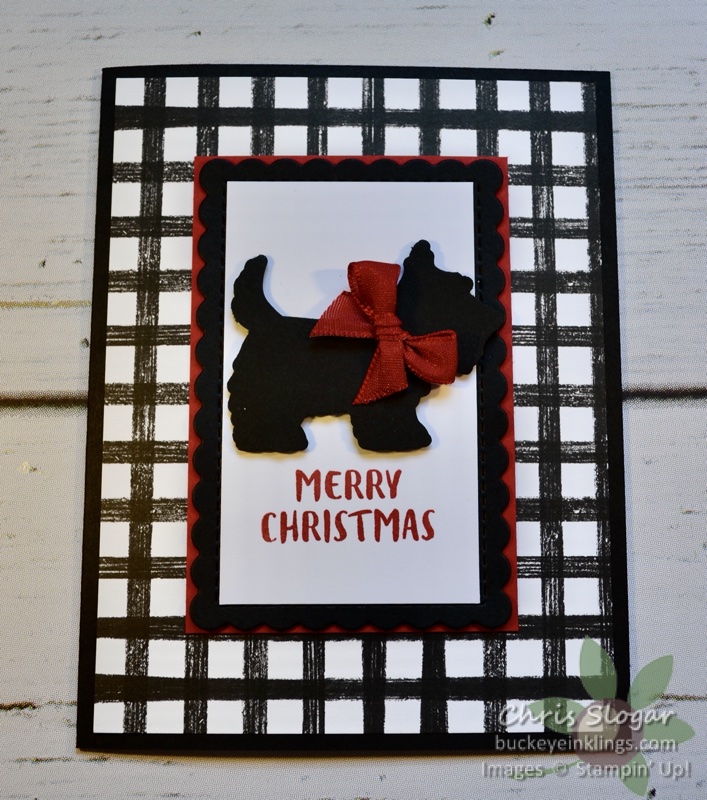
This one uses perhaps my favorite combination – black & white (again with Gingham Cottage designer paper) with a pop of Real Red. We have so many black & white paper choices right now – including the collection that is called Black & White, Rustic Harvest and Celebrate Everything.
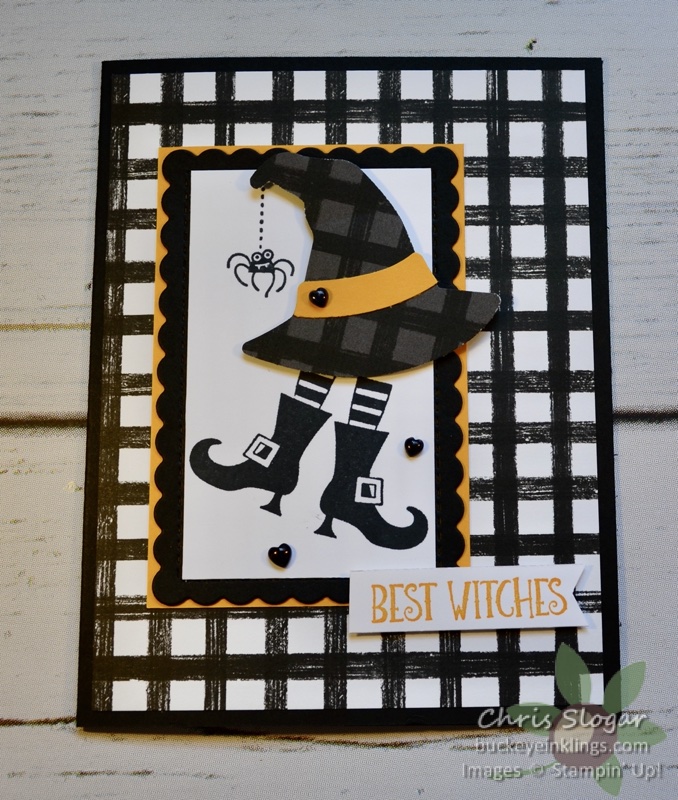
And the final one is my CASE of Debbie’s card, but with a pop of Mango Melody and the Bewitching Bundle. The cardstock around the scalloped shape die measures 2 9/16″ x 3 13/16″ and the Basic White measures 2″ x 3 3/8″. These are super-fun to make, and really you could use any monochromatic paper with a pop of color!
Thank you so much for checking out my projects! If you need any of our fabulous products, I would very much appreciate your business. Please click here for the online store, or use the carousel below to be directed to a specific product used today. Due to the wide variety of themes covered, cardstock and ink are not included in the carousel.
Place a $35 order with Host Code KS4KANB3 in September and I will send you a package of Adhesive-Backed Seasonal Sequins and a handmade card. This is my way of sharing the Stampin’ Rewards with you – I appreciate your business!!
Edited 9/28/22 – I am receiving feedback about the link to the facebook video not working, so I added this video to my YouTube Channel and am sharing it here…
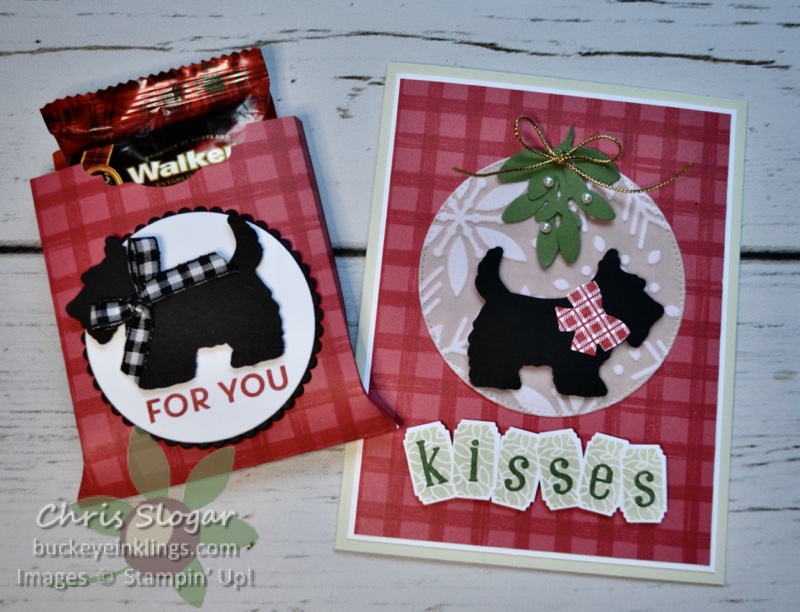
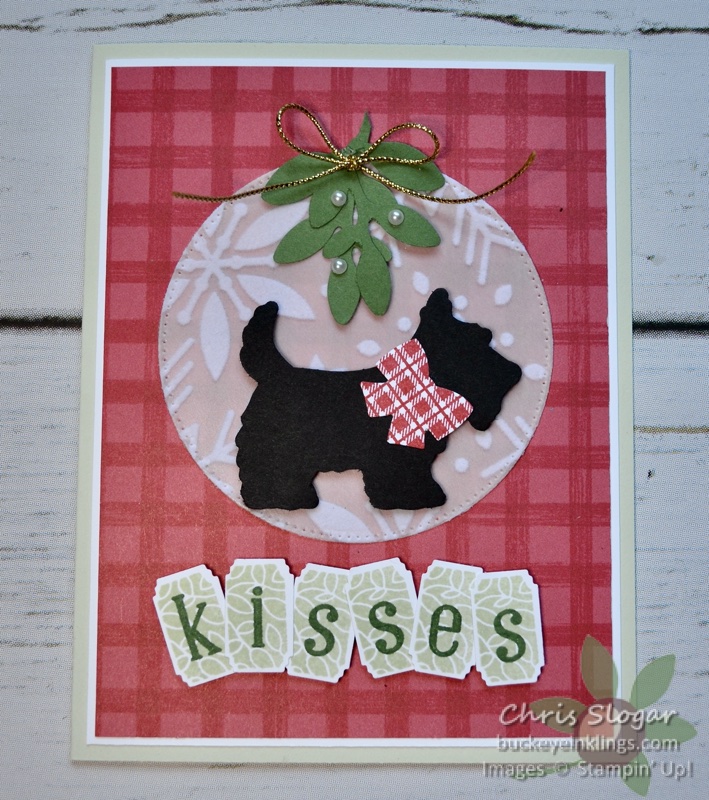
I featured the Christmas Scottie bundle last night on Facebook Live, along with the fabulous Gingham Cottage designer paper collection.
I am presenting pictures and details here as a quick reference, but you may need to see the video for full details. Click here for the Facebook Live video, and please join the Buckeye Inklings Stampers Group on Facebook to get notice of my live videos.
I always appreciate any help you can give me in Likes, Shares and purchases – I am really close to earning this year’s Incentive Trip, and orders placed between now and September 30 count toward this reward!
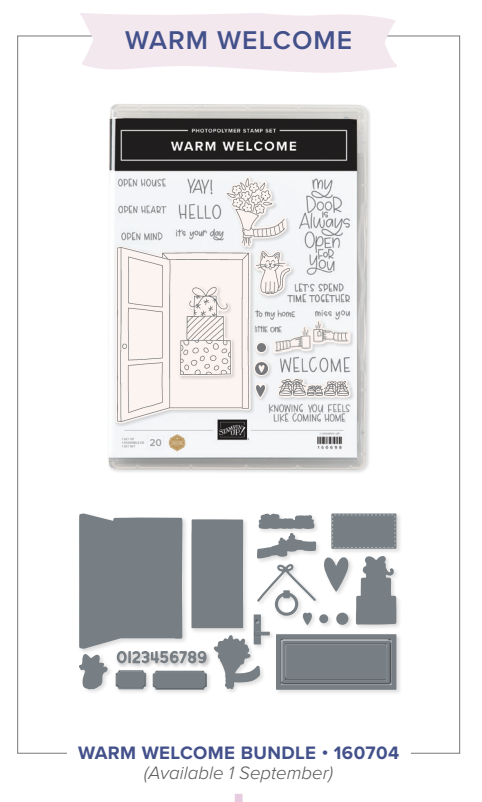
My first project is a pretty simple card that takes advantage of the beautiful Snowflake Specialty Vellum as a backdrop for our cute Scottie. I have also used the Alphabest bundle to create my own greeting. Love, love, love making my own words to use on cards!
The only dimensions of note here are the Basic White mat at 4″ x 5 1/4″ and the designer paper at 3 7/8″ x 5 1/8″. The circle is the largest of the Stylish Shapes circles.
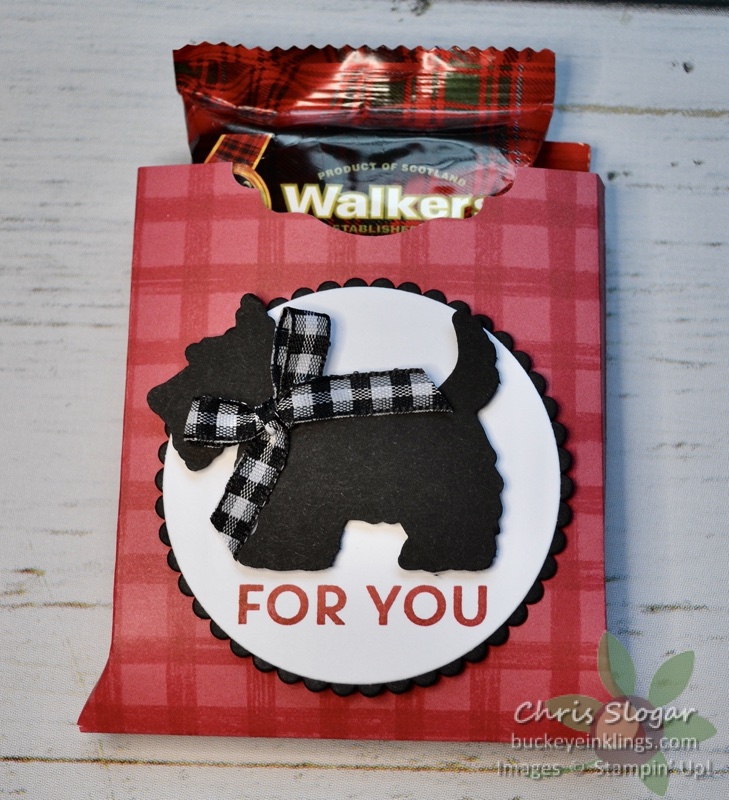
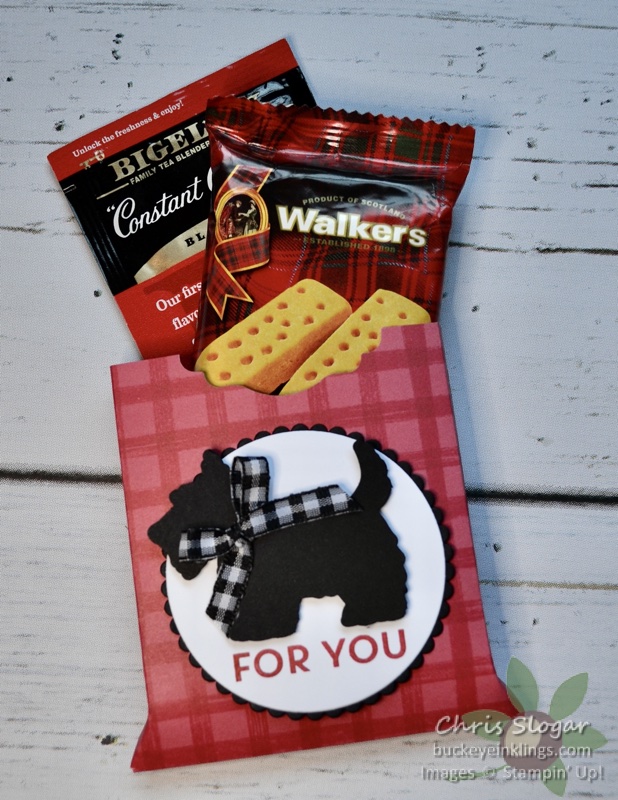
The favor is one that I will be making in quantity for craft shows – so you know it has to be pretty simple!
It is a gusseted pouch that I have sized to hold tea and cookies. I got the Walkers shortbread at World Market and will swap out the tea for a Christmas tea when those are available.
The designer paper measures 4″ x 7 1/2″, scored at 2″ and 5 1/2″ and at 3/8″ along the bottom edge. The gusset is a total of 1/2″ wide, so I scored at 1/4″ from each edge after the pouch was folded – please refer to the video for tips and tricks to make this cute little pouch. This is a hard one to describe in words – but very easy to make!!
All of the patterns in the Gingham Cottage designer paper collection are so cute! It’s a big pack, but I know I will use every sheet.
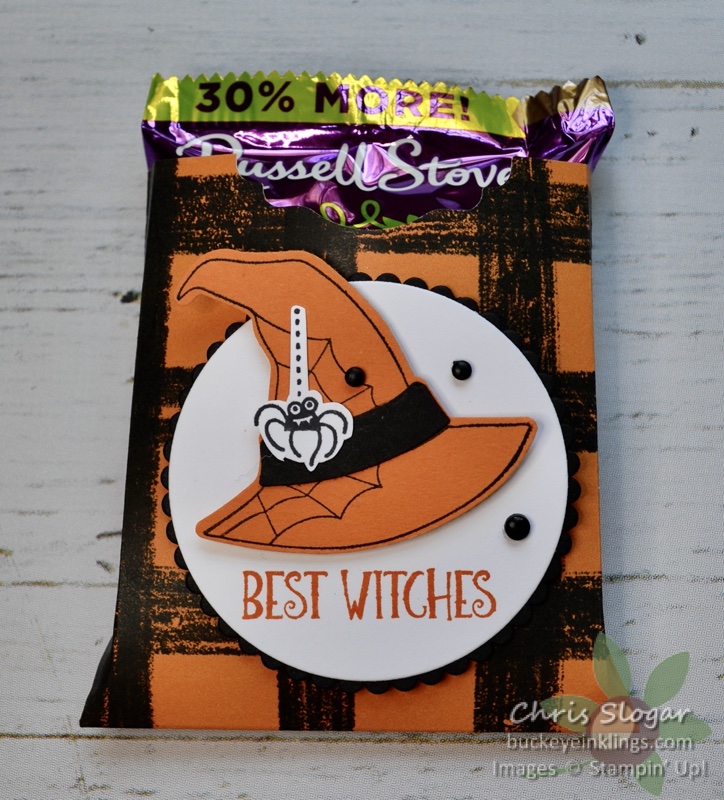
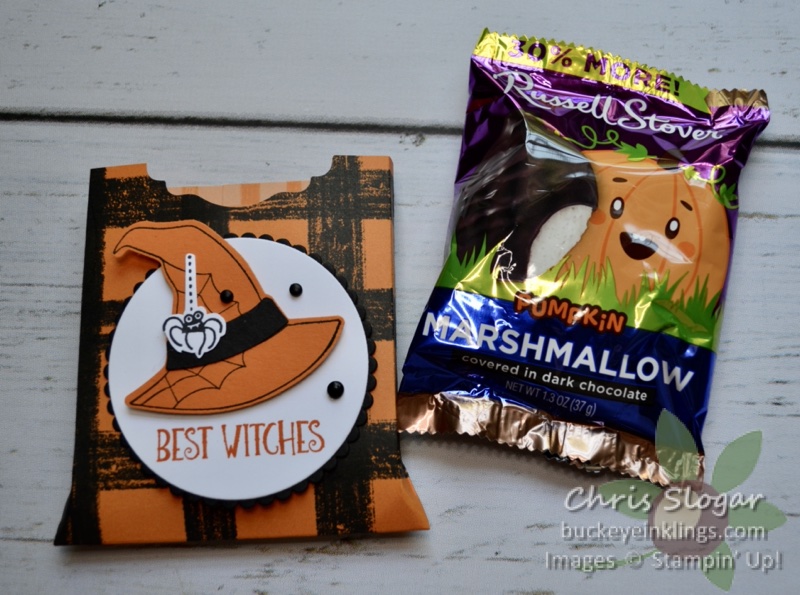
There’s even a black and orange pattern for Halloween. I used the Bewitching bundle to decorate this one. So many different Halloween treats will fit in this – and you can modify the depth of the pouch and dimensions very easily.
Thank you so much for checking out my projects! If you need any of our fabulous products, I would very much appreciate your business. Please click here for the online store, or use the carousel below to be directed to a specific product used today. Due to the wide variety of themes covered, cardstock and ink are not included in the carousel.
Place a $35 order with Host Code FVABHG7X in August and I will send you a package of Fine Sparkle Adhesive-Backed Gems and a handmade card. This is my way of sharing the Stampin’ Rewards with you – I appreciate your business!!