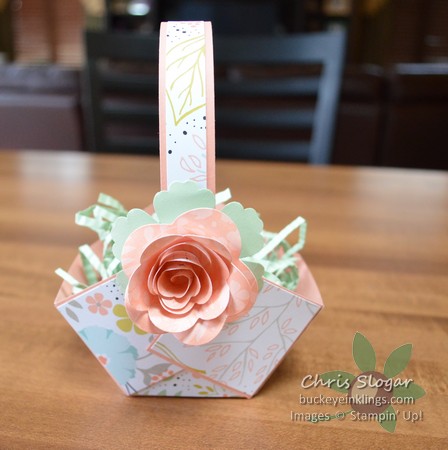
According to the calendar, spring has officially arrived. Woohoo! Won’t spring flowers be so much sweeter this year after that brutal winter? Along with the flowers come events – showers, Easter, and Mother’s Day to name a few. Today I have a quick and easy basket for you that would suit many occasions.
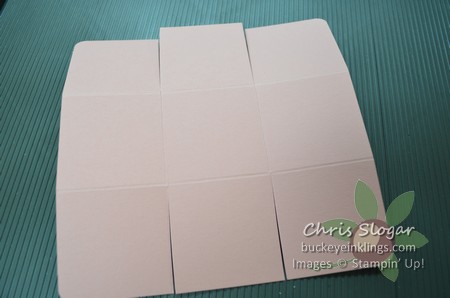
The basket itself requires no special tools or dies. You could probably make one within 5 minutes using what you have on hand. It is made from a 6″ square of cardstock, scored at 2″ and 4″ in each direction. Trim along the score lines in four places as shown in the picture below.
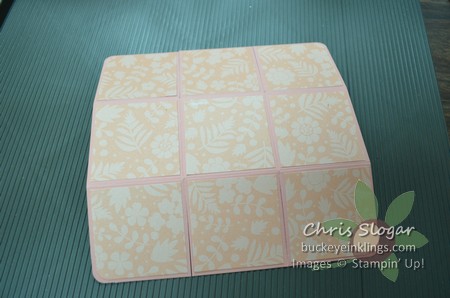
Round the four outside corners and add 1 7/8″ squares of designer paper to each section. (The picture below shows a different print than what was used in my finished project picture.) Don’t forget to round a single corner on four of the designer paper squares to match the outer corners of the cardstock.
That’s basically it – just bring the corner pieces toward each other and attach them to the middle piece on the two cut sides to form the basket bottom. Add a 3/4″x10″ handle decorated with a 1/2″x10″ piece of designer paper. I always use sticky strip on these 3D projects.
I added a flower cut from coordinating paper with the Spiral Flower Die. The paper is Sweet Sorbet designer paper, one of the freebies in the Sale-a-bration catalog. It is perfect for spring projects, and you can get a free pack with a $50 purchase. The leaves are from the Blossom Punch.
You can alter the size of this basket by starting with a smaller or larger square – just score at third points in each direction and cut designer paper to fit the panels.


