Love & Affection

DSC_2377w

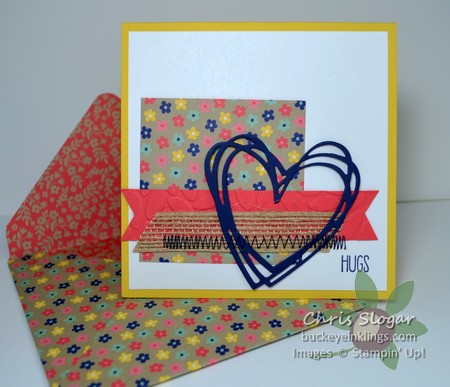
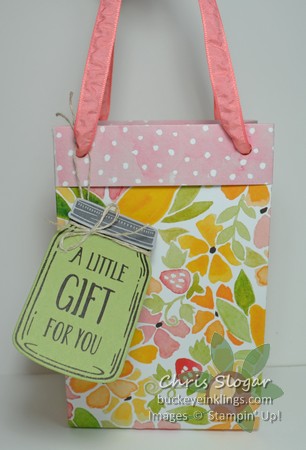
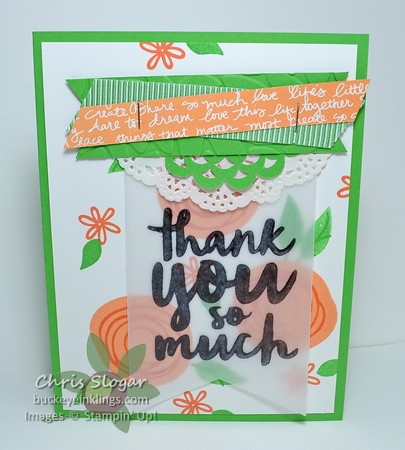
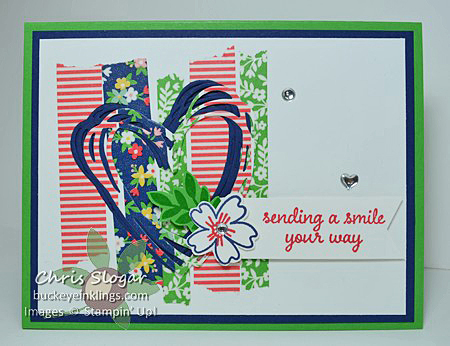
My plan for this card changed a bit as I created it.  It is basically an inlaid die cutting project with two Night of Navy thinlit hearts under the Washi Tape heart.  I had intended to stack the thinlit heart shapes directly on top of each other.  In the end, I liked the effect of of fanning them out so that the Washi Tape didn’t line up exactly.

Here’s a picture taken at about the halfway point of my process – it looks like a typical inlaid die cut:

DSC_2376w

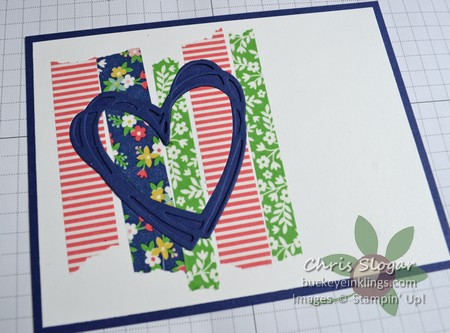
To get to this point, I took a 3 3/4″ x 5″ piece of Whisper White cardstock and I added Washi Tape to the left side.  I used the heart from the Sunshine Wishes thinlits to cut through the Whisper White and Washi Tape, making sure to save the heart piece and the inside of the heart.  I also cut two Night of Navy hearts.

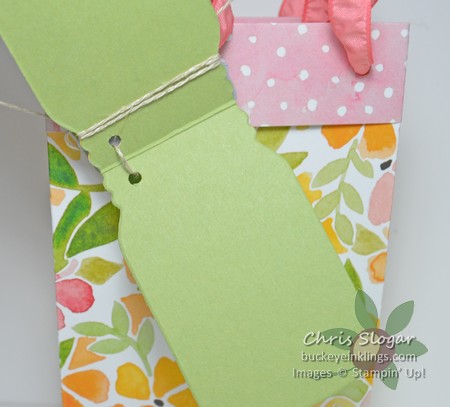
I attached the Whisper White mat to a 4″ x 5 1/4″ Night of Navy mat, saving the heart and its center for later.  I used the Fine Tip Glue Pen to attach one of the Night of Navy hearts into the opening.  Then I attached the Washi Tape-covered center of the heart.  The above picture was taken at this stage.

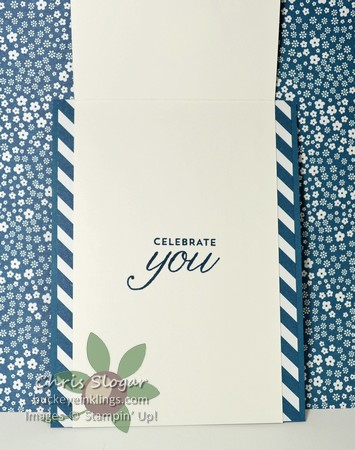
To finish, I simply added the second Night of Navy heart, the Washi Tape-covered heart, and the greeting and flower elements.  This is simpler than it looks, and fun!

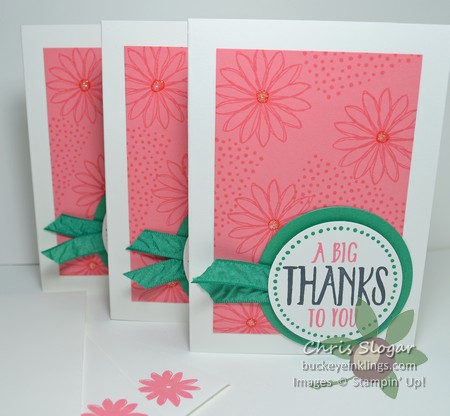
Have a great weekend!  And a reminder for my local (northeast Ohio) readers, my Third Annual Rubber Stamp and Papercraft Sale is Saturday from 9am-1pm at my house.  It is a combined sale, with product from about 20 sellers, much of it is Stampin’ Up!  Please contact me if you need directions.

Chris_buckeye_signature_rose_final

A Little Stitching

CCMC415

I rarely make a square card, but I always think it is such a nice change of pace!  This week’s sketch calls for a square.

DSC_2358w

My card is a 4 1/4″ square, and I stamped the Whisper White mat and attached all of the elements to it before attaching it to the card.  The line of stitching is a great horizontal element, and it is also very effective at securing the scribbly heart.  Besides this line of stitching, the heart is only affixed with a drop or two of glue between the two humps.  The fine tip glue pen is fabulous for tucking glue into tight spots.

Please visit Create with Connie and Mary to see the cards created by my talented teammates as well as the entries.  Hope you’ll be inspired to play along!

Chris_buckeye_signature_rose_final

Flourishing Phrases

DSC_2372w

Everything about this bundle is beautiful – the images, the thinlit shapes, the greetings – they are awesome!  This card doesn’t even scratch the surface!

I started with a Tip Top Taupe wood grain background.  I heat embossed the scrollwork from the stamp set on the background with our new Copper Embossing Powder.  I cut one thinlit flower out of Tip Top Taupe, and I heat embossed it, too.  I simply pressed my Versamark pad to the cut shape, sprinkled it with embossing powder, and heated it with the heat gun.  It looks like a little metal flower.

DSC_2373w

I also used a few wisps of Copper Metallic Thread on the flower to add some extra interest.  A glue dot in the center of the flower holds the flower and the thread in place, and I covered that glue dot with a retired Candy Dot.

DSC_2374w

And here’s the sentiment that finishes the thought – love it!  This would make a great wedding or anniversary card.

Chris_buckeye_signature_rose_final

Fruit Stand Gift Bag

DSC_2371w

Our double-sided designer paper is fabulous for gift bags!  I used a sheet from the Fruit Stand collection to make this summery bag.  I used the Gift Bag Punch Board, following the guides for a Large bag.  My paper was cut at 8″ x 12″ to start, but I scored and folded the top edge at 1″ before punching holes for the ribbon handles.

The jar-shaped tag opens with space for a message.

DSC_2362w

This tag is Pear Pizzazz, but I have some pictures below of how to stamp and cut a tag like this using a Flirty Flamingo example.

DSC_2364w

Stamp jar on 2″ width piece of cardstock.  Score and fold at top edge of stamped image.

DSC_2365w

Place fold just inside top edge of framelit and cut through both layers.

Thanks for stopping by today!  Have a great day!

Chris_buckeye_signature_rose_final

Marquee Messages

DSC_2357w

Love this “Marquee Messages” for fun birthday cards!  You can use it in any color scheme, and you can make different messages (see below).  If you want to color-block as I have here, the fussy-cutting is very easy.

For my local customers…a reminder that my Third Annual Rubber Stamp and Papercraft Sale is this Saturday, July 16, 9am-1pm at my house (contact me if you need directions).  I have more sellers than ever this year, with a huge collection of products from Stampin’ Up! and other companies.

Chris_buckeye_signature_rose_final

Many Thanks

DSC_2353w

I haven’t sung the praises of our pre-cut and scored note cards lately, so it is time!  The finished cards measure 3 1/2″ x 5″, and they come in packs of 20 with envelopes for $6.  They are convenient for quick little sets, like this set of thank you notes.

 I stamped a 2 3/4″ x 4 1/4″ piece of Flirty Flamingo to use in the background of my greeting.  The stamps are from “Perfectly Wrapped” – take a look at the set below to see the possible greeting combinations you can create.  The flowers and coordinating dotty pieces are awesome for cards and tags.

This is the coordinating stamp set for the “Perfectly Wrapped Project Kit”, shown below.  The kit contains materials for 16 packages.

Have a great weekend!

Chris_buckeye_signature_rose_final

Orange and Green

CCMC414

The colors in this week’s challenge didn’t grab me…at first.  As it turned out, I really enjoyed working with them.  I am happy with my bright card, and my teammates’ cards will also make you a fan of this combination.

DSC_2345w

I used “Swirly Bird” and “Thankful Thoughts” on my card.  The greeting is stamped with Staz-On on vellum.  I layered the vellum and everything else onto the stamped Whisper White piece without any adhesive, and I stapled right through it all.  I was holding my breath a little because of the thickness, but our stapler didn’t let me down.  Then I attached the Whisper White piece to the Cucumber Crush card base.

Please visit Create with Connie and Mary to see the cards created by my talented teammates as well as the entries in this challenge.  Hope you’ll be inspired to play along!

Chris_buckeye_signature_rose_final

Joyful Nativity

DSC_2352w

A little Christmas in July, anyone?  I have been anxious to use this set since I got it last month.  It is “Joyful Nativity”, a set of seven stamps – you can see six of them on this card.  It is a photopolymer set, which means the stamps are easier to place and the cost is lower – only $17!

This may be the card I make in quantity this year.  It uses some fun accents without being difficult, and it includes a decent amount of stamping.  The embossing (angel and star) adds a great touch, also without being difficult 🙂

Here’s a tip to make the specialty papers easier to secure – I simply stapled the 1″ strip of Fabulous Foil Designer Acetate and the Gold Foil swirl to the 1 1/2″ strip of This Christmas Designer Paper, and then I attached the designer paper to the card base.  The nativity image covers the staple.

DSC_2348w

I made this card in Early Espresso, too.  I am sure some additional color options and designer paper choices will tempt me once the Holiday Catalog is released, but if you want to get a start on your Christmas cards, this is all available now.

Please click here to shop for any of the great products I have used in these projects, or use the carousel below to go directly to a specific product.  I appreciate your support of Buckeye Inklings, and I will send you the Featured Project (shown at top right of this page) when you spend $35 or more.

Have a great day!

Chris_buckeye_signature_rose_final

Flower Arranging with Jar of Love

DSC_2346w

 This was a super-fun card to create because of the flower arranging involved.  I stamped the jar and the water first, and then added stems and leaves – some of the leaves are stamped off for a lighter look.  I had a bunch of flowers stamped and cut, and I moved them around in the arrangement until I was happy.  The flowers that overlapped are on dimensionals.

Except for the greeting, all of these stamps are part of the “Jar of Love” set.  I made this card for a good friend’s birthday, so I added a greeting from “Birthday Blossoms”.

DSC_2347w

Only the white section of the card opens.  The card base is a 4 1/4″ x 5 1/2″ piece of Dapper Denim cardstock.  I added two 3/4″ strips of designer paper to the base, and then the Thick Whisper White piece.  It measures 3 1/2″ x 11″, scored at 5 1/2″.

Have a great day!

Chris_buckeye_signature_rose_final
WordPress theme: Kippis 1.15