Kickoff Week

DSC_2461w

This is one of the fun cards I have available in Card Buffet this week.  It’s timely, too, as the Buckeyes will open their season this Saturday – a sure sign of fall in the Midwest!

The buckeyes are made with the 2 1/2″ circle punch and the retired wide oval punch.  The letters are from a retired set of dies, cut from red foil.  The stamp is from a past Paper Pumpkin.

Go Bucks!!

Chris_buckeye_signature_rose_final

Swirly Scribbles Pumpkin

DSC_2466w

I used two of the Swirly Scribbles Thinlits to create this pumpkin.  My stem and leaf are from the retired “Apple of My Eye”, and the greeting is from a retired Hostess set.  You can substitute easily for those items, and if you don’t have any of last year’s Black Glimmer Paper, you can use Basic Black with Wink of Stella for the jack-o-lantern features.

I used a triangle punch to nip out bits of black for the eyes and nose, and the mouth is from our new Sprinkles Punch.  The chevron designer paper is from the Pop of Pink collection.  I stapled an 8″ length of Basic Black twine over the fold of Cucumber Crush ribbon, and I tied a bow.  I colored the rhinestones with a Sharpie.

Chris_buckeye_signature_rose_final

Fall Faves from Last Year

DSC_2460w

Two of my favorite things from the 2015 Holiday Catalog are back in this year’s Annual Catalog – the stamp set “Acorny Thank You” and the Woodlands Textured Impression Embossing Folder.  I used them here with the new Layering Circles framelits and a greeting from a past Paper Pumpkin.

Have a good Monday!

Chris_buckeye_signature_rose_final

Christmas Pines Sneak Peek

It has been hard to resist playing with all of the new holiday goodies 🙂  As a result, another sneak peek today…

DSC_2455w

The “Christmas Pines” bundle was high on my wish list.  I have used only one stamp and three of the thinlits here – there are a whopping 22 stamps (including 8 greetings) and 13 dies in the bundle.  I have also used the coordinating Pine Bough Textured Impressions Embossing Folder, Copper Foil, and a few new trims from the upcoming catalog.

Items from the 2016 Holiday Catalog will be available starting September 1.  Have a great weekend!

Chris_buckeye_signature_rose_final

Seeing Spots

CCMC421

Circles make me think of the stamp set “Perfectly Wrapped”.

DSC_2458w

I don’t always use every stamp from a stamp set, but that is not the case with “Perfectly Wrapped”.  I love the fact that the sentiments fit so nicely into circles, and I love the dotty images and flowers, too.

 I used a color combination that I saw my teammate Carol Coy using this week – Night of Navy and Flirty Flamingo.  She showed me a card that she made in these colors, and I was hooked!

Thank you for checking out my challenge card.  Please visit Create with Connie and Mary to see all of the cards created by my talented teammates, as well as the entries.  Hope you’ll be inspired to play along!

Chris_buckeye_signature_rose_final

Holiday Catalog Sneak Peek Blog Hop

GV Blog Header

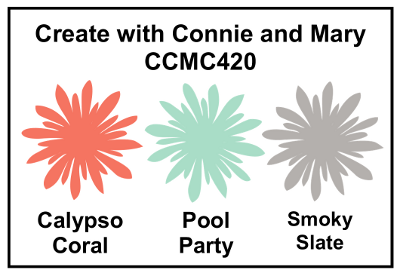
Welcome to the Grand Vacation Achievers hop for August. This month we are providing a sneak peek at products that will be available from the fabulous 2016 Holiday Catalog beginning September 1.

You may just be starting the blog hop here at my blog (Chris Slogar) or may have come from the person previous to me in the list. If you get off track at any time, the full lineup below will help you move along from blog to blog so you see all of the projects.

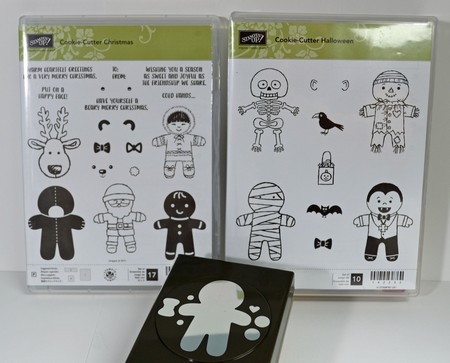
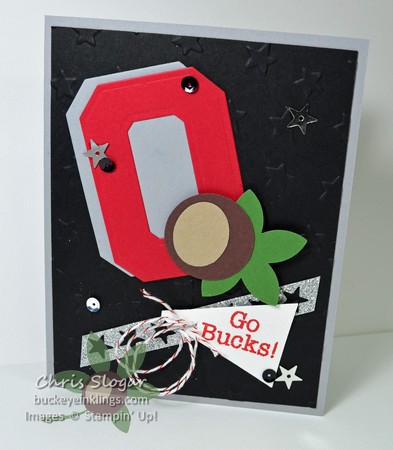
I chose a Halloween set to use for my Sneak Peek.  The set is called “Spooky Fun”, and there are coordinating framelits.

DSC_2453w

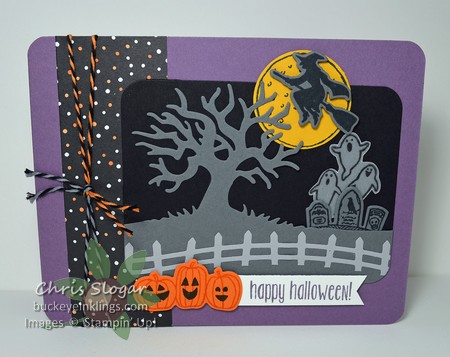
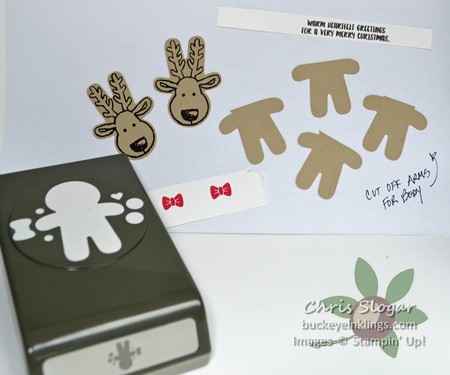
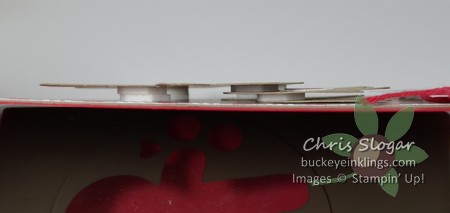
It was spooky-fun to put together this little scene!  There are a lot of pieces, but you can cut several at a time on the Magnetic Platform.  The pictures below show the steps I took to assemble the scene.

DSC_2444w

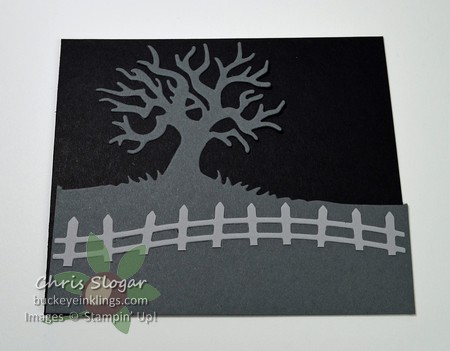
I cut a Basic Gray tree and a Smoky Slate fence.  I used my Fine Tip Glue Pen to attach the fence to the tree piece.  I then attached the tree piece to a 3 1/2″ x 4 1/4″ piece of Basic Black, but I did not use glue on the tree branches in the area of the moon.  I also did not apply glue close to the top edge of the ground line.  I did not worry about aligning the edges of these pieces.

With these pieces attached, I cut the outer edge of the scene with one of the Project Life framelits.

DSC_2445w

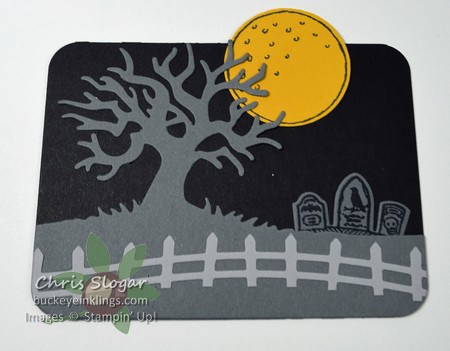
Then I slipped the moon under the tree branches and glued it in place.  I slipped the tombstones under the top edge of the groundline, and glued them in place.  At the same time, I tucked the ghosts under the tombstone.  The ghosts are stamped on vellum.

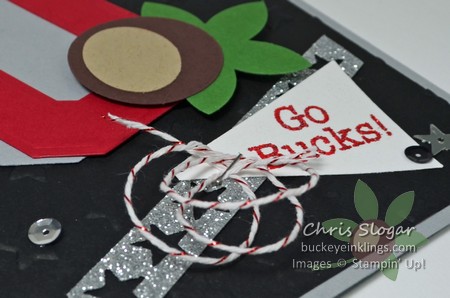
I also want to point out the fabulous Halloween Night Baker’s Twine and Designer Paper.  What a fun suite of products!

 Thanks for taking part in our blog hop, there are so many great projects here.  Remember that currently you are at my blog – Chris Slogar – so check the blog hop line up list to see who is next, and enjoy!

Chris_buckeye_signature_rose_final

Cookie Cutter Christmas Sneak Peek

DSC_2450w

We made this cute reindeer card in our Team Meeting last night.  It uses “Cookie Cutter Christmas” and the coordinating punch.  You may recognize the shape of the reindeer head from a card I showed last week – the scarecrow.

DSC_2437w

The scarecrow is from a second set of stamps that coordinates with the same punch – “Cookie Cutter Halloween”.  As I said last week, this group of items was at the top of my list of “must-have” products.  It is so versatile for the upcoming season with its collection of cute characters and accessories.

DSC_2438w

Back to my reindeer card…  The reindeer are punch art, but you only need one punch 🙂

DSC_2456w

Here’s a look at the pieces you need to create two reindeer.  You do need to cut the “arms” off each of the four body pieces at the right of this picture.  The side view below shows how I built up the reindeer.

DSC_2457w

The first set of legs is attached directly to the card.  I used a dimensional at the top of the first set of legs to add the second set of legs.  I used another dimensional to add the head.  I added a stack of two dimensionals under the antlers (left side of picture) to support them.

The designer paper is also from the upcoming Holiday Catalog.  It is called Candy Cane Lane.  All of these holiday products will be available beginning September 1.  Please contact me if you would like a catalog.

Have a great day!

Chris_buckeye_signature_rose_final

Bridal Showers

DSC_2355w

I had a couple of special brides-to-be to make cards for recently, so of course I needed extra-special cards.  While this design is not terribly difficult, the special papers and trims make it fancy.  The striped vellum is retired, but you could substitute the metallic acetate from this year’s catalog.  The fabulous foils and glimmer papers on both of these cards is current.

DSC_2447w

The first card used Blushing Bride with Silver, the second uses our retired Blackberry Bliss with Gold.  The beauty of this design is how easy it is to change to match a bride’s colors.  This would also make a great engagement or wedding card.

Chris_buckeye_signature_rose_final

“Ruff” Week

We successfully delivered our Buckeyes to Columbus this week – Jen for her Junior year, and Julia for her Freshman year.  Needless to say, it involved a lot of laundry and packing.  While I am sad to leave a whole phase of life behind,  I am happy for them, and also a bit relieved that we got through it!

DSC_2442w

I designed this card as a “Good Luck” card for the guys and gals on my growing list of OSU friends.  The Block O is made from non-SU! dies; the leaves are a retired flower punch; the buckeye is a 1 1/4″ circle with an oval from a retired punch; and the megaphone is the retired tree punch.  The glimmer strip of stars is cut from a die in the Mini Treat Bag Thinlits.

DSC_2443w

Here’s a better look at the sparkly part.  The words (not from SU!) are heat-embossed with Real Red Glitter Stampin’ Emboss Powder from the upcoming 2016 Holiday Catalog.  I am sorry the picture does not show it well – it is awesome!   And there is a Real Red metallic thread (❤❤❤!!) through the Baker’s Twine, which will also be available from the Holiday Catalog.  These products will be available starting September 1.

So, back to the “ruff” week…

IMG_3387c

Chip not only lost his favorite girls this week, but he is standing in the empty space that was the home for his favorite couch.  Yes, it moved to Columbus, too.  I am not sure where Chip will take his morning naps – he looks sad, doesn’t he?

One more picture, a flashback…

Scan_Pic0029c

Growing up in Columbus, they were always Buckeye fans 🙂  I miss them already!

 Have a great weekend!

Chris_buckeye_signature_rose_final

Bella & Friends

CCMC420

Sometimes it’s hard to see past the designer paper that carries the exact colors of a challenge.  That’s how it was for me this week – I couldn’t resist the Foxy Suite for its paper.

DSC_2421w

See?  I wasn’t kidding about that – used it for the whole card front!  The little dog is from “Bella & Friends”, and I colored her with my Blender Pen.  The circles are cut with our fabulous new Layering Circles Framelits.

 Thank you for checking out my challenge card.  Please visit Create with Connie and Mary to see all of the cards created by my talented teammates, as well as the entries.  Hope you’ll be inspired to play along!

Chris_buckeye_signature_rose_final
WordPress theme: Kippis 1.15