Here for You

DSC_2419w

This is a CASE of a card I saw on Pinterest by Patty Bennett.  It was part of last week’s Card Buffet, and I want to show it here to highlight the greeting set “Here for You”.  The greetings are different than the usual polite greetings – take a look below.

I love to pair the greeting “Well, this just stinks.” with the punch art skunk you can make with the Foxy Friends bundle.  It’s such a cute pairing that it might bring a smile to someone who needs one!

Chris_buckeye_signature_rose_final

Bright and Cheery

DSC_2415w

I tried to capture a little bit of summer on this card – it is one of the choices in my Card Buffet this month.  I used the Starburst die on a circle of Daffodil Delight cardstock along with a punched 1 1/2″ circle of Peekaboo Peach.  The Sunshine Sayings bundle supplies the striking greeting.

Thanks for stopping by today.  Have a great weekend!

Chris_buckeye_signature_rose_final

Affectionately Yours

CCMC417

I went with my first thought on this sketch and used a favorite new paper collection.

DSC_2403w

I love the patterns and the colors in Affectionately Yours – especially the Night of Navy.  That was the first Stampin’ Up! color I ever purchased, and still a huge favorite!  I am happy that we offer a solid Night of Navy Baker’s Twine this year.  The greeting is from “Flourishing Phrases”.

My talented teammates have come up with some clever interpretations of this sketch – please visit Create with Connie and Mary to see them, as well as the entries.  Hope you’ll be inspired to play along!

Chris_buckeye_signature_rose_final

Floral Boutique

DSC_2413w

The Floral Boutique suite is fabulous!  The hand-painted florals in Night of Navy and White are so classic; the stamp set is a lovely mix of images and greetings; and the dies?  Wow!

DSC_2407w

Here’s a closer look at the card I created with the designer paper and washi tape.  This sentiment from “Floral Phrases” is great for a wedding or anniversary.

DSC_2414w

I found this favor on Pinterest by Gosia MacKinnon.  Click here to see her original post.  Mine is made with Thick Whisper White, cut at 8” x 4 1/8” and scored at 3 1/4” & 4 3/4”.  Each of the edges is cut with the larger of the Detailed Floral Thinlits along with the edge piece.

Thanks for looking!

Chris_buckeye_signature_rose_final

Foxy Friends Reindeer

DSC_2394w

This is the “Christmas in July” card that we made in club this past weekend.  Oh my goodness, what adorable animals you can make with “Foxy Friends”!!  The inside card pulls up and out of the wrap.

DSC_2398w

I used designer paper from the current “This Christmas” collection, but I did have to sneak in a retired wooden snowflake as we await the release of this year’s holiday goodies.  You can’t celebrate Christmas in July without embellishments!

I wish I could take credit for this design, but it is a CASE of the adorable swap card that I received from Janice Urke.  Janice’s card was made with the colors and papers from the Foxy Suite.  Super cute, huh?!

Processed with MOLDIV

Processed with MOLDIV

 Thanks so much for stopping by!

***Video instructions added 9/9/16***

Chris_buckeye_signature_rose_final

Mini File Box for Tags

DSC_2401w

“Christmas in July” was our theme in club this weekend, and this Mini File Box with Christmas Tags was one of the projects.  There are many great Christmas stamp sets and framelits available in the year-round Annual Catalog.  I used the stamp sets “Oh, What Fun” and “Peaceful Pines” along with the great new specialty paper collection called “This Christmas”.

I did have to pull from my retired stash for a few of the trims I used on this project…only because our 2016 Holiday Catalog is not yet available.  That catalog will come out next month, with a sales period starting September 1.  I am sure there will be great embellishments available to take the place of the retired items I have used in this project.  In the meantime, though, let’s take a closer look at the box. DSC_2402w

The box is made from a 6″ square of Kraft Cardstock.  I used the envelope punch board to create it – the instructions are in the video.  As for the tags, they are 2″ wide and anything goes!  You really can sit down with just a few scraps and stamps, and come up with some great tags.

 Have a great Monday!  I’ll be back tomorrow with the cute Christmas card we made in club.

Chris_buckeye_signature_rose_final

Gift From the Garden

CCMC416

This week’s colors were perfect for use with a stamp set I just recently got – “Gift from the Garden”.

DSC_2381w

I used my Stampin’ Write markers to ink up the stamp, and I used the new Layering Ovals Framelits to frame the image.  The greeting is from “Thoughtful Banners”.  I made a very similar card which allowed space for a larger greeting.  This shows you how easily you can modify a layout instead of designing a whole new card.

DSC_2379w

This greeting is from the fabulous “Flourishing Phrases”.  The greetings in this set are great expressions of caring, and the set includes coordinating thoughts for the inside of your cards.

DSC_2380w

DSC_2378w

These cards were both inspired by this week’s colors.  Please visit Create with Connie and Mary to see the cards created by my talented teammates as well as the entries for this challenge.  Hope you’ll be inspired to play along!

Chris_buckeye_signature_rose_final

Another Type of Double Z-fold

DSC_2388w

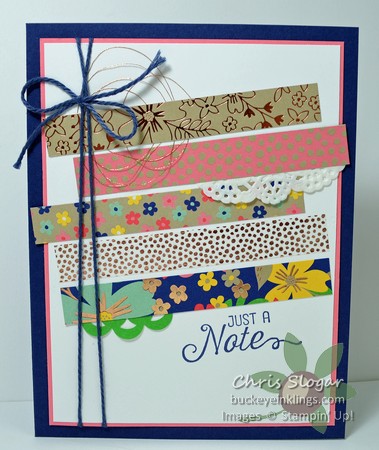
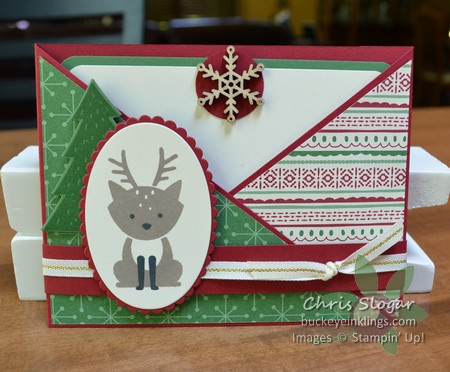
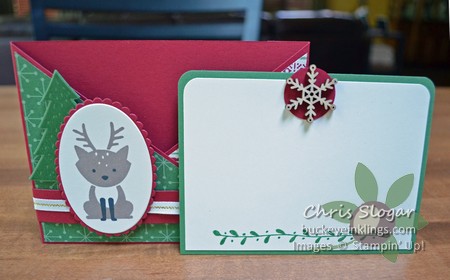
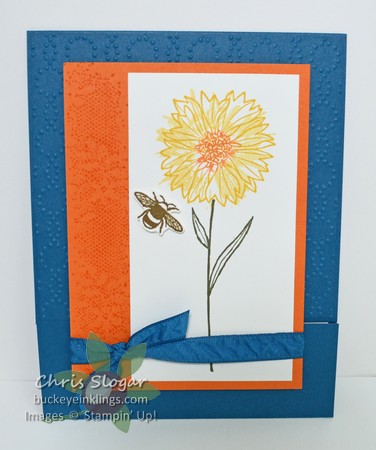
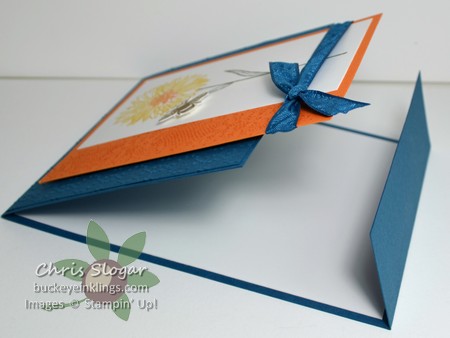
This card is not obviously a z-fold card, but there are actually two z-shapes here.  The panel at the middle of the card is one section of the second “z”.  You can see this smaller “z” as the card opens…

DSC_2386w

DSC_2387w

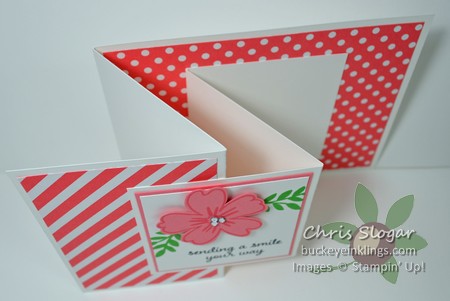
Isn’t it fun?  It’s clever but easy, and it also satisfies my love of using coordinating designer paper patterns.  I know this is a lot of Flirty Flamingo – you can choose something else if the pink is too overpowering.

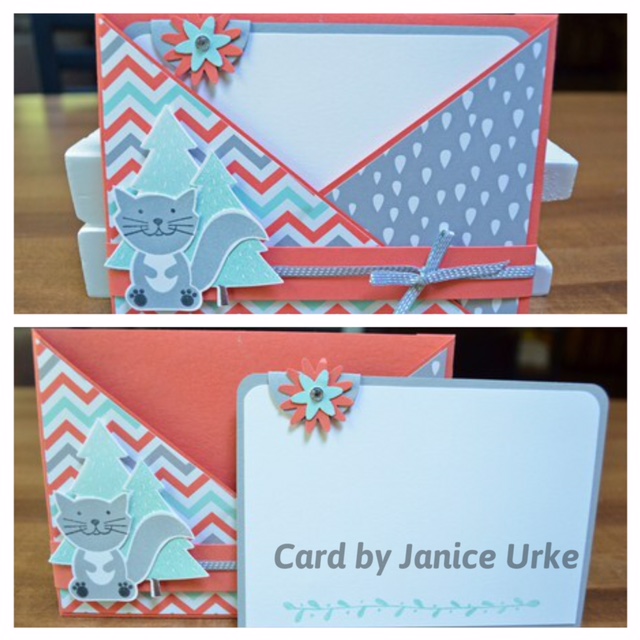
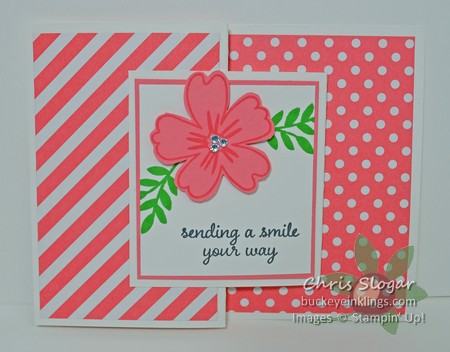
The base is 4 1/4″ x 11″, scored at 2 3/4″ and 5 1/2″.  The designer paper pieces on the base are 2 1/2″ x 4″ and 5 1/4″ x 4″.

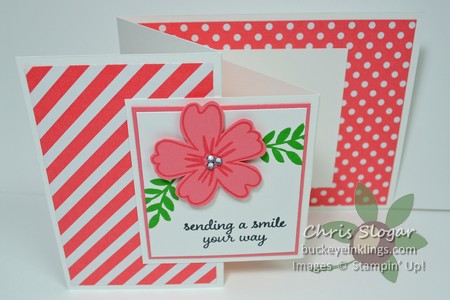
The second “z” measures 3″ x 8 1/4″, scored at 2 3/4″ and 5 1/2″.  Fold this smaller “z” into the fold of the card base and make sure it is centered when closed.  Attach all of the back of this “z” to the back panel of the base, but only attach half of the front panel as per the picture.

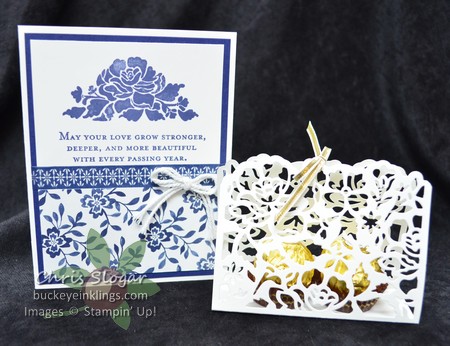
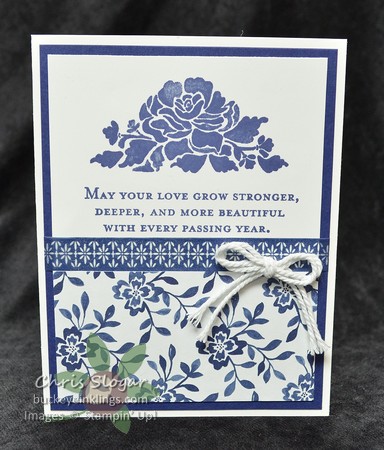
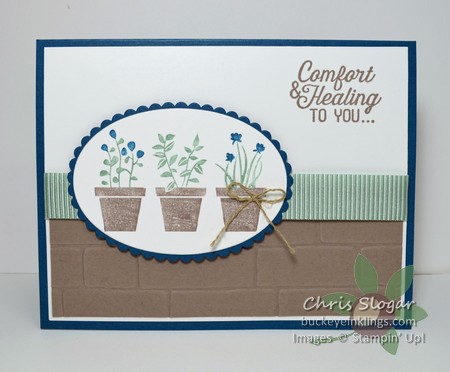
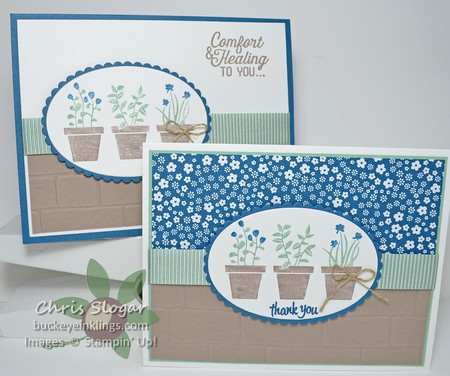
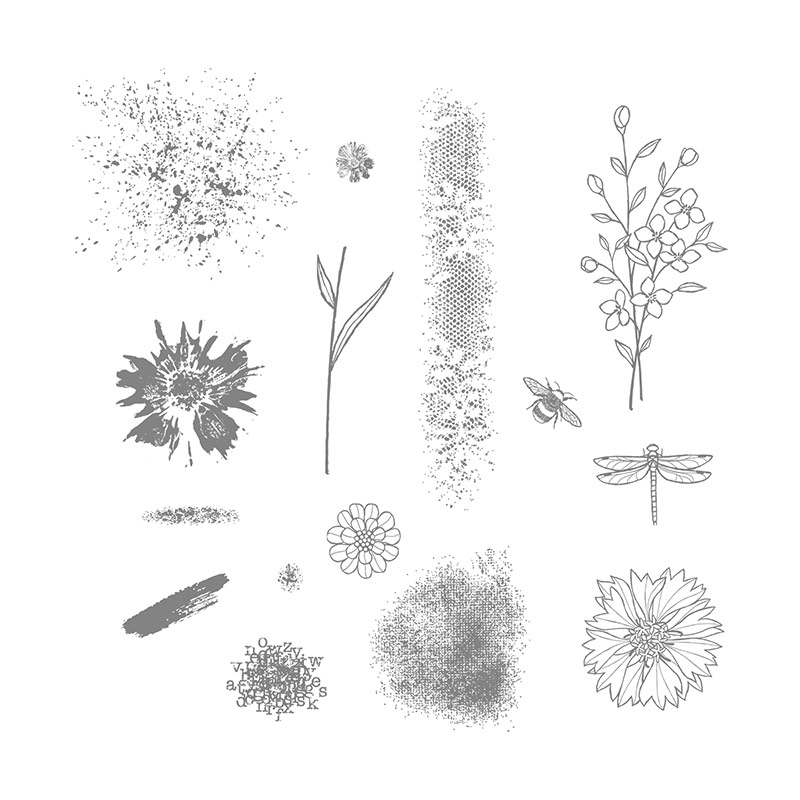
The stamps are from “Love & Affection”.  Of course, you can use any stamps and any designer paper, but I love the fact that you can create this card without a lot of tools.

Chris_buckeye_signature_rose_final

Foxy Friends

DSC_2385w

This suite of products is too cute!  The stamp set is called “Foxy Friends” and there is a coordinating punch available.  The trees in the set coordinate with the Perfect Pines Framelits that were introduced in last year’s Holiday Catalog.  The designer paper is also from the “A Little Foxy” suite.

You can make more than foxes with this stamp set and punch, though.  You can make bears, raccoons, squirrels, skunks, and more.  The punch is the latest in the line of versatile “must-have” builder punches by Stampin’ Up!, and the coordinating stamp set is a bonus.

Chris_buckeye_signature_rose_final

Touches of Texture

DSC_2382w

I kept the layout and embellishments simple on this one, so that we could appreciate the two-step flower from “Touches of Texture”.  I stamped the outline in Crushed Curry, with added Pumpkin Pie from my marker at the center of the flower.  I used a light touch of So Saffron (stamped off) to fill in the flower.  The stem is stamped in Always Artichoke.  The bee is Soft Suede with Wink of Stella on the wings.

I did deviate from our typical fold to add some interest.

DSC_2383w

The Dapper Denim base is 4 1/4″ x 11″, socred at 1 1/2″ and 7″.  The embossed panel measures 4 1/8″ x 3 7/8″.  The Pumpkin Pie panel is 3 1/4″ x 4 1/2″ and the Whisper White measures 2 1/4″ x 4 1/4″.

This set offers so many “Touches of Texture” – can’t wait to play with it more.  Here’s a look at the images in the set.

Have a great Monday!

Chris_buckeye_signature_rose_final
WordPress theme: Kippis 1.15