
Best wishes for a safe and happy holiday season to all of my stampin’ friends!


Best wishes for a safe and happy holiday season to all of my stampin’ friends!


Make your list now – Coming November 24, Stampin’ Up! will offer 10% off all Annual Catalog Items with the exceptions noted below:
Stamp Sets: Harvest Hellos, Playing with Patterns Suite Collection, Host Sets
Adhesives: Glue Dots, all Stampin’ Seal products, Multipurpose Glue, Fine Tip Glue Pen
Ink Pads, Refills: Versamark, all StazOn ink, refills, & cleaner, Memento Black & refill, Whisper White Craft & refill, Uninked Stampin’ Spots, Pumpkin Pie ink & refill
Coloring: Blender Pens, Sponge Daubers, all Stampin’ Write Markers
Embellishments: Artistry Blooms Sequins, Holiday Rhinestones
Cardstock,Envelopes & Packaging: All Whisper White & Very Vanilla Cardstocks, Note Cards & Envelopes, Pumpkin Pie, Mini Paper Pumpkin Boxes, Grid Paper
Punches: Scalloped Tag Topper, Triple Banner, Delightful Tag Topper, Fancy Tag Topper, Lovely Labels Pick-a-Punch
Stampin’ Cut & Emboss Machine & Specialty Plate
Storage: Clear Block Caddy, all Stampin’ Storage, Full Wood-Mount Stamp Cases
Other Tools: Trio of Tags Dies, Stamparatus Magnets & Storage Bag
Pre-Paid Paper Pumpkin Subscriptions

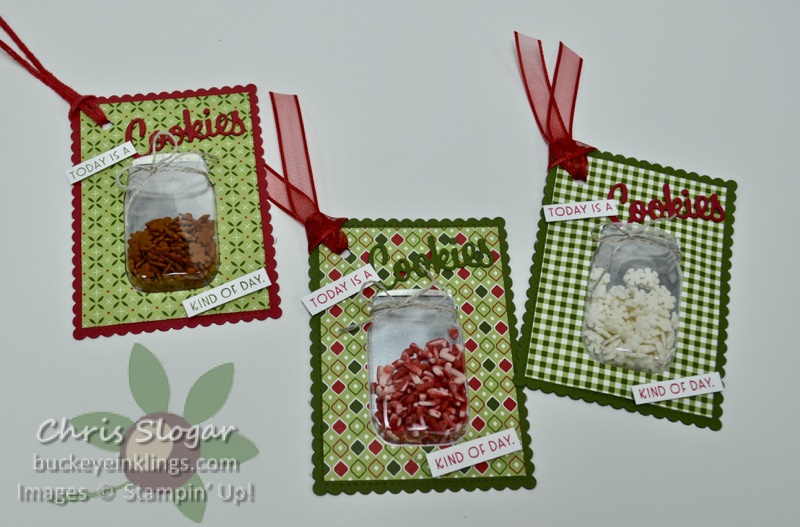
I started my Facebook Live last night with these really fun tags for cookie giving! They use the Jar Punch and Mason Jar Shaker Domes to hold sprinkles. You can even coordinate by using the same sprinkles on your tag as on your baked goods – how fun is that?!
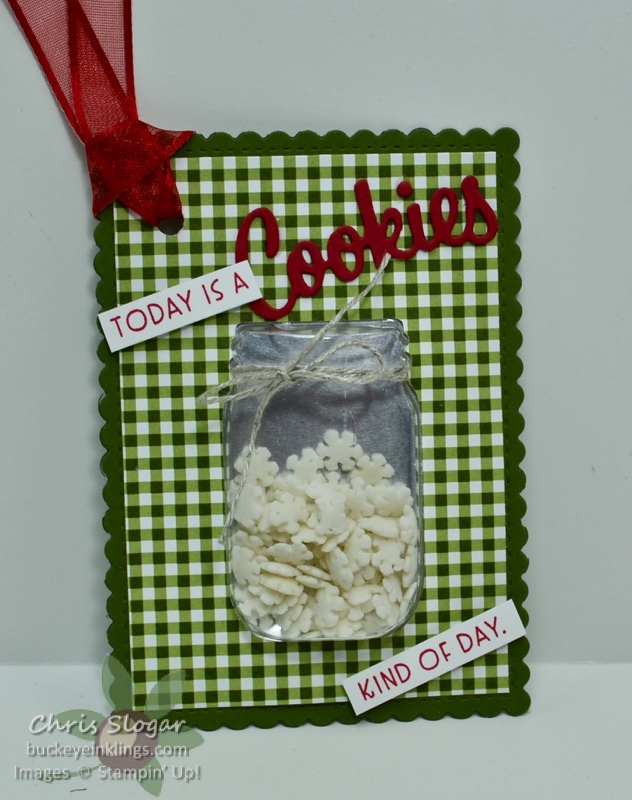
I used Silver Foil behind the punched opening in the designer paper (2 5/8″ x 3 3/4″). Once the jar was in place, I mounted the whole assembly on a scalloped stitched rectangle (the largest of the Stitched So Sweetly collection). Both the stamps and die cut in the sentiment are from the Nothing’s Better Than Bundle.
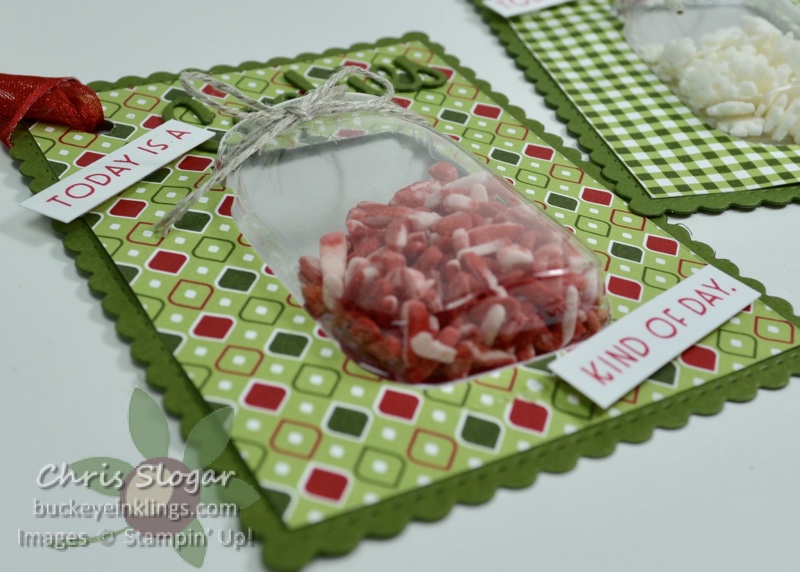
These Mason Jar Shaker Domes were introduced in this year’s Annual Catalog, but are great for Christmas!
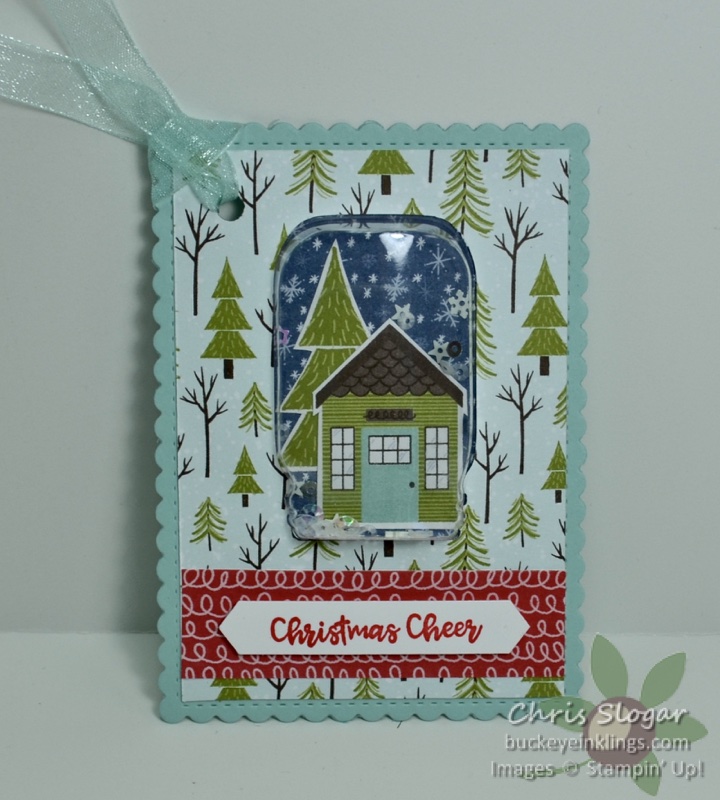
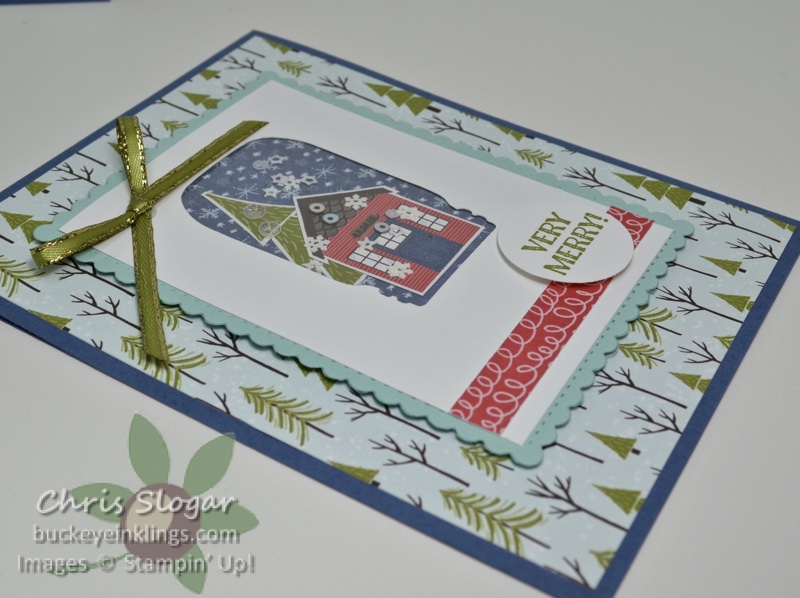
I made a very similar tag to look like a snow globe with fussy-cut pieces from the Trimming the Town designer paper collection and Snowflake Sequins.
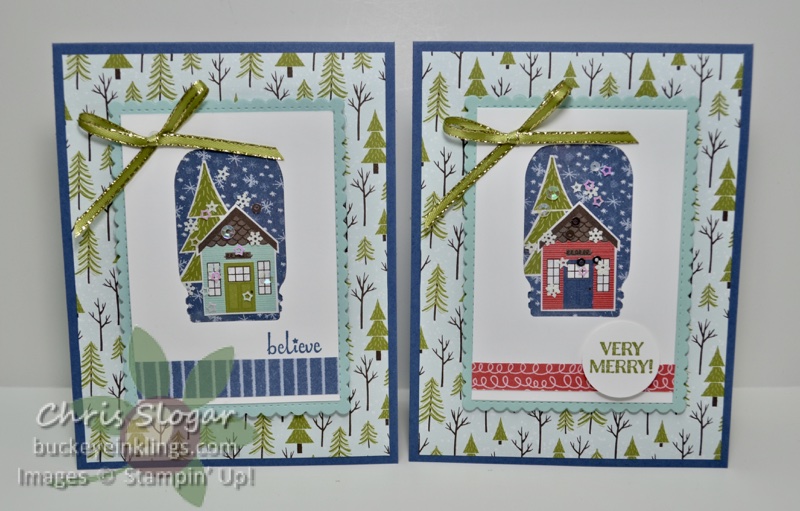
My card version is flat. I used a Window Sheet to sandwich the sequins to the images. It gives the same effect as a shaker card, but you can’t shake it. I’m calling it a No-Shake Shaker.
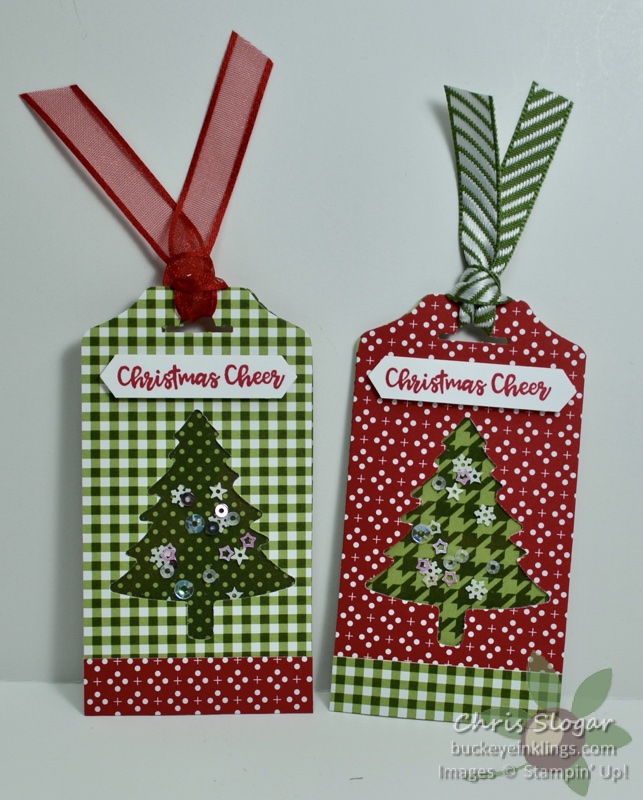
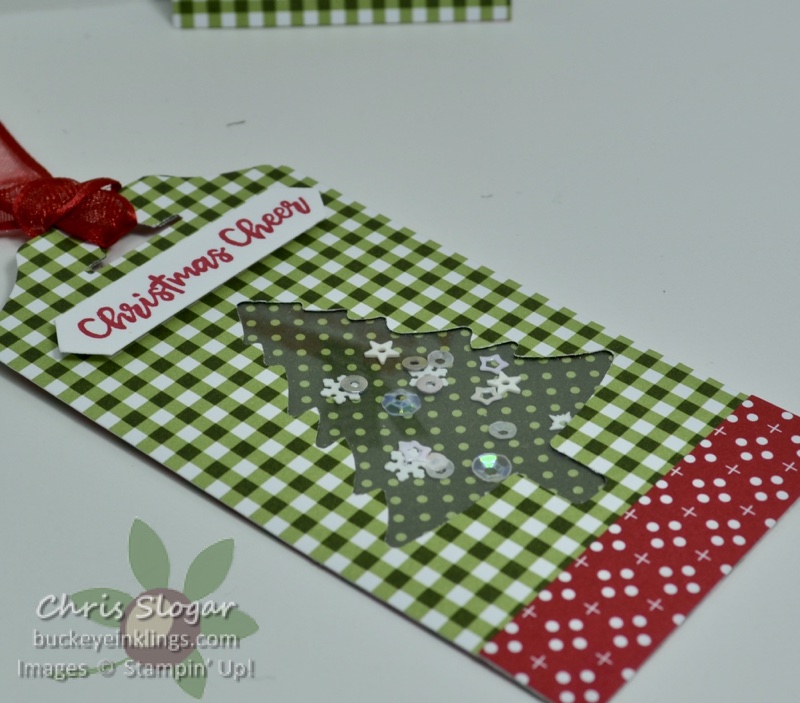
I made some easy punched tags with this same method. It’s a great technique for many shapes, especially since we don’t have shaker domes for all of our punches and dies!
There are two 2″ x 4″ pieces of designer paper here, with an additional 1/2″ strip. Each of the tag pieces are punched with the Fancy Tag Topper Punch. Tags like this could also be mounted on a card.
Thank you for checking out my projects – I hope you will give them a try!
This post is meant as a supplement to last night’s Facebook Live. Please click here to see the video – and please join the Buckeye Inklings Stampers Group on Facebook to get notifications of all of my live videos.
I also have a YouTube channel with many different videos from what you will see on Facebook. Thank you for any support that you can give in these platforms and in the online store. I need your help to continue to bring you new ideas!
If you need any products, please click here for my online store, or use the carousel below to be directed to a specific product used today. Use Host Code HPBUEJYA with a $35 order in November, and I will send you a package of Basic Rhinestones and a handmade card. I appreciate your business!


Welcome to the Trip Achievers Blog Hop for November! You may just be starting the blog hop here at my blog (Chris Slogar) or may have come from the person previous to me in the list. If you get off track at any time, the full lineup below will help you move along through all of the projects.
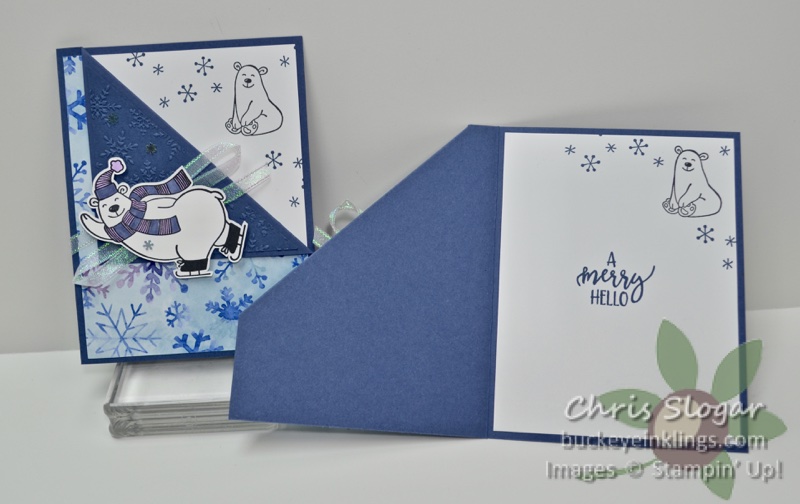
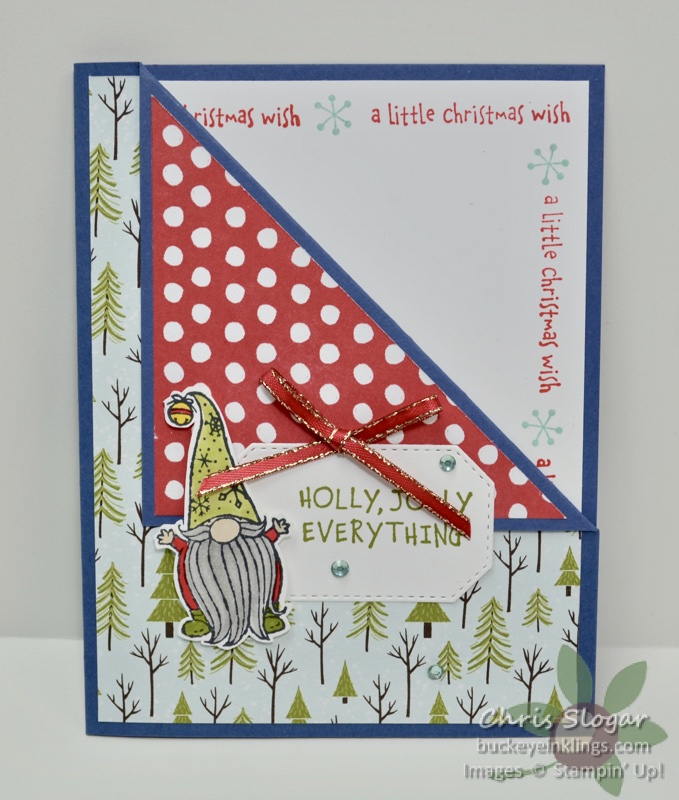
I have two versions of a really easy fun fold to share today. A corner of the card front is folded down and decorated for a unique look.
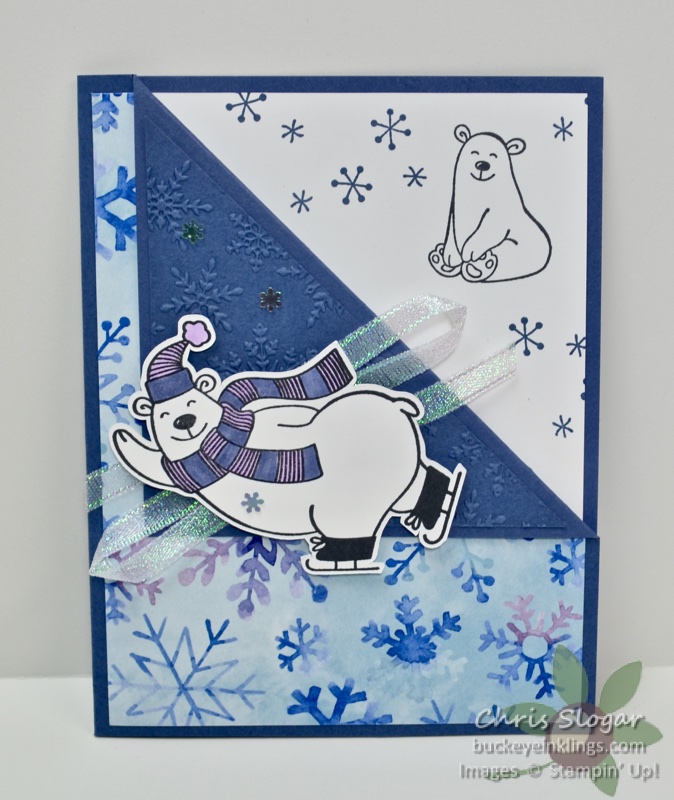
You can decorate with any papers and focal point. I chose Snowflake Splendor designer paper and the Warm & Toasty stamp set for this one.
My next version uses Trimming the Town designer paper with the Gnome for the Holidays stamp set.
These were inspired by a card I saw on our Demonstrator facebook group by Jennie Portonova. It’s a versatile fun fold – we made it in our team meeting last week, with everyone choosing their own papers and focal points. The variety was amazing! One gal even closed up the bottom and right edge to make a pocket for hot cocoa.
You can find complete directions in the YouTube video below. If you are receiving this post in an email, please click here for the video.
Thank you for visiting my site. Please use the list below to continue to the next blog on the hop!

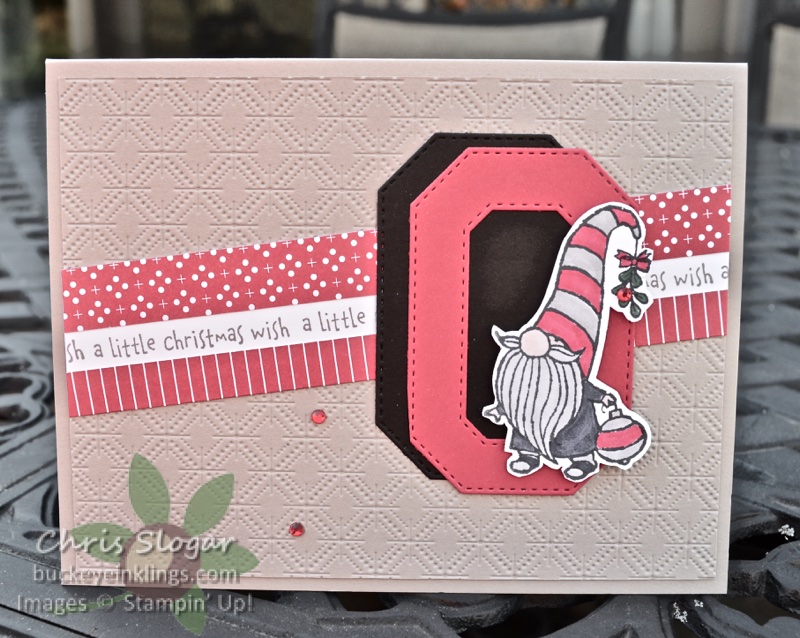
My upline Mindy Gray showed us a cute Buckeye Gnome card that she made a few weeks ago. My card is a CASE of the parts I remember – the strips of designer paper and the gnome in scarlet and gray (well, Real Red and Gray Granite). I have a lot of Ohio State fans on my card list who will appreciate this!
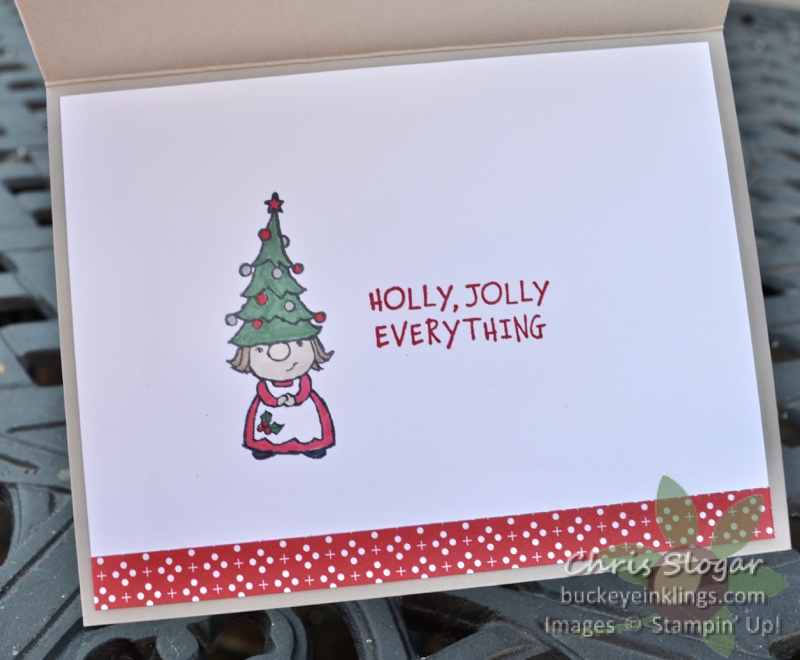
The gnomes are just fun to color – and so cute! I highly recommend them:)
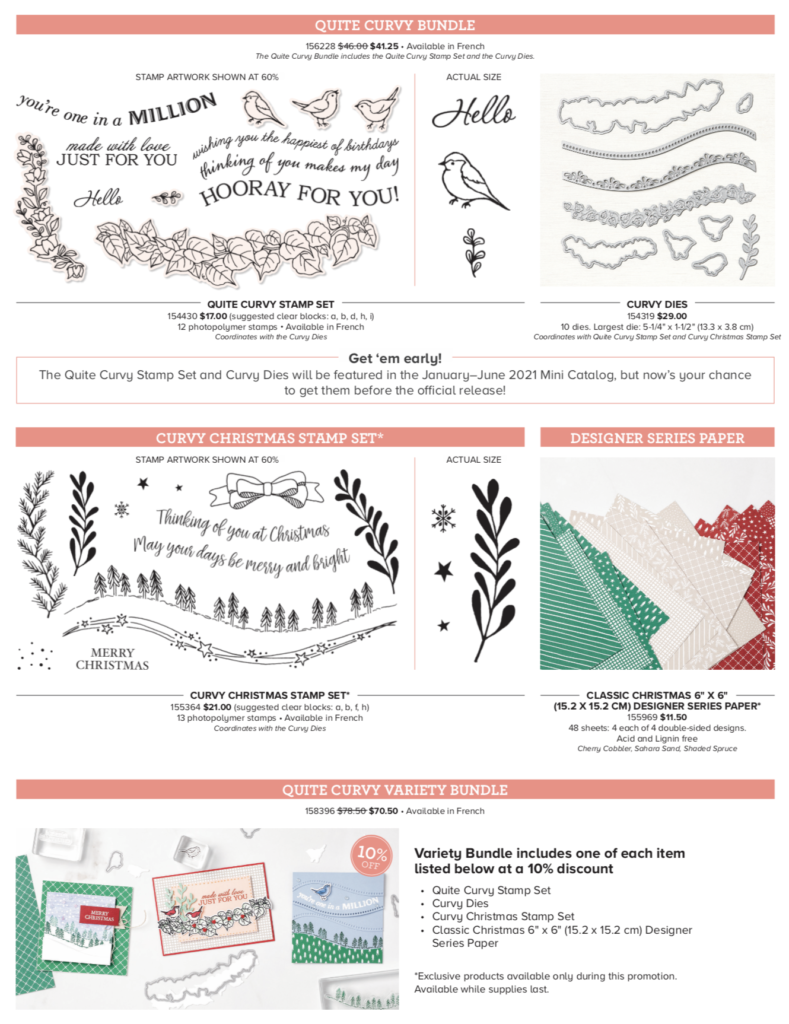
Also, don’t forget to check out the Exclusive and Early-Release products that are available now. The Quite Curvy bundle will be featured in our January-June 2021 Mini Catalog, but the designer paper and Christmas stamp set are available while supplies last during this promotion (Nov 3 – Jan 4).
Thank you for checking out my card! If you need any of our fabulous products, please click here for the online store, or use the carousel below to go directly to a product used today.
Place a $35 order with Host Code HPBUEJYA in November, and I will send you a package of Rhinestone Basic Jewels and a handmade card. This is my way of sharing the Stampin’ Rewards with you – I appreciate your business!!

My original plan for this week’s Facebook Live only involved watercoloring. Then I got distracted by a beautiful paper collection that I had bought in August…and forgot about! It is the Wonder of the Season Specialty Designer Paper. See my projects below…
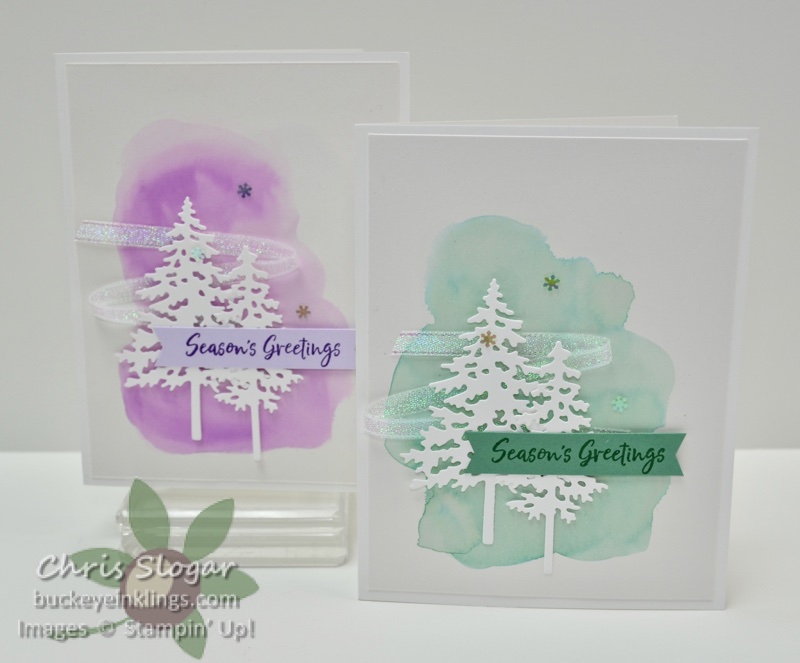
My watercoloring is limited to a simple splash of color (Just Jade and Gorgeous Grape) on these cards, CASEd from Lauren Alarid. I’m a beginner when it comes to watercoloring, but my background wash technique is greatly improved because we now have a wide brush in our set of three Water Painters. I used Shimmery White cardstock, and I could cover a large area with just a few strokes.
I love that the trees in this bundle (In the Pines) can be a focal point, or a background.
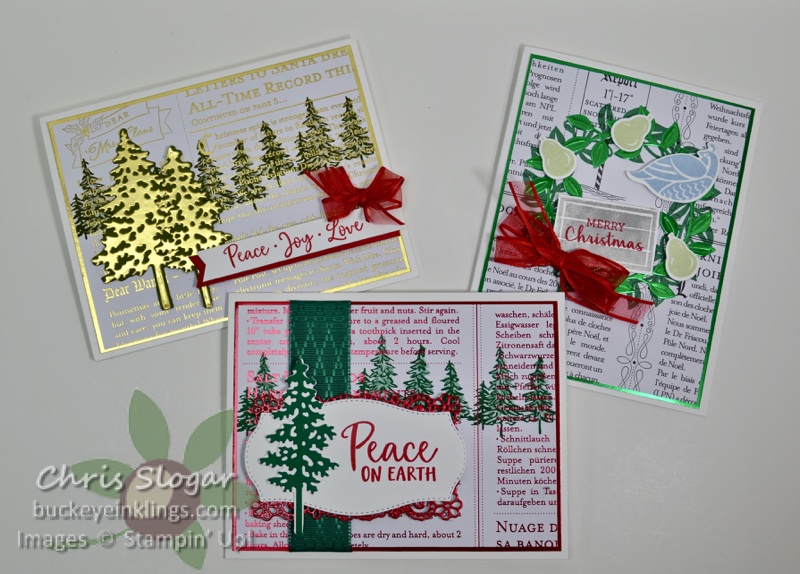
Moving on to the Wonder of the Season Specialty Designer Paper, you can see right away what makes it so special – the embossed red and gold sides! Even the black and white sides make a great background.
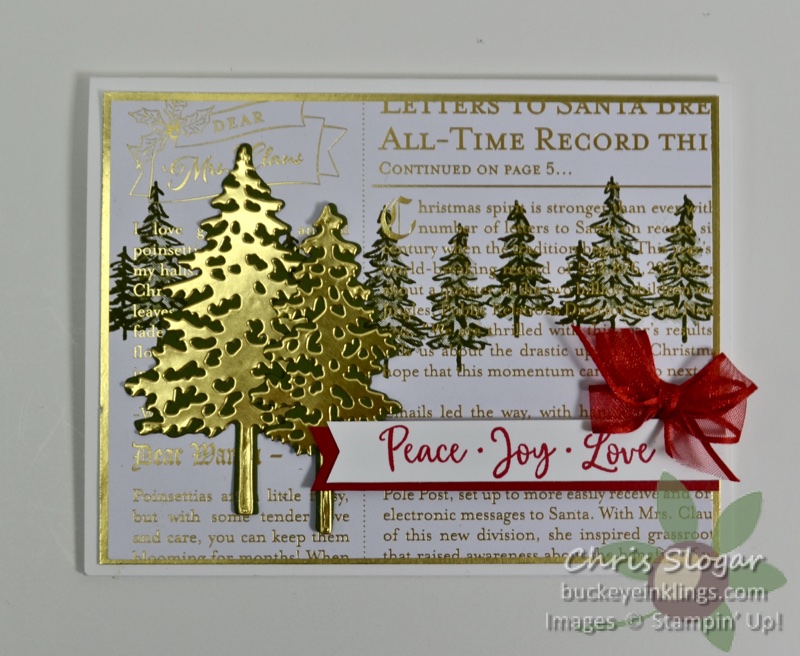
I stamped the trees in the background with Mossy Meadow, and they have gold highlights from the paper. It’s an easy card to make – don’t forget to cut the gold foil trees from your gold foil mat to save foil! The greeting is from the Dove of Hope stamp set.
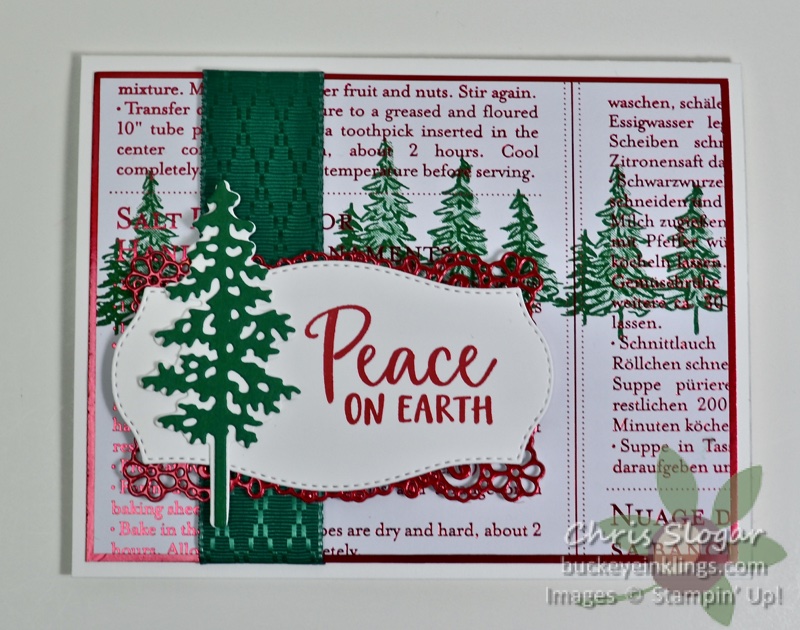
This is the “red foil version” of the previous card. We have red and green foil available in the Mini Catatlog. I used Shaded Spruce for my trees to coordinate with the ribbon, and a red foil label cut with a die from the Ornate Layers collection.
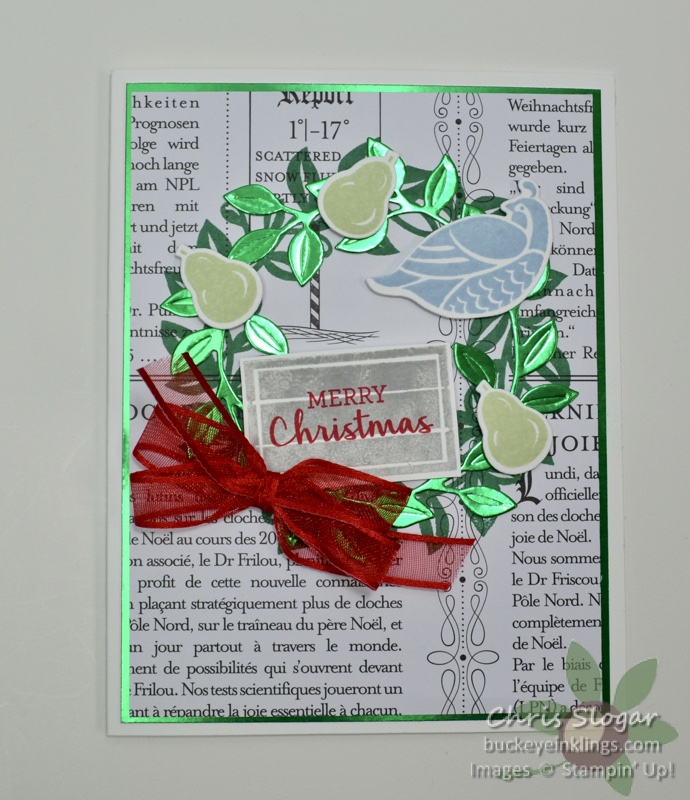
So of course I needed a “green foil version” to complete the set. The trees would have worked again, but I was anxious to cut the green foil with the Wreath Builder dies. The stamps are from the coordinating Arrange a Wreath stamp set.
I hope this is a good reminder that you can stamp on that beautiful designer paper! We have so many collections that are good for stamping.
This post is meant as a supplement to last night’s Facebook Live. Please click here to see the video – and please join the Buckeye Inklings Stampers Group on Facebook to get notifications of all of my live videos.
I also have a YouTube channel with many different videos from what you will see on Facebook. Thank you for any support that you can give in these platforms and in the online store. I need your help to continue to bring you new ideas!
If you need any products, please click here for my online store, or use the carousel below to be directed to a specific product used today. Use Host Code HPBUEJYA with a $35 order in November, and I will send you a package of Basic Rhinestones and a handmade card. I appreciate your business!

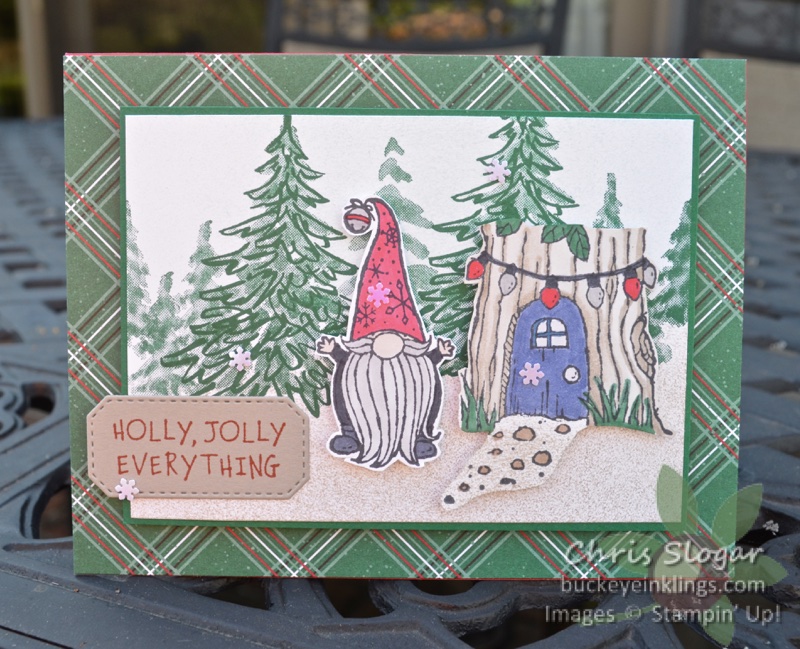
The gnomes from “Gnome for the Holidays” are just begging for a woodland home! I made a simple one here with a few trees from “In the Pines” and a couple of passes with my sponge brayer. The gnome and tree stump are fussy-cut and popped up on dimensionals.
The gnome set is just too adorable! You can’t go wrong with this one – especially if you like a little coloring!
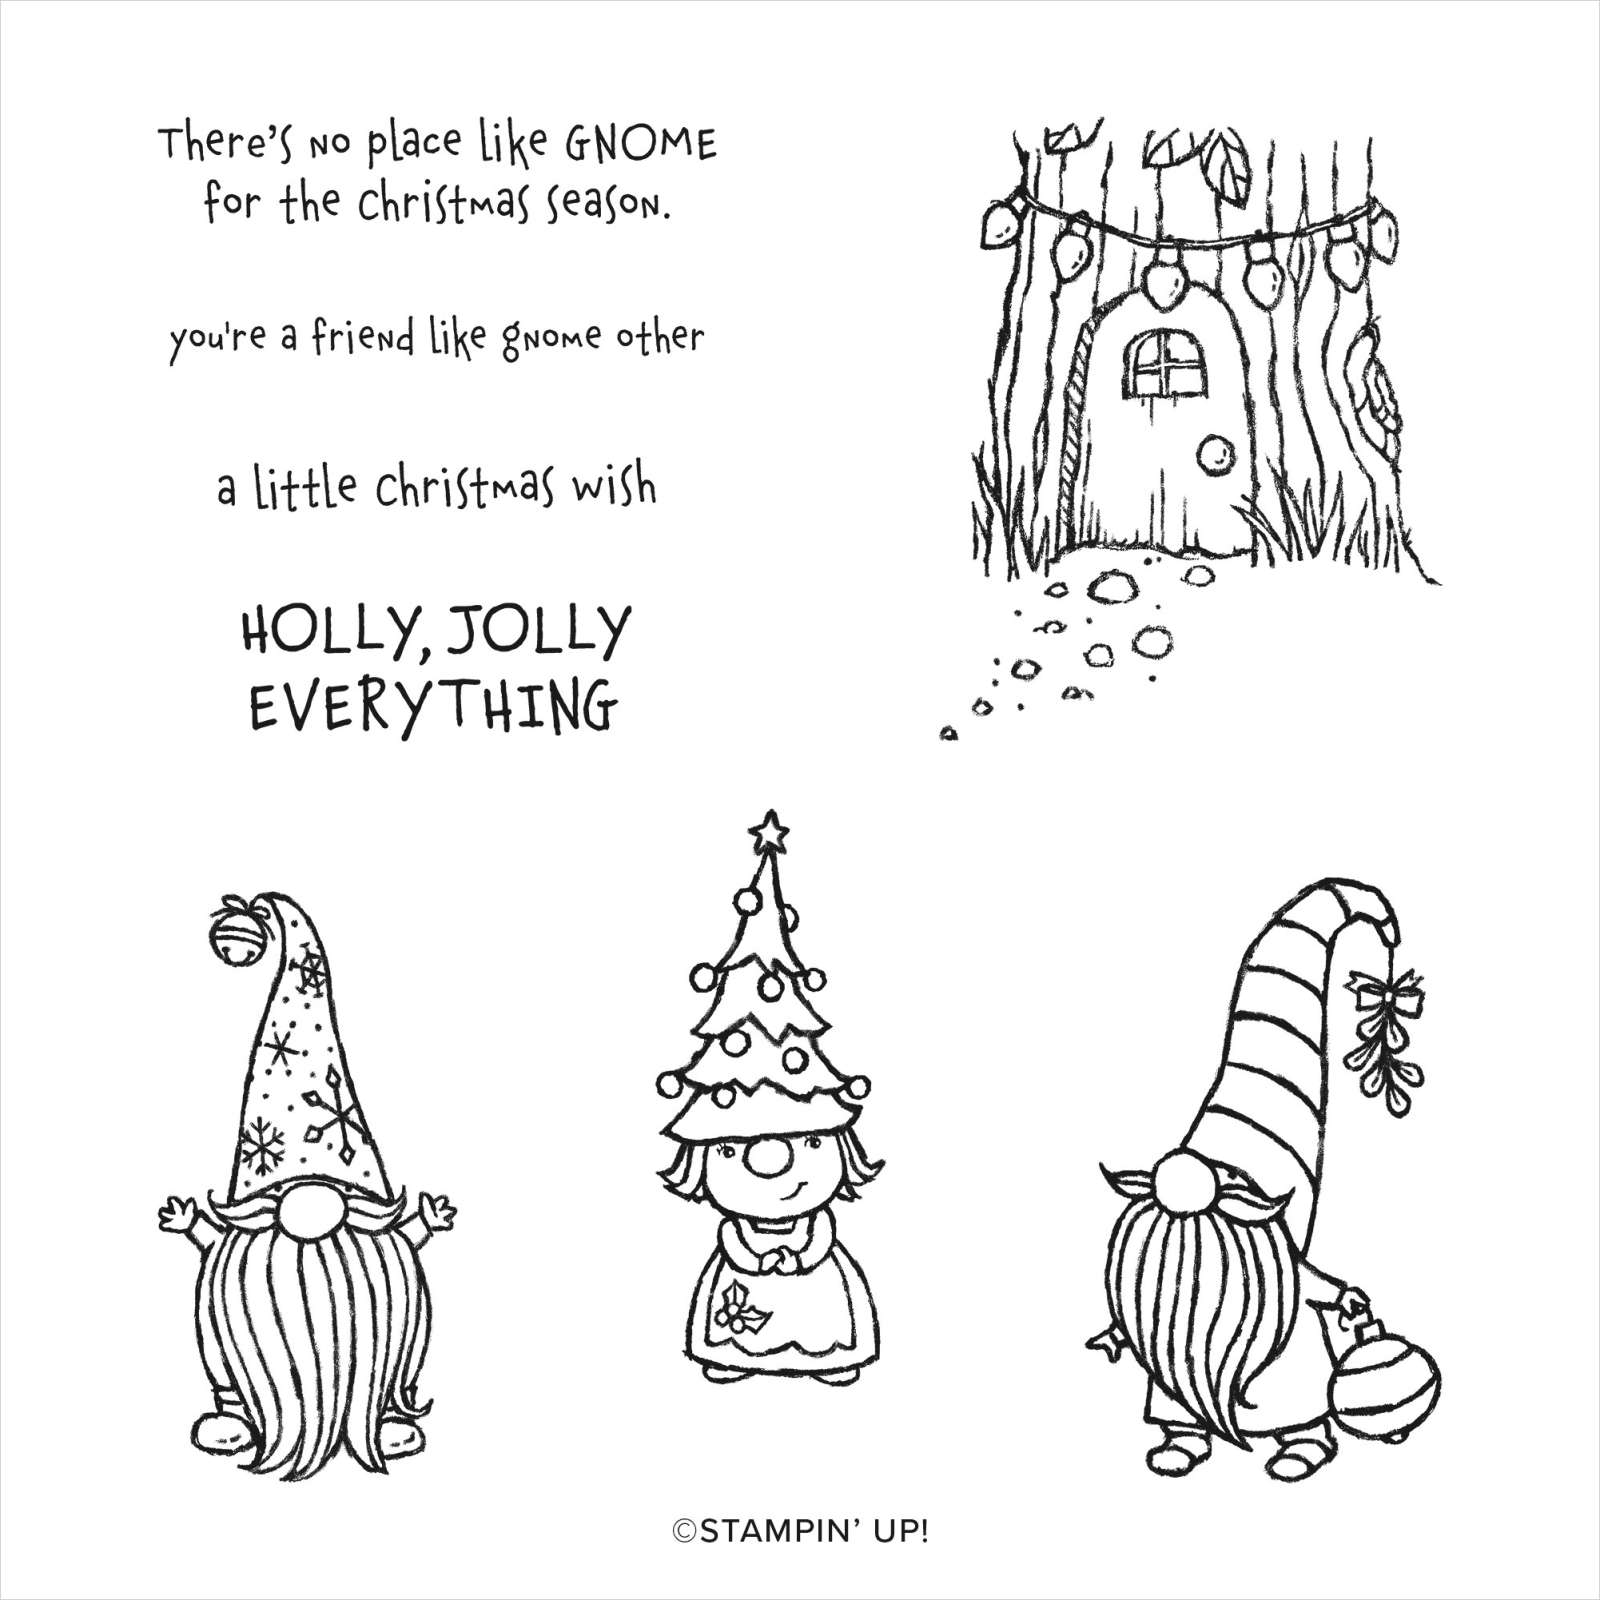
Thank you for checking out my card! If you need any of our fabulous products, please click here for the online store, or use the carousel below to go directly to a product used today.
Place a $35 order with Host Code HPBUEJYA in November, and I will send you a package of Rhinestone Basic Jewels and a handmade card. This is my way of sharing the Stampin’ Rewards with you – I so appreciate your business!!

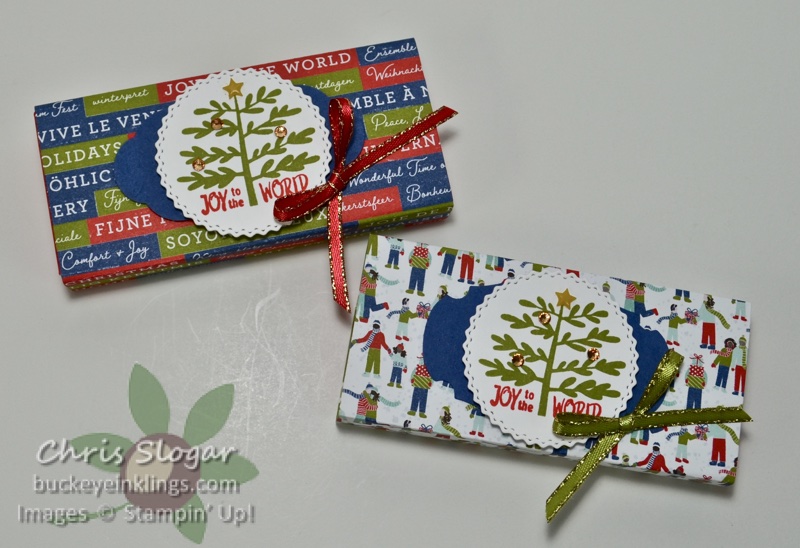
I’ve had a few questions about the Lip Balm version of the Hand Sanitizer shadow boxes that I showed previously. The method to make either is the same, but the dimensions are different. Today, I am adding a video showing the Lip Balm version, so that you don’t have to figure out the changes.
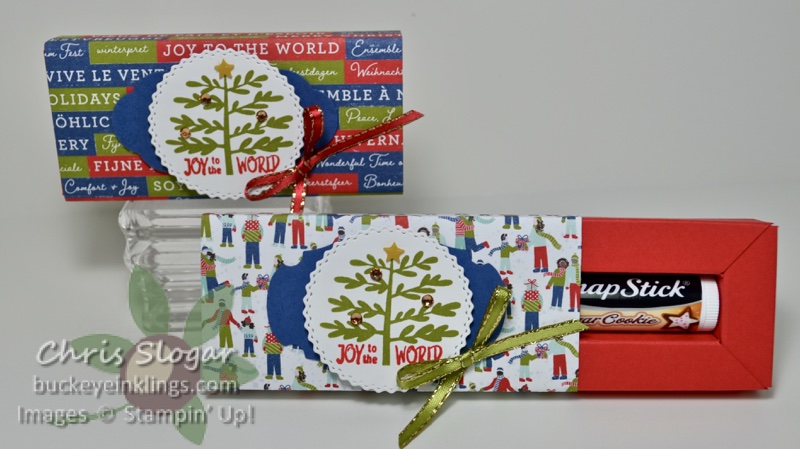
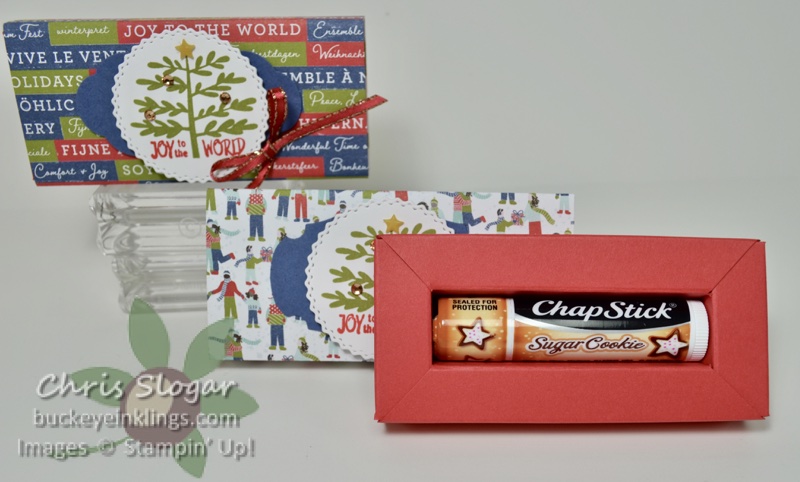
I used Trimming the Town designer series paper and trims, with a stamp from “Everything Essential”. Love these bright Christmas colors!! Find full instructions in the video below. If you are receiving this post in an email, click here for the video.
Thank you for checking out my project! If you need any of our fabulous products, please click here for the online store, or use the carousel below to go directly to a product used today.
Place a $35 order with Host Code HPBUEJYA in November, and I will send you a package of Rhinestone Basic Jewels and a handmade card. This is my way of sharing the Stampin’ Rewards with you – I so appreciate your business!!

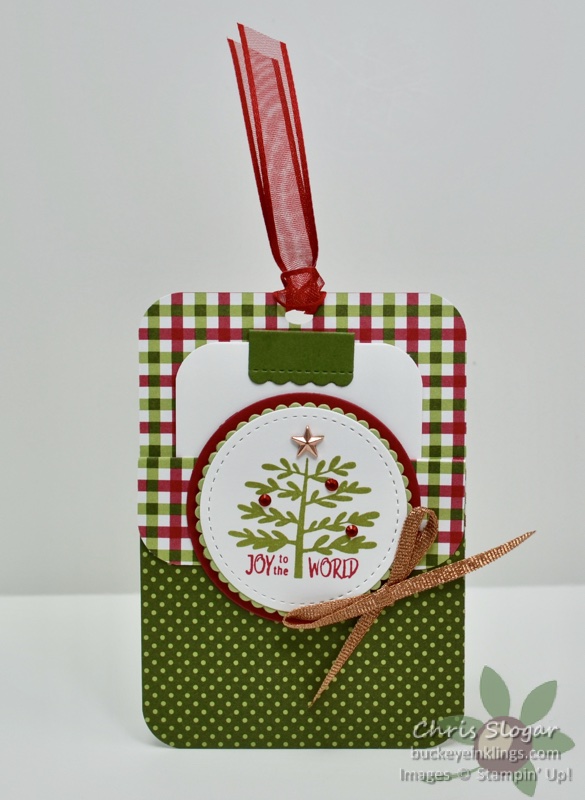
I made this pocket tag for our team tag swap last month. It uses a print from the beautiful Heartwarming Hugs designer paper. The pocket piece measures 3″ x 8″, scored at 4 1/4″ and 7″. I used a very skinny (1/8″) adhesive along the sides to create the pocket, but you could also use a fine line of glue.
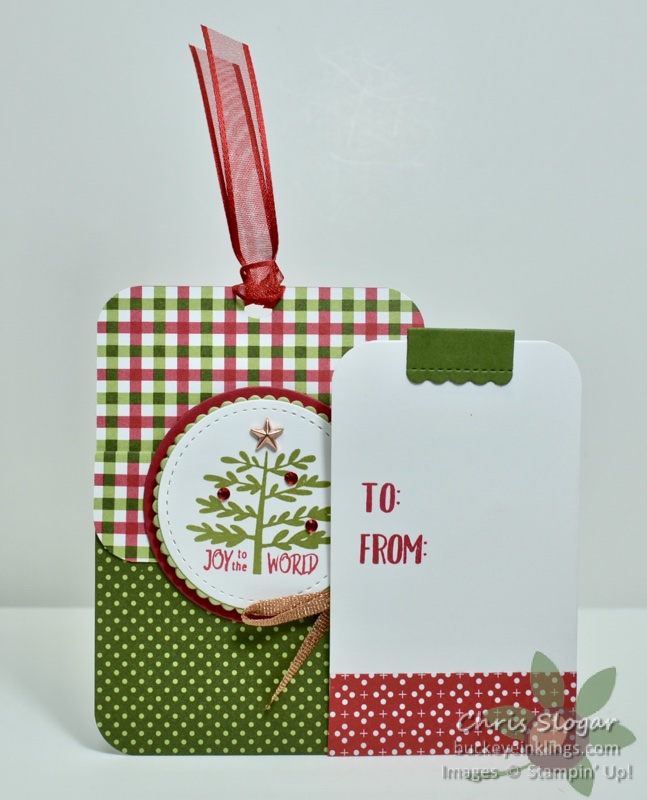
The Whisper White tag measures 2 1/4″ x 3 3/4″, with a 3/4″ strip of coordinating designer paper. The “To/From” stamp is from “Banner Year” and the tree image is from “Everything Essential”. I used half of a label die cut from the Little Treat Box Dies for the Mossy Meadow piece at the top of the tag.
Thanks so much for checking out my project today! If you need any of our fabulous products, please click here for the online store, or use the carousel below to be directed to a product used in today’s project.
Use Host Code M4R2UBVP with a $35 order in October, and I will send you a package of Holiday Rhinestones and a handmade card. I appreciate your business!

Before I get to last night’s Facebook Live projects, I want to bring our great Designer Paper Sale to your attention. Select papers are 15% off in the online store – but only through October 31! Spend $35 or more with Host Code M4R2UBVP in October, and I will send you a package of Holiday Rhinestones and a handmade card:)
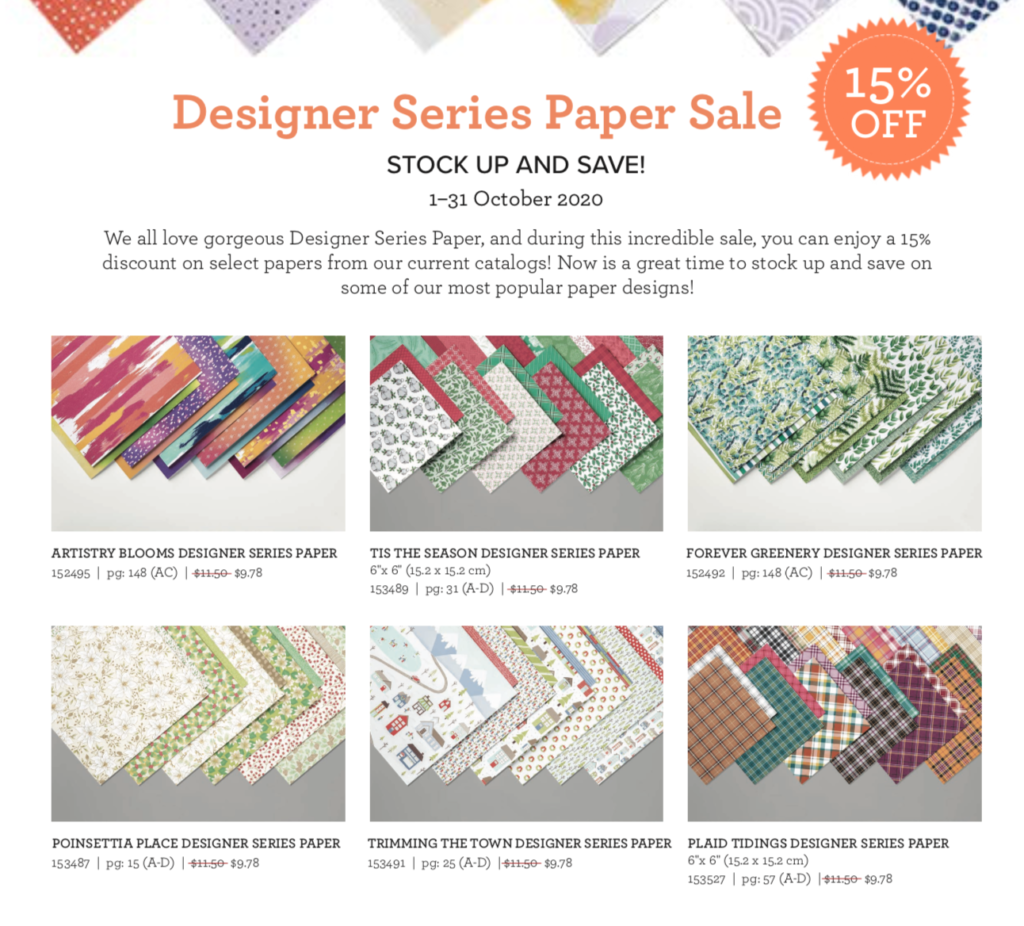
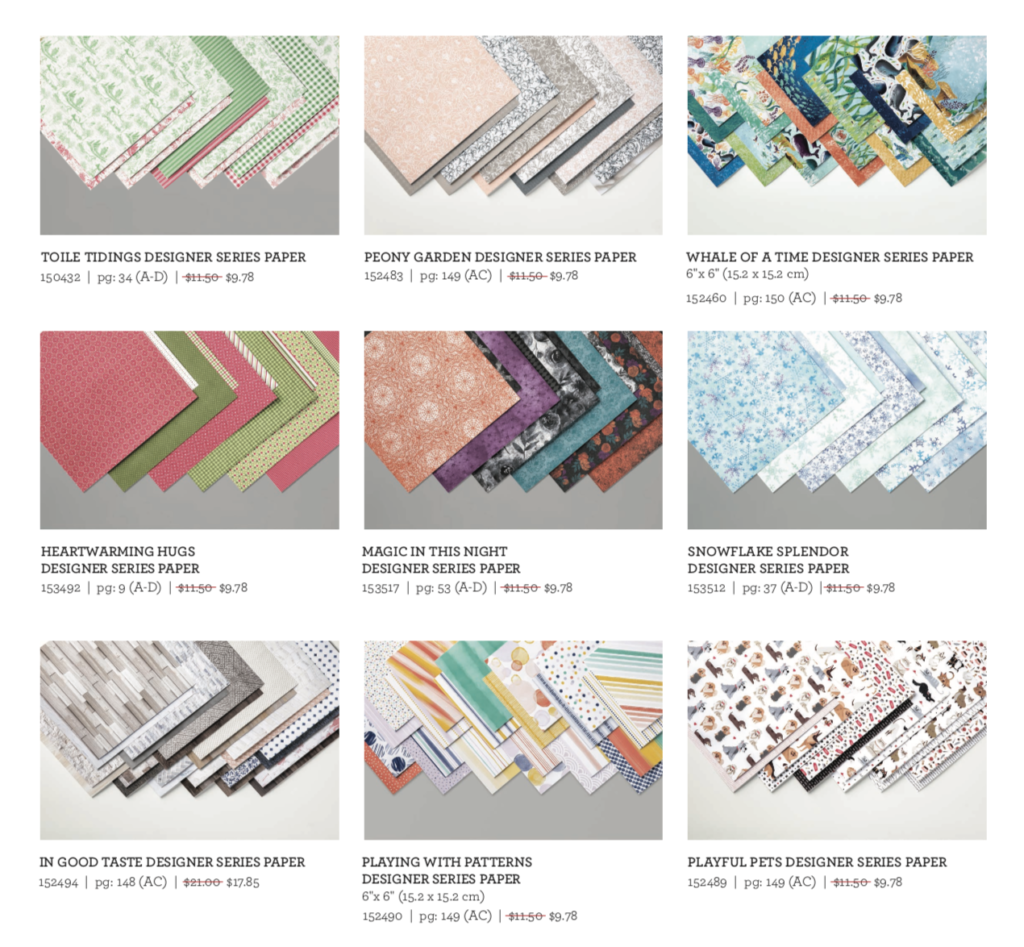
My cards in last night’s Live used two of the papers that are on sale – Trimming the Town and Heartwarming Hugs. This is a great time to stock up on these papers for the holiday season!
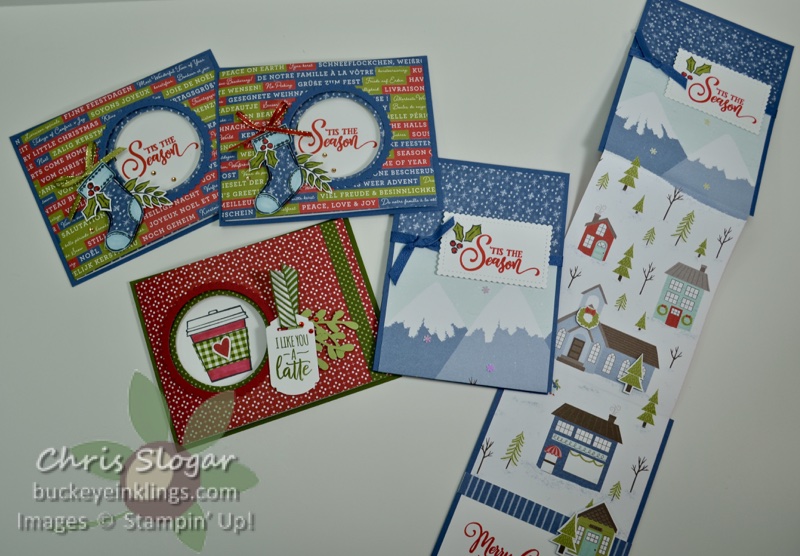
Starting with the card on the right…
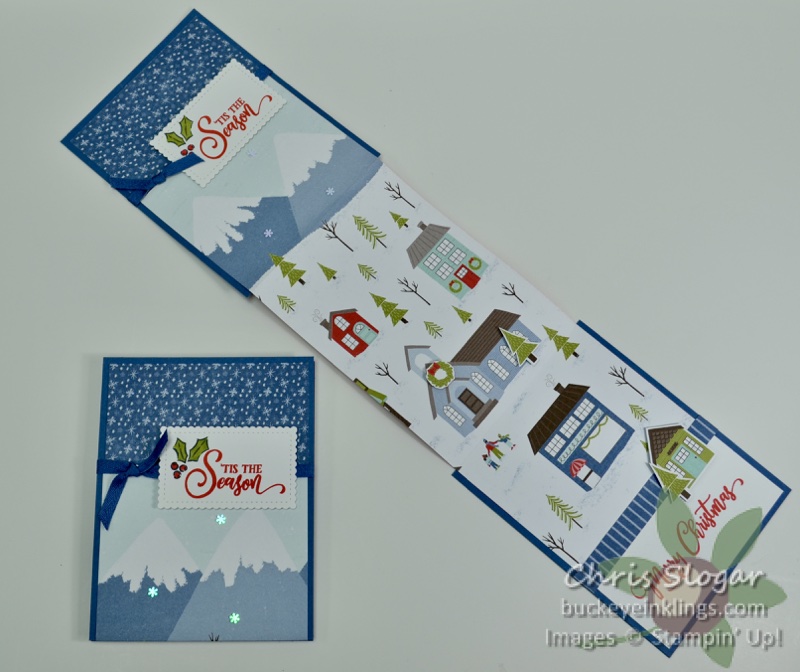
I made this card to show off as much as possible of the 12″ square panorama that is included in the Trimming the Town collection. It uses a 4″ x 12″ strip of the paper. It is scored at 3 1/4″ and 8 3/4″, and adhered to Misty Moonlight pieces that each measure 4 1/4″ x 5 1/2″.
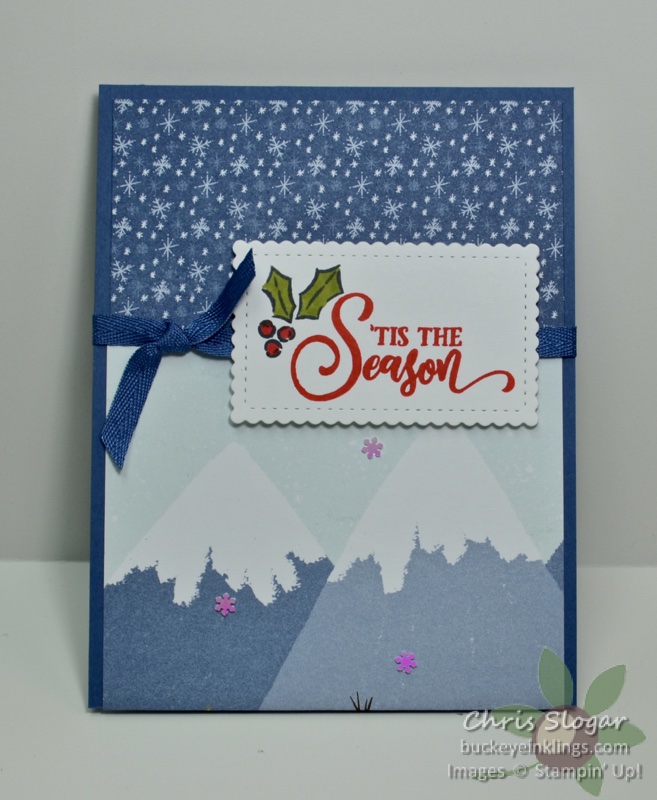
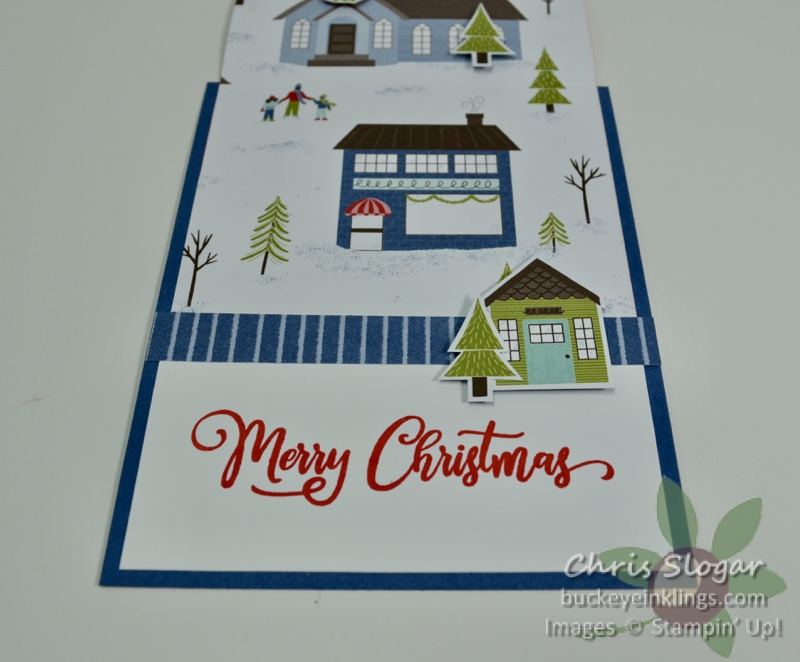
The snowflake designer paper and Whisper White pieces each measure 4″ x 2 1/8″. I covered the seam between pieces with ribbon on the front panel, and with a 1/2″ x 4 1/4″ strip of designer paper on the inside panel.
The greetings are from “Tag Buffet”.
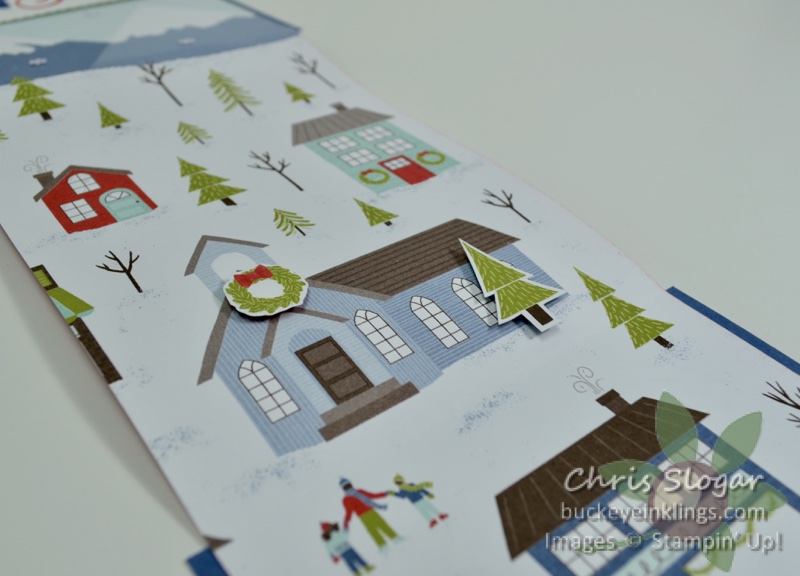
The scene itself provides enough of a focal point. I simply added a few popped up images for decoration – like the wreath and tree at the church, and the house and tree on the designer paper strip. I also added a few adhesive snowflakes to the front of the card.
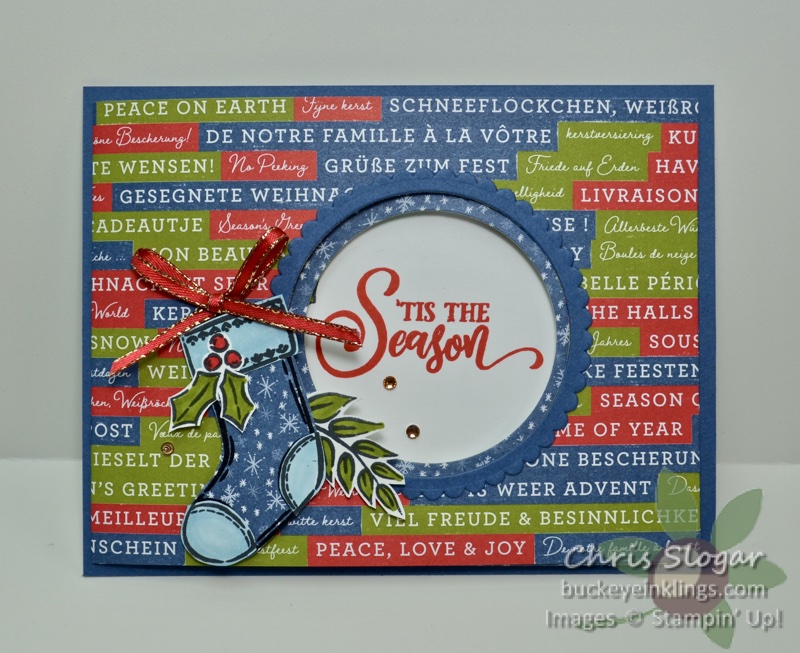
My next card type uses a few patterns of the paper to create flaps over the greeting. The flaps have openings to reveal the greeting on the inner panel.
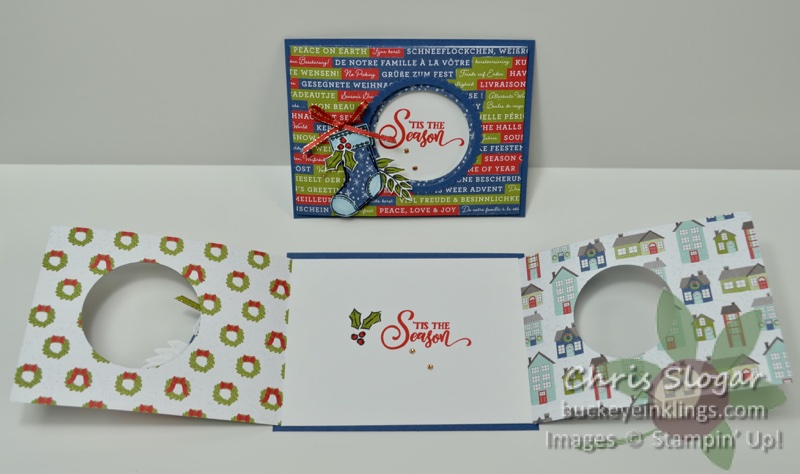
Again, the greeting is from “Tag Buffet” as are the images.
Dimensions are as follows:
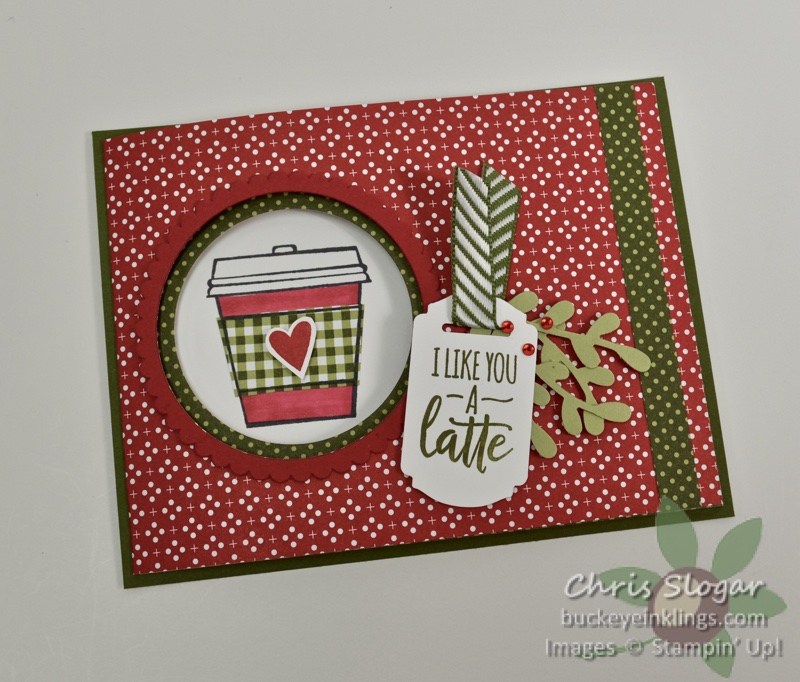
Here’s another sample, made the same way with paper from the Heartwarming Hugs collection.
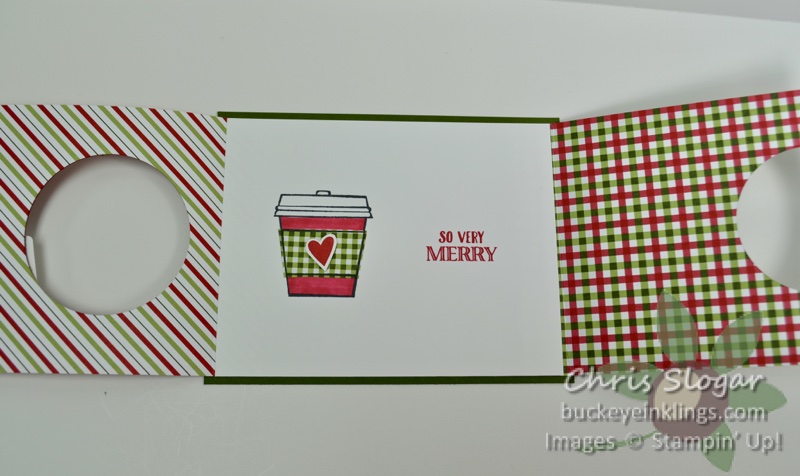
The stamps are from “Press On” and “Heartwarming Hugs”.
This post is meant as a supplement to last night’s Facebook Live. Please click here to see the video – and please join the Buckeye Inklings Stampers Group on Facebook to get notifications of all of my live videos.
I also have a YouTube channel with many different videos from what you will see on Facebook. Thank you for any support that you can give in these platforms and in the online store. I need your help to continue to bring you new ideas!
If you need any products, please click here for my online store, or use the carousel below to be directed to a specific product used today. Use Host Code M4R2UBVP with a $35 order in October, and I will send you a package of Holiday Rhinestones and a handmade card. I appreciate your business!
