Embossing Paste and Color

I used Embossing Paste with die cut “stencils” last night on my Facebook Live, and while it’s hard to appreciate the texture provided by the paste in pictures – it is a nice effect in person.

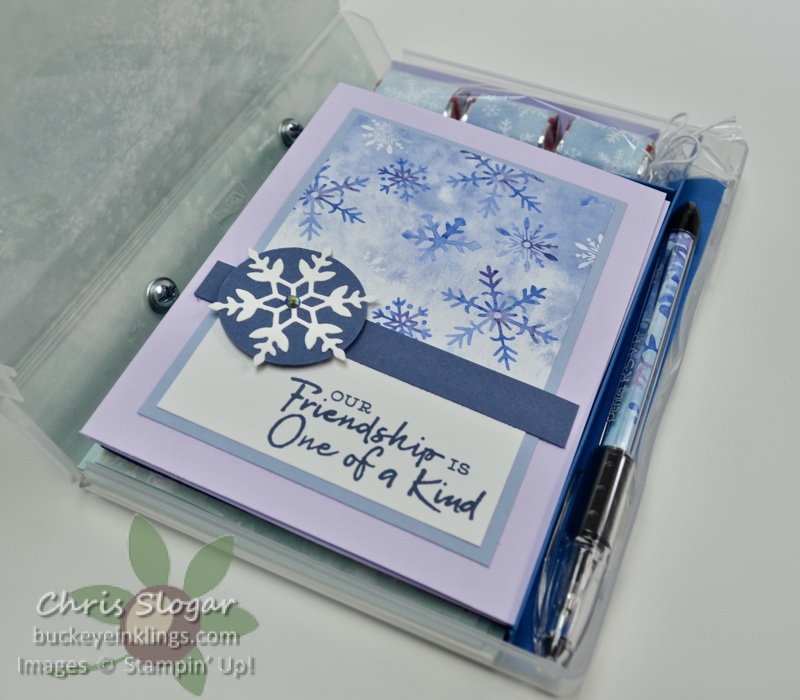
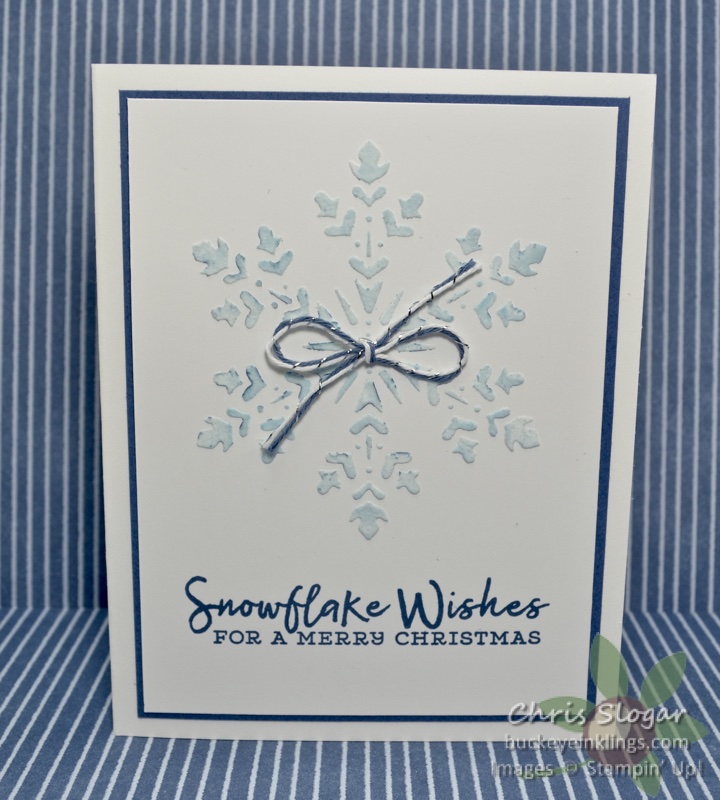
The snowflake here is made with our white embossing paste, spread over a die-cut snowflake that had been previously sponged in Misty Moonlight ink. The paste picks up the blue tint as it is spread, resulting in a mottled color. (You can premix the paste with a reinker and spread over a Whisper White die-cut if you prefer a more uniform color.)

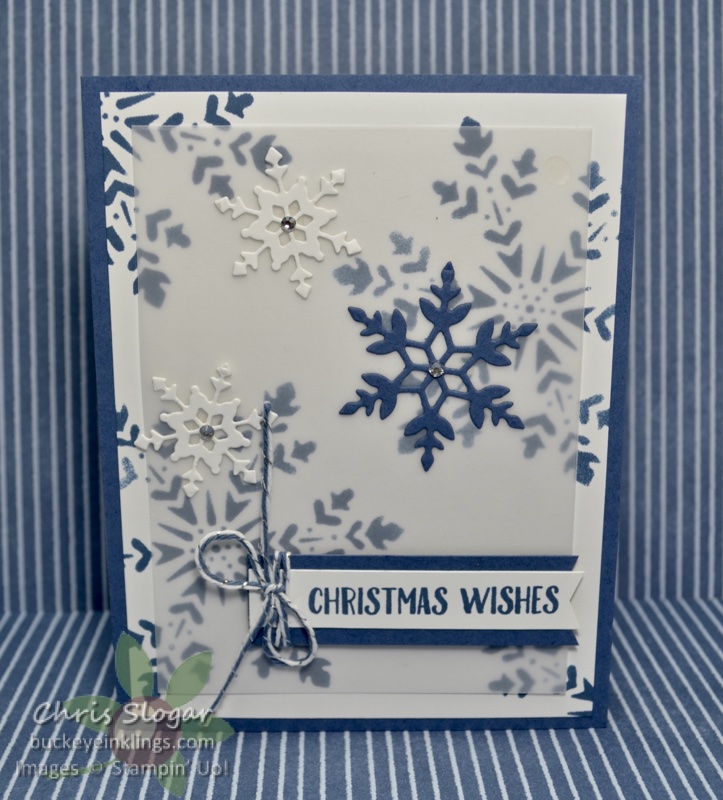
Backing up a bit, I first made this pretty background. I cut the large snowflake die (So Many Snowflakes die set) from a piece of Whisper White cardstock. The die cut served as stencil for this background piece. I used a dauber to fill in the Misty Moonlight color to create the snowflakes. I finished this card with a layer of vellum, some additional snowflakes, and a greeting.

I then used the daubered die cut as a stencil for my embossing paste projects. The embossing paste picks up color from the ink, creating the effect on the first card shown above, and the cards below.

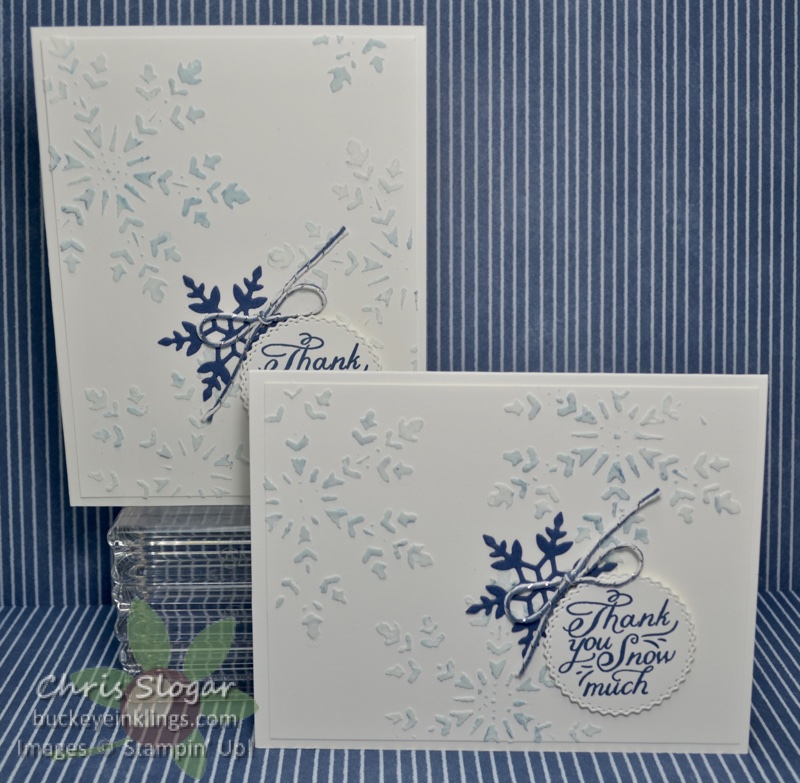
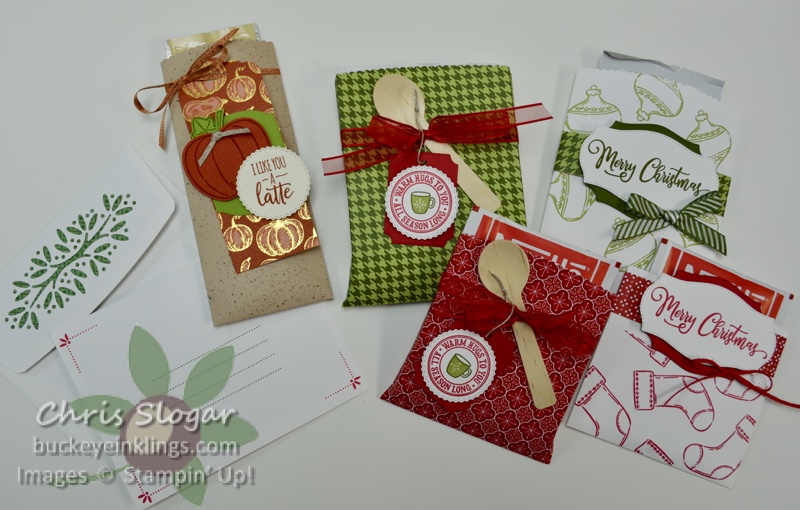
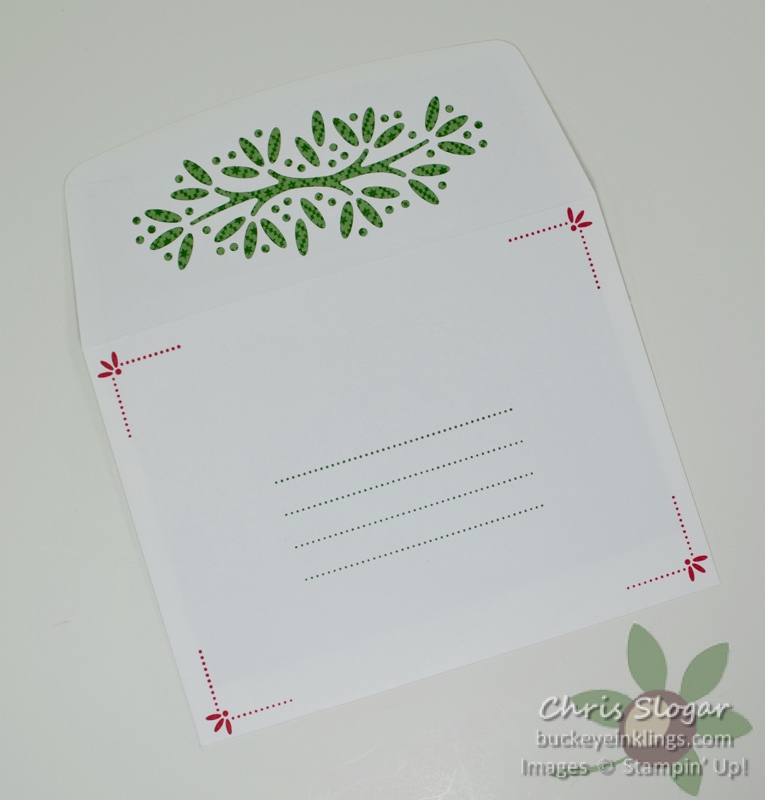
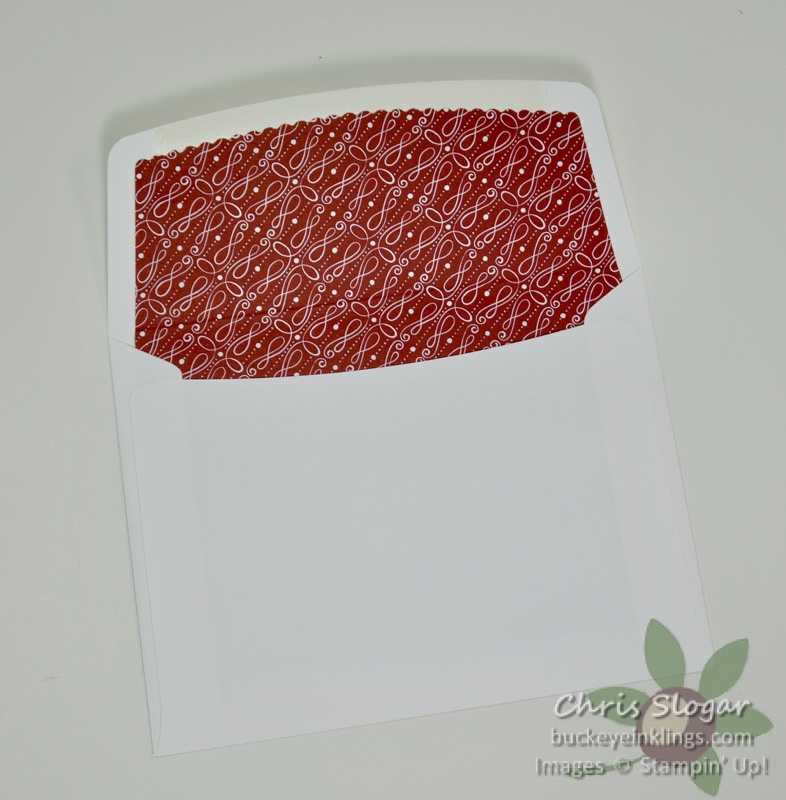
I also made some really easy note cards…

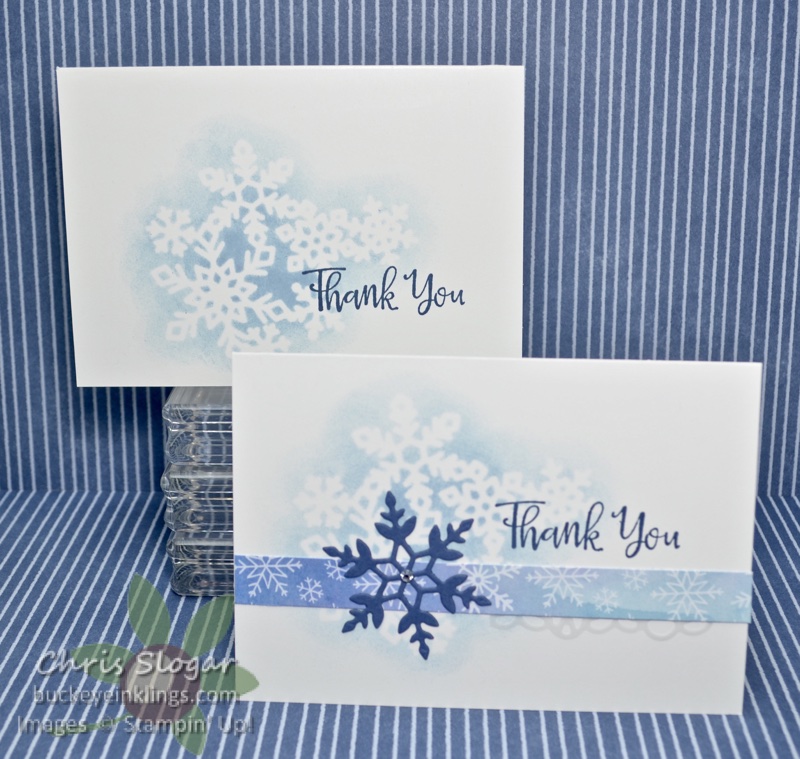
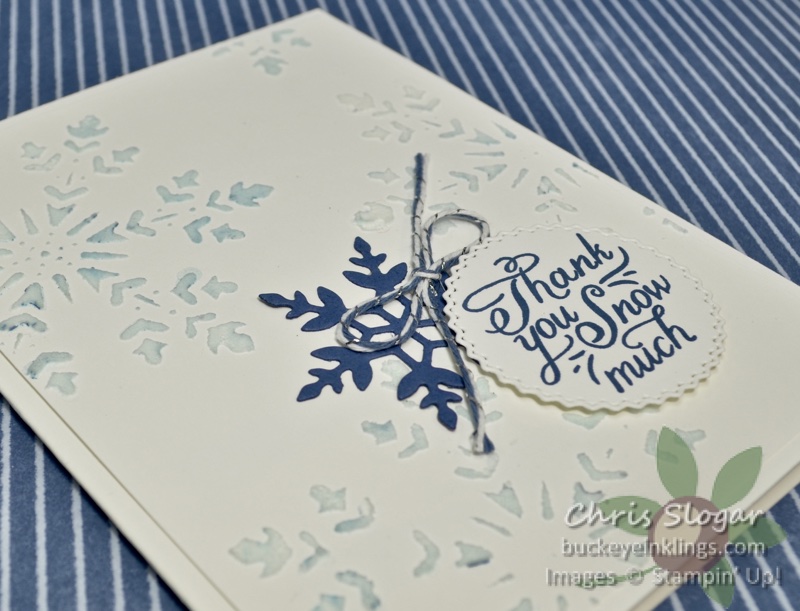
In the simpler version, I simply daubered (is that a word?) over a die cut from the Christmas Layers collection. The “stepped-up” version is not much more difficult. I simply added a 1/2″ strip of designer paper, a strip of vellum doily, and a snowflake. Wouldn’t these be cute to make in sets for holiday giving?

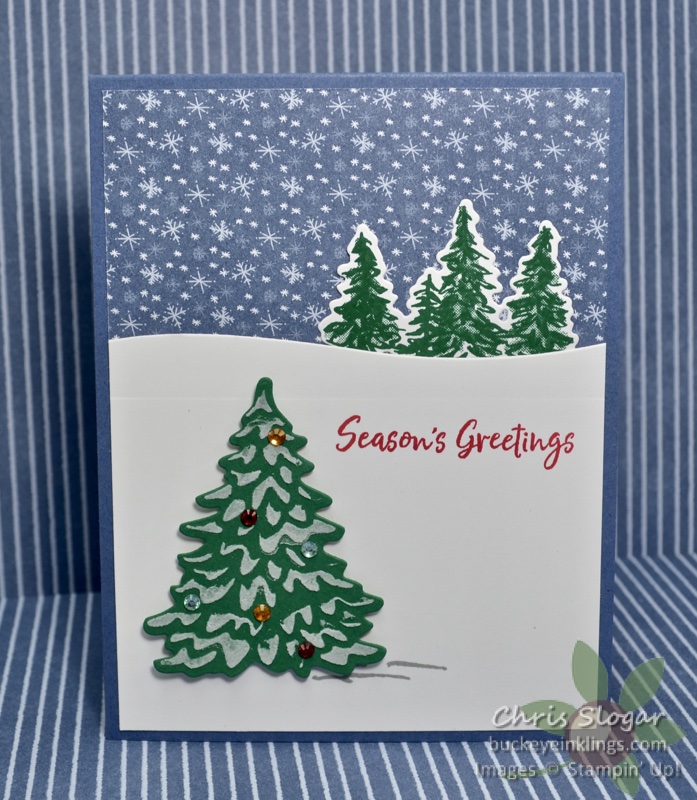
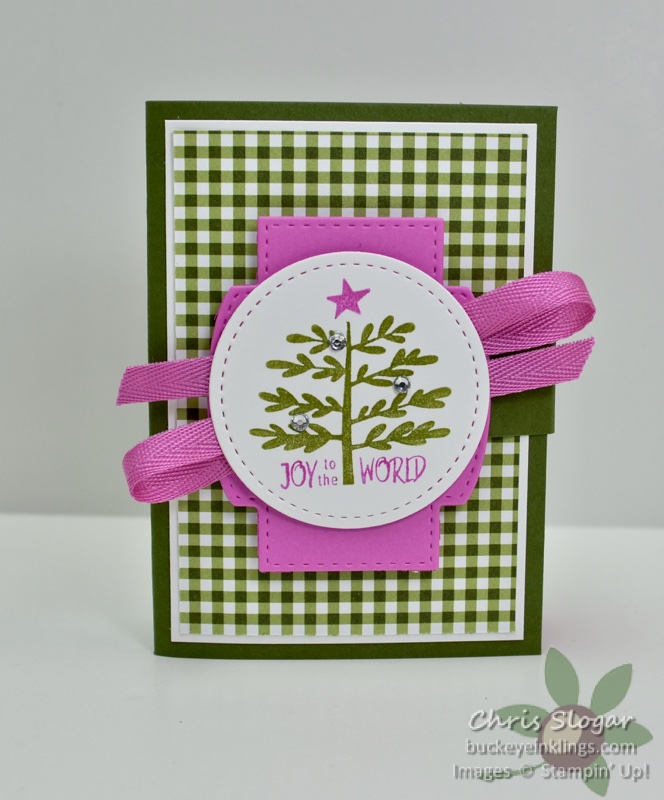
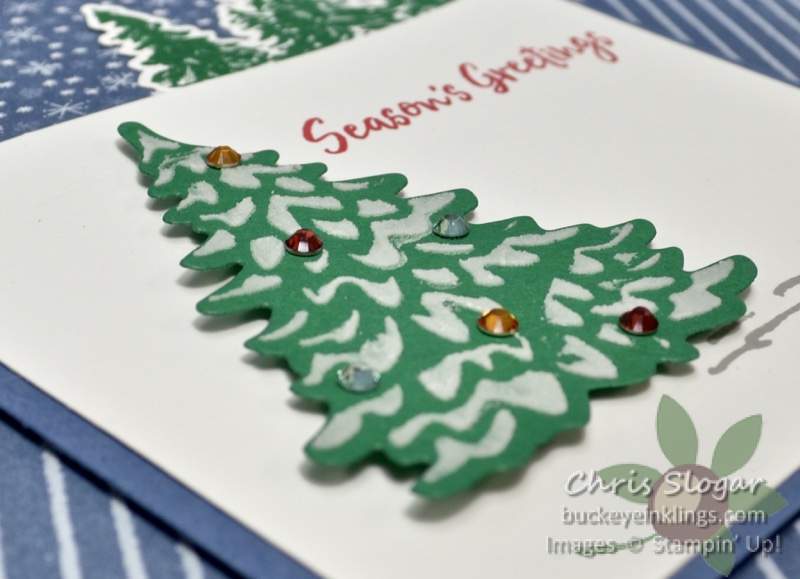
I brought back the embossing paste for my final project using the In the Pines bundle. The Shaded Spruce tree in the foreground is cut from a die in this bundle, and there is a coordinating die that I used to make a stencil for the embossing paste.

This post is meant as a supplement to last night’s Facebook Live. Please click here to see the video – and please join the Buckeye Inklings Stampers Group on Facebook to get notifications of all of my live videos.

I also have a YouTube channel with many different videos from what you will see on Facebook. Thank you for any support that you can give in these platforms and in the online store. I need your help to continue to bring you new ideas!

If you need any products, please click here for my online store, or use the carousel below to be directed to a specific product used today. Use Host Code M4R2UBVP with a $35 order in October, and I will send you a package of Holiday Rhinestones and a handmade card. I appreciate your business!

Chris_buckeye_signature_rose_final

Everything Essential

Welcome to the Trip Achievers Blog Hop for September! You may just be starting the blog hop here at my blog (Chris Slogar) or may have come from the person previous to me in the list. If you get off track at any time, the full lineup below will help you move along through all of the projects.

Lately, I have been making shadow box favors for lip balms and hand sanitizers, and I wanted to share one with this hop. I used a stamp from Everything Essential to decorate my hand sanitizer box.

The Magenta Madness shadow box is wrapped in a cardstock cover. You can see more of the shadow box below.

Shadow boxes are so versatile because you can adjust the size of the opening to fit any item. The video below shows how to make this size, though it is decorated differently. If you are receiving this post in an email, please click here for the video.

Thank you for visiting my blog! Please use the list below to continue to the next demonstrator.


Chris_buckeye_signature_rose_final

Nothing’s Better Than…

…Cookie Monster!

I have had this card in my head for a while, but didn’t get a chance to make it until now. The large die from the Sunflowers Dies makes an excellent Cookie Monster head to coordinate with the Nothing’s Better Than Bundle.

This card is a gate fold, and the embossed 1″ x 4 1/4″ Pretty Peacock strip is attached to the top flap to hide the seam. Other measurements are as follows:

  • Pretty Peacock 4 1/4″ x 11″, scored at 1 1/2″ and 7″
  • Designer Paper 3 3/4″ x 4″
  • Whisper White 1 1/4″ x 4″ and 4″ x 5 1/4″

Cookie Monster’s eyes are made with a 1″ and 1/2″ punch, and his mouth is part of a 2″ circle.

Thank you for checking out my card today! If you need any supplies, please shop in my online store or use the carousel below to be directed to a specific product used today.

Use Host Code WXMZUBQD with a $35 order in September, and I will send you a package of Wonderful Gems and a handmade card. This is my way of sharing the Stampin’ Rewards with you. I appreciate your orders!

Chris_buckeye_signature_rose_final

Hand Sanitizer Shadow Box

I made this fun little gift last night on Facebook Live. It contains a hand sanitizer. I used one of the plaids from our fabulous Plaid Tidings collection as my color inspiration. The pumpkin is made with “Harvest Hellos” and the Apple Builder Punch, and the greeting is from “Banner Year”.

You can see the depth in this picture – the Cinnamon Cider portion is the end of a shadow box that holds the hand sanitizer, and it is wrapped in a Melon Mambo cover.

I also showed this version. The shadow box is the same, but it is wrapped in a 3 7/8″ x 7 1/2″ sleeve of designer paper from the Magic in the Night collection.

Please note that this post is meant as a supplement to the Facebook Live video (click here for that video). Join the Buckeye Inklings Stampers Group on facebook to get notifications of all of my live videos.

I have also created a YouTube video for this project (below). If you are receiving this post in an email, please click her for the video.

Dimensions for the project are listed below for easy reference, but this project really requires the video for complete instructions 🙂

  • Cinnamon Cider 8″ x 9 1/4″, score on all four sides at 1/2″, 1 3/8″, 1 7/8″, 2 3/4″; add score on long sides at 3 1/4″, 6″ (only to second horizontal score line)
  • Melon Mambo 3 7/8″ x 6 3/8″, scored at 2 3/4″, 3 5/8″
  • Melon Mambo 3/4″ x 3 1/4″, scored at 1/2″, 1 3/8″
  • Mango Melody 3 5/8″ x 2 1/2″
  • Designer Paper 3 1/2″ x 2 3/8″

Thank you for checking out my project! I need your help to continue to bring you new ideas – if you need any supplies, please shop in my online store or use the carousel below to be directed to a specific product used in today’s project.

Use Host Code WXMZUBQD with a $35 order in September, and I will send you a package of Wonderful Gems and a handmade card. This is my way of sharing the Stampin’ Rewards with you. I appreciate your orders!

Chris_buckeye_signature_rose_final

Slimline Cards

At our team meeting this week, we shared slimline cards. Slimline cards are a great change of pace since they offer such different layout options. I made this one with the stamps from “Little Treats” and “A Merry Hello”. The dimensions are as follows:

  • Misty Moonlight – 7″ square, scored in half at 3 1/2″
  • Whisper White 2 7/8″ x 7″
  • Trimming the Town designer paper 2 3/4″ x 7″

I also made these fun cards with “Cute Fruit” and stamps from the May 2020 Paper Pumpkin kit. The Pineapple card uses Pineapple Punch cardstock which is still available on the Clearance Rack for only $3.50!

Each of these bases is also a 7″ square. The folded cards fit into a Monarch envelope, which measures 3 7/8″ x 7 1/2″.

Thank you for checking out my cards today! I need your help to continue to bring you new ideas – if you need any supplies, please shop in my online store or use the carousel below to be directed to a specific product used today.

Use Host Code WXMZUBQD with a $35 order in September, and I will send you a package of Wonderful Gems and a handmade card. This is my way of sharing the Stampin’ Rewards with you. I appreciate your orders!

Chris_buckeye_signature_rose_final

Love of Leaves and Harvest Hellos

…and Daisy Lane! Three great fall elements come together here with one of the prints from the Plaid Tidings collection. I remade the card in more muted colors (below) to coordinate with a print from the Gilded Autumn collection. Do you have a preference?

Thank you for checking out my cards today! I need your help to continue to bring you new ideas – if you need any supplies, please shop in my online store or use the carousel below to be directed to a specific product used today.

Use Host Code WXMZUBQD with a $35 order in September, and I will send you a package of Wonderful Gems and a handmade card. This is my way of sharing the Stampin’ Rewards with you. I appreciate your orders!

Chris_buckeye_signature_rose_final

Treat Caddy from Little Treat Box

Facebook Live came early this week – if you missed this change, you can still watch the replay in the Buckeye Inklings Stampers Group. My focus this week is the Little Treats Bundle. This bundle creates a sweet little favor with a narrow width that can be extended as shown below.

The standard treat box, shown in red on the left, is 3/4″ wide. The 3/4″ width is increased to 2 1/4″ in the extended versions. The black one shown above is decorated for Halloween (see below), and I also made a fall and Christmas version.

Each is cut from a 5 1/2″ x 8 1/2″ piece of cardstock. The video below shows how these were cut with the die, and it also gives more detail on the handles. The designer papers measure 1 1/2″ x 9″.

I used the same method to create an even longer (3 1/2″) caddy. The Misty Moonlight version shown here is cut from a 5 1/2″ x 9 3/4″ piece of cardstock. The designer paper wrap measures 1 1/2″ x 12″.

Check out the video below for complete instructions, or click here for the Facebook Live video. Please join the Buckeye Inklings Stampers Group on Facebook to get notified of my live tutorials.

I need your help to continue to bring you new ideas – if you need any supplies, please shop in my online store or use the carousel below to be directed to a specific product used today.

Use Host Code WXMZUBQD with a $35 order in September, and I will send you a package of Wonderful Gems and a handmade card. This is my way of sharing the Stampin’ Rewards with you. I appreciate your orders!

A Final Reminder…I am taking orders for two versions of this Stamp Case Gift Set Slass through tomorrow, September 10. Click here for details.

Chris_buckeye_signature_rose_final

Ornamental Envelopes

I apologize for the technical issues on this week’s Facebook Live. I couldn’t get a continuous transmission last night, and as it turned out, I couldn’t get one today either. When I finally go through my projects, they were presented in two segments:)

My projects use the Ornamental Envelopes bundle with a few other stamps that suited these projects.

First, I used the bundle as intended to create an “over-the-top” envelope. It is stamped, die cut and lined! The reverse side of this envelope is shown below. The designer paper is from the “Tis the Season collection.

I also used the scalloped-edge dies on several favors, starting with this one that holds a Starbucks Pumpkin Spice Latte. The greeting is from “Warm Hugs” and the paper is from the Gilded Autumn collection.

The designer paper measures 7″H x 6″W, scored at 1 1/2″ and 4 1/4″ along the width. The height is 7″, with a score 1/2″ from the bottom edge.

These favors are similar, but I added a gusset to the sides to allow for thicker contents. The green one holds a Ghirardelli Brownie Mug Cake, and the red one holds a hot cocoa packet.

Dimensions are as follows:

Brownie Mix – the designer paper measures 6″H x 10″W, scored at 2 3/4″ and 7 1/2″ along the width. The height is 6″, with a score 1/2″ from the bottom edge. The gusset scores are 3/8″ from each edge.

Hot Cocoa – the designer paper measures 5″H x 9″W, scored at 2 1/2″ and 6 3/4″ along the width. The height is 5″, with a score 1/2″ from the bottom edge. The gusset scores are 1/4″ from each edge.

Finally, I showed these very simple favors, each made from a Medium Envelope. The stamps are from “Tag Buffet”.

Thanks for checking out my projects. This post is meant as a supplement to this week’s Facebook Live. Due to technical issues, the video is in two pieces here and here. Please join the Buckeye Inklings Stampers Group on facebook to get notifications of all of my live videos.

I need your help to continue to bring you new ideas – if you need any supplies, please shop in my online store or use the carousel below to be directed to a specific product used today.

Use Host Code WXMZUBQD with a $35 order in September, and I will send you a package of Wonderful Gems and a handmade card. This is my way of sharing the Stampin’ Rewards with you. I appreciate your orders!

Chris_buckeye_signature_rose_final
WordPress theme: Kippis 1.15