Gift Card Holders

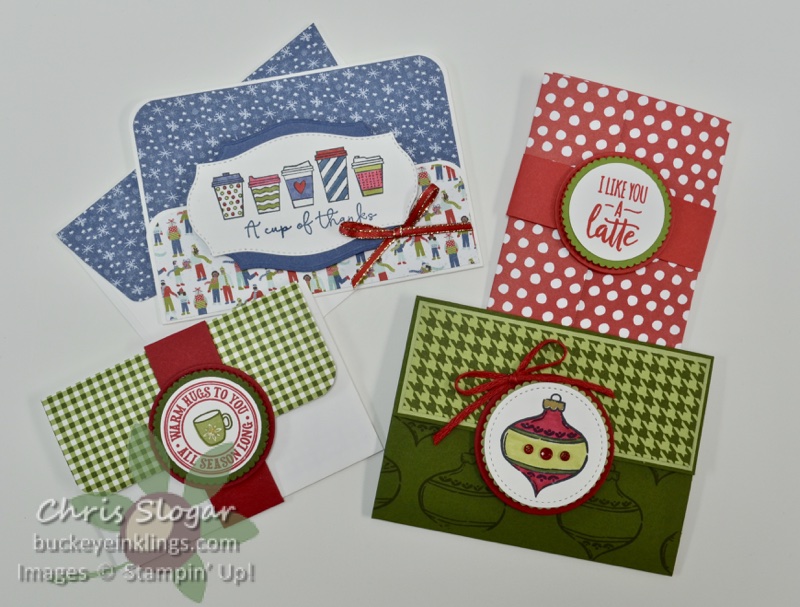
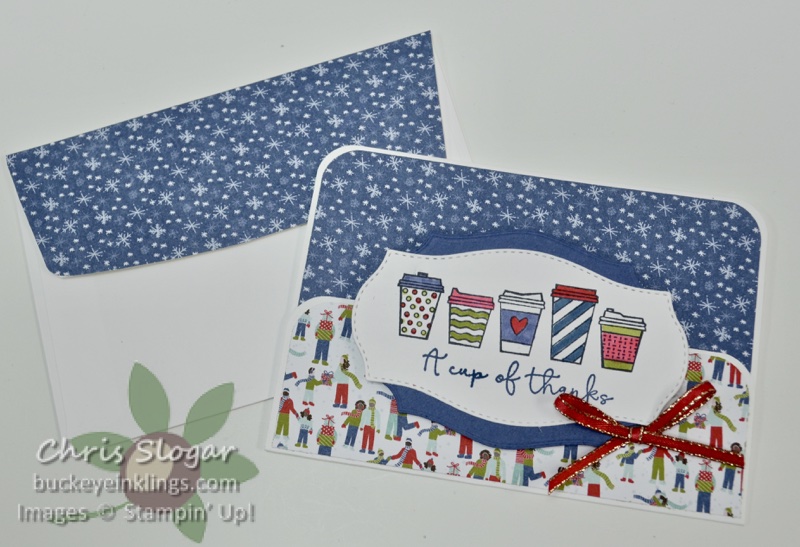
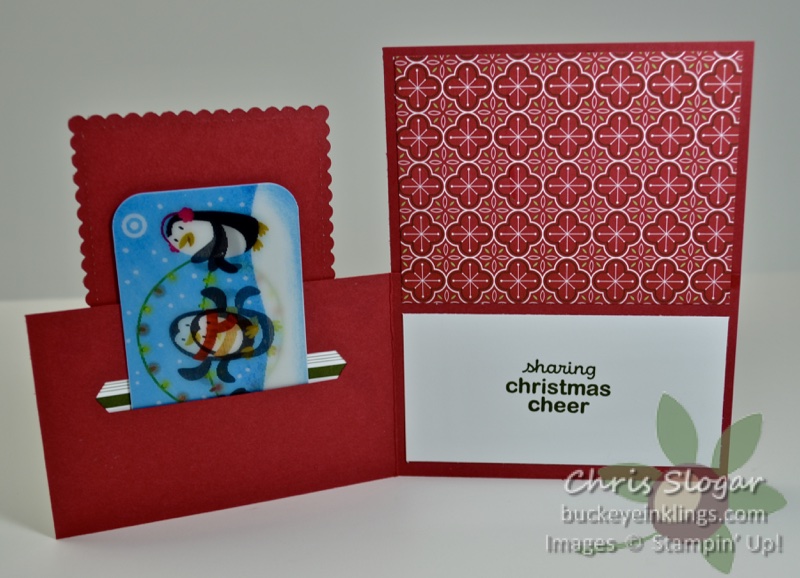
We breezed through four gift card holders last night on Facebook Live. They are all so quick and easy! I featured two of my favorite papers from the mini catalog – Heartwarming Hugs and Trimming the Town – but of course these layouts are easily adaptable to other papers and themes.

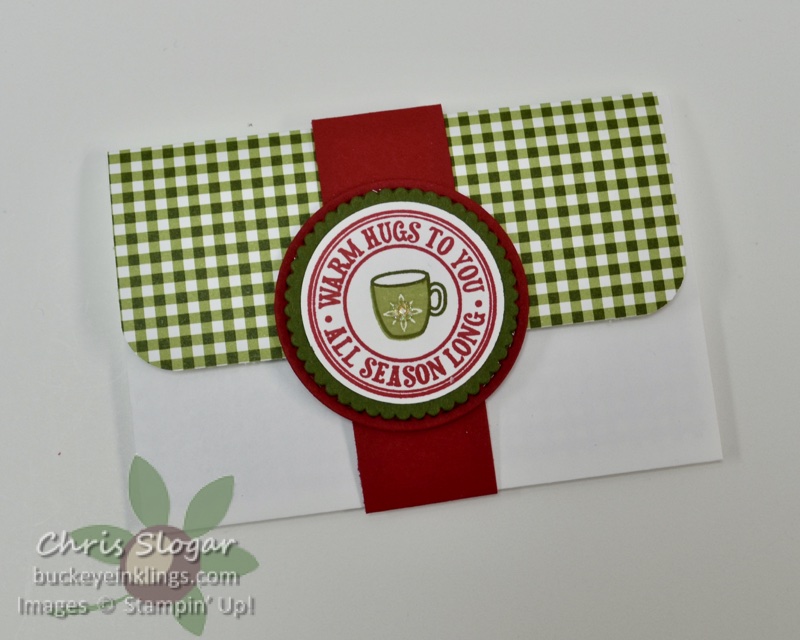
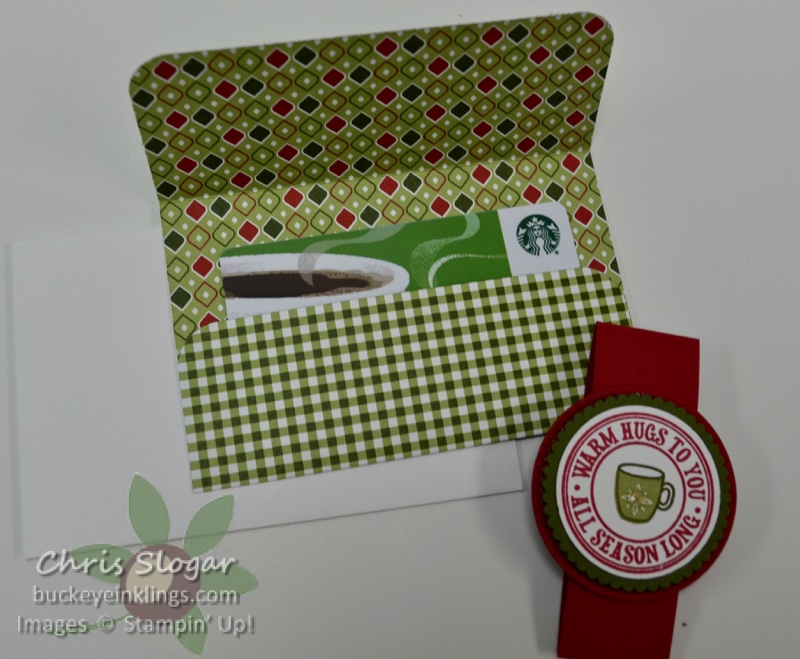
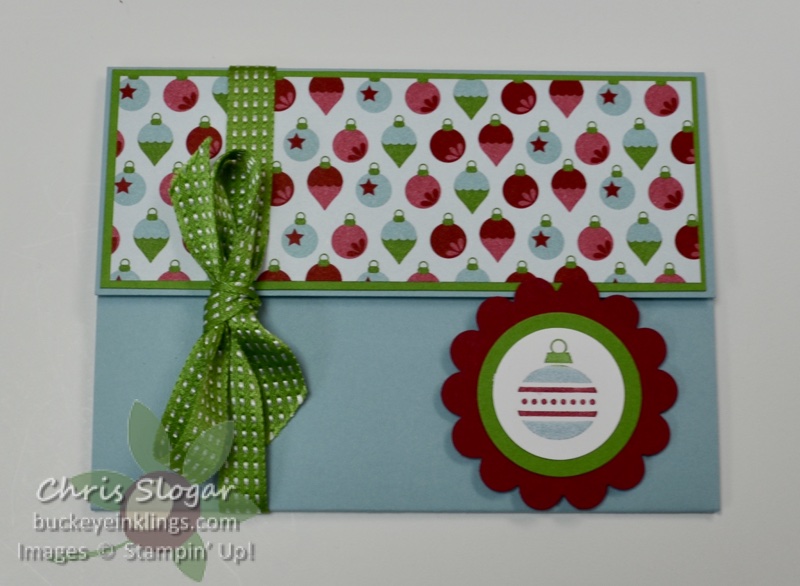
The first uses half of a Medium envelope as a base.

The designer paper creates a flap and a pocket, all in one. Measurements are as follows:

  • Medium Envelope – cut in half at 2 7/8″
  • Designer Paper 4 1/4″ x 6″, scored at 1 1/2″, 4 1/4″
  • Real Red 1″ x 7″

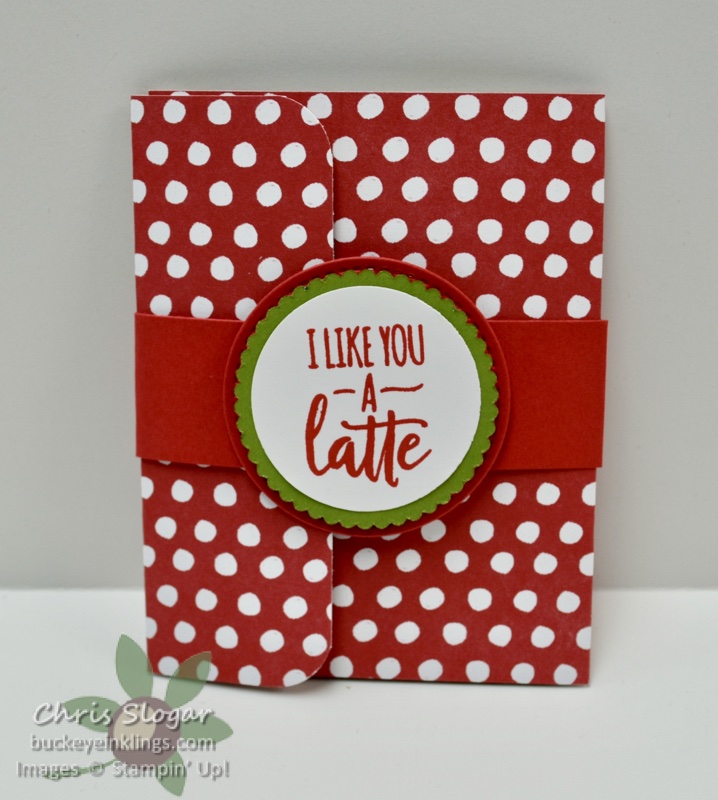
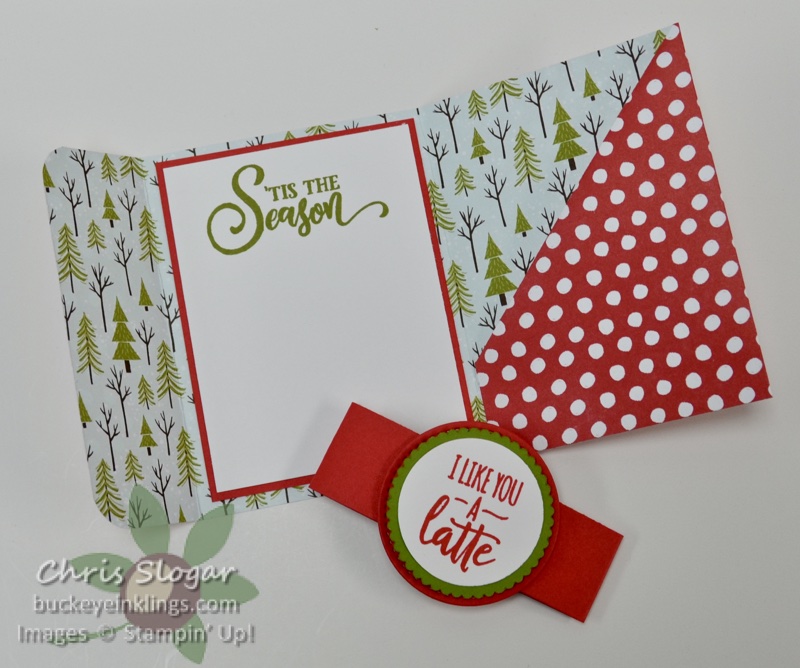
This is probably my all-time favorite gift card holder – you have seen it before, but here is a little reminder 🙂

Dimensions are as follows:

  • Designer Paper 4″ x 10 1/2″, scored at 3″, 6″, 9 1/8″
  • Poppy Parade 2 7/8″ x 3 3/4″ and 1″ x 7″
  • Whisper White 2 3/4″ x 3 5/8″

This one is a simple pocket created with our precut and scored note cards. I CASEd this one from Marisa Alvarez of Kitchen Table Stamper – love the simplicity and the premade components!

Simply cut off 1 3/4″ of the front of the note card, and add designer paper (1 5/8″ x 4 7/8″ and 3 3/8″ x 4 7/8″). I used the Tasteful Labels dies for my focal point with stamps from “Press On”.

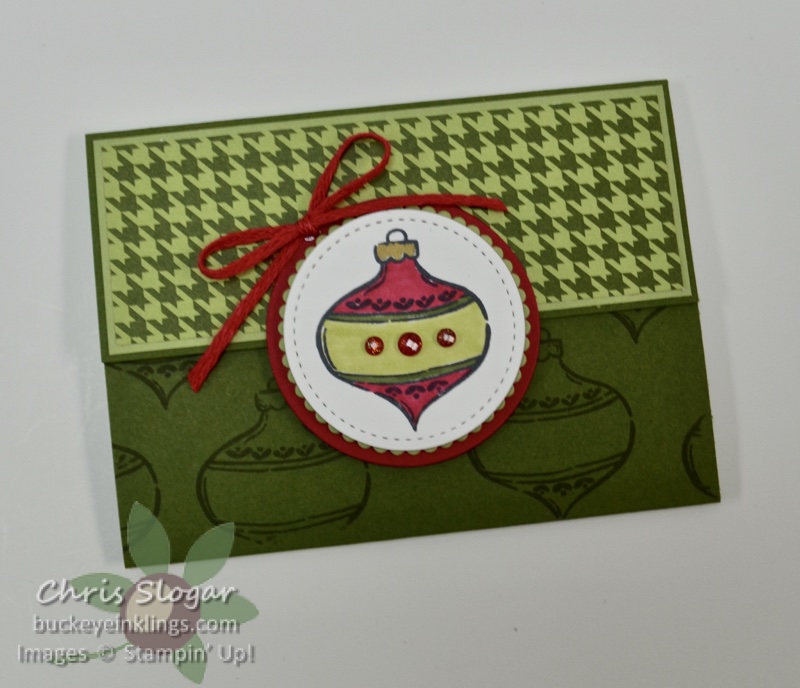
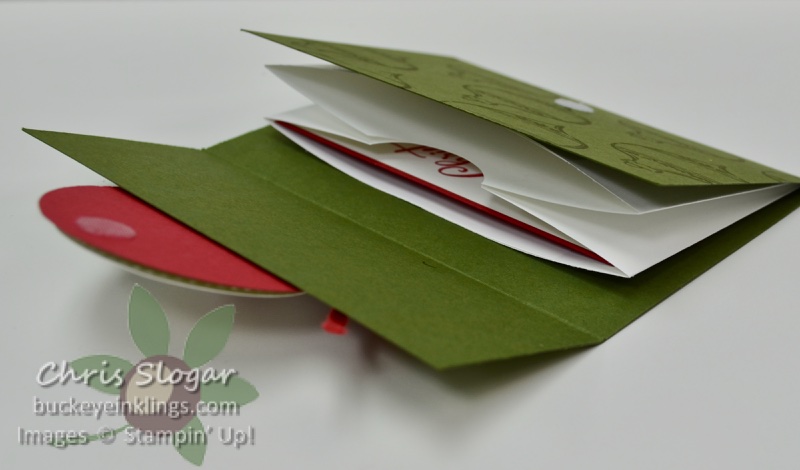
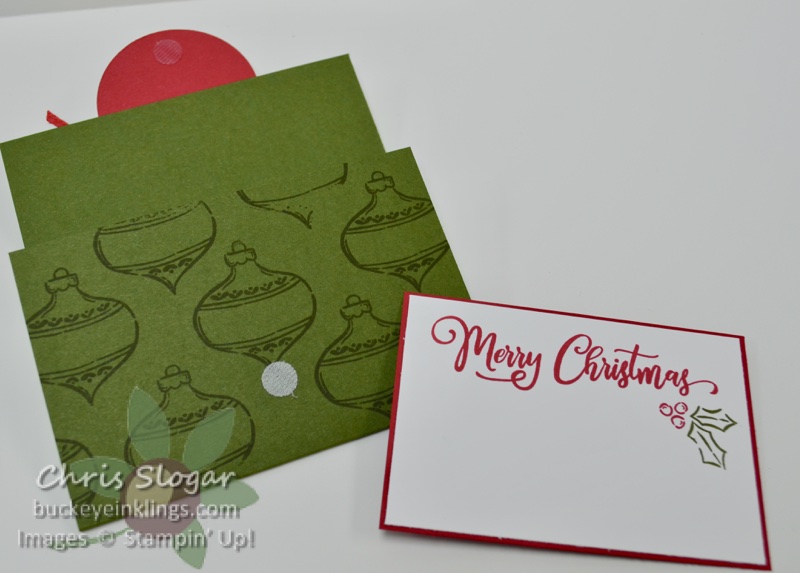
And finally, a remake of a gift card holder I haven’t made since my early days as a demonstrator (will post the original version below). This one opens to reveal two accordion pockets…

The pockets are the two halves of a Medium Envelope.

I have included a note card in one of the pockets. The other pocket is perfect for a gift card or another small, flat gift. Dimensions are as follows:

  • Medium Envelope – cut in half at 2 7/8″
  • Mossy Meadow 4 3/4″ x 8 1/2″, scored at 1 7/8″, 5 3/8″
  • Poppy Parade 2 3/4″ x 4″
  • Whisper White 2 5/8″ x 3 7/8″
  • Pear Pizzazz 1 3/4″ x 4 5/8″
  • Designer Paper 1 5/8″ x 4 1/2″

Here’s the Throwback Thursday version…

Does anyone remember these colors and papers?

Thanks for checking out my projects. This post is meant as a supplement to last night’s Facebook Live. Click here for the video, and please join the Buckeye Inklings Stampers Group on facebook to get notifications of all of my live videos.

I need your help to continue to bring you new ideas – if you need any supplies, please shop in my online store or use the carousel below to be directed to a specific product used today.

Use Host Code EGWEG7FW with a $35 order in August, and I will send you a package of Snowflake Adhesive-Backed Embellishments and a handmade card. This is my way of sharing the Stampin’ Rewards with you. I appreciate your orders!

Chris_buckeye_signature_rose_final

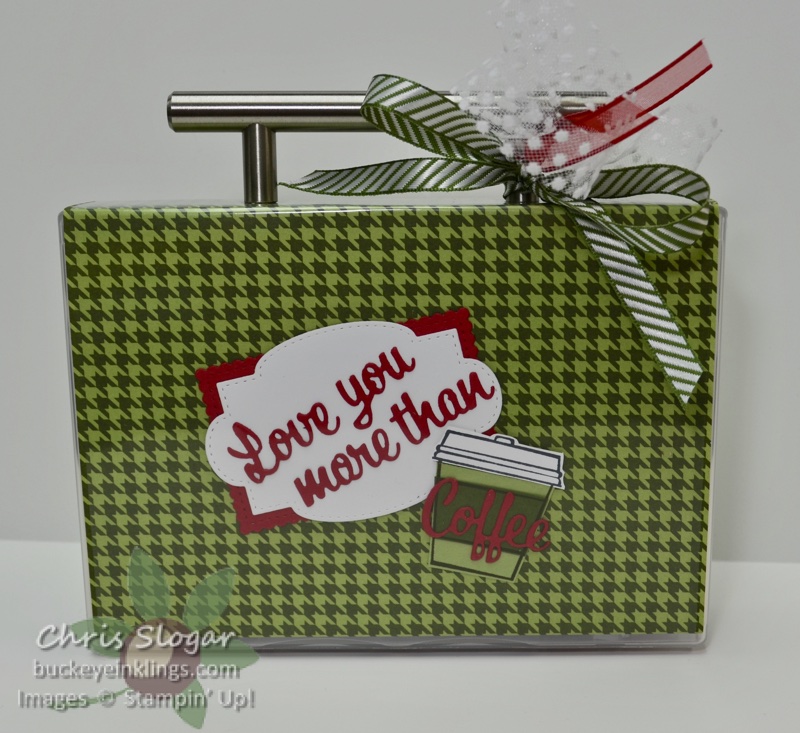
Mini Paper Pumpkin Gift Box

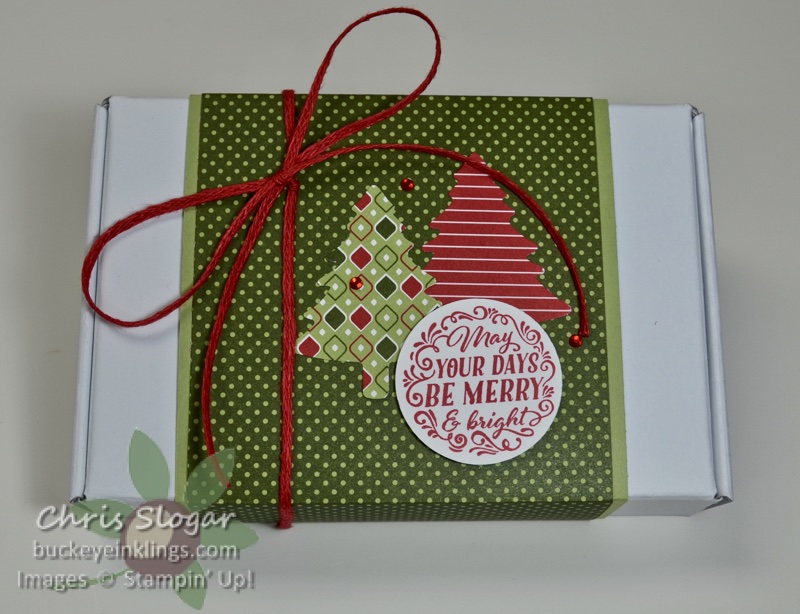
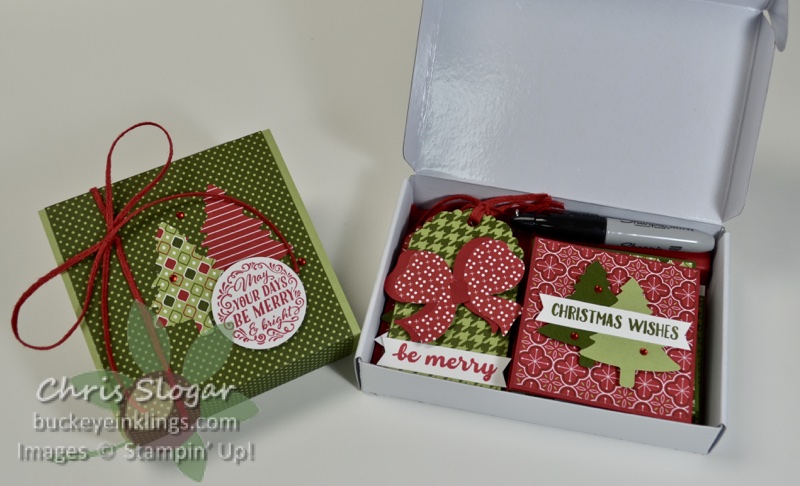
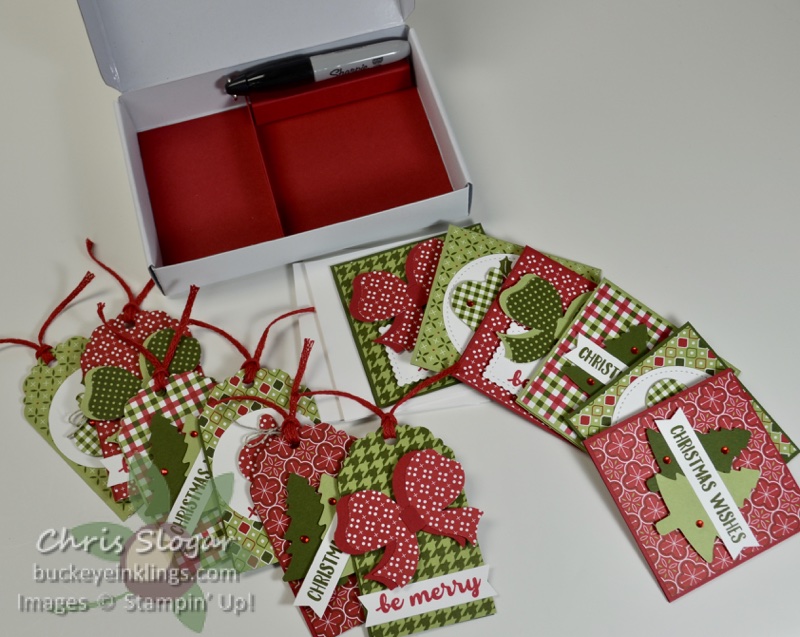
I showed this gift box last night on Facebook Live. It contains a gift of mini cards and tags.

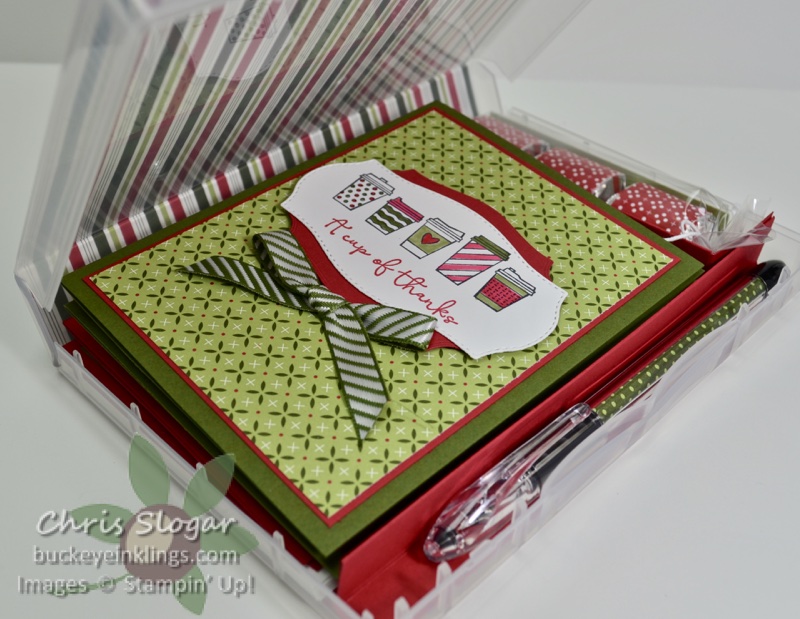
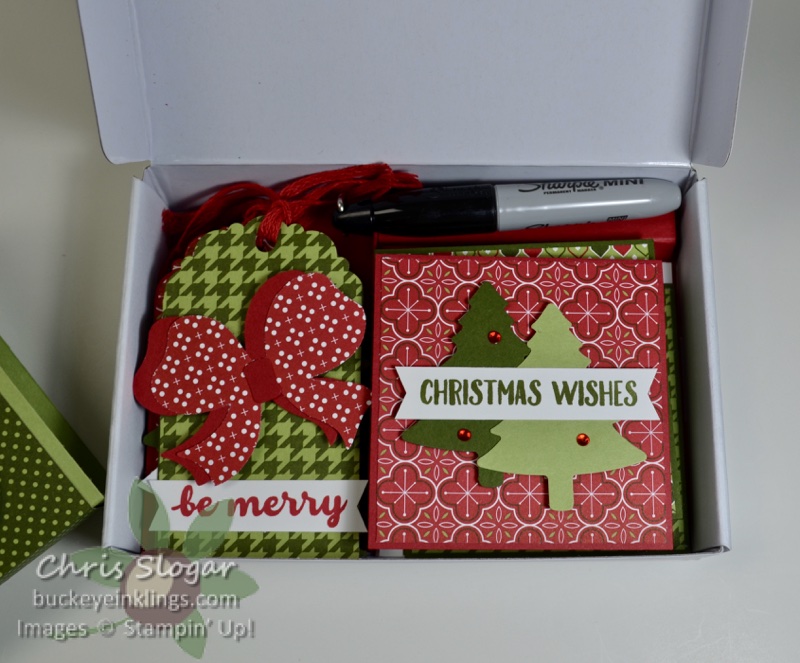
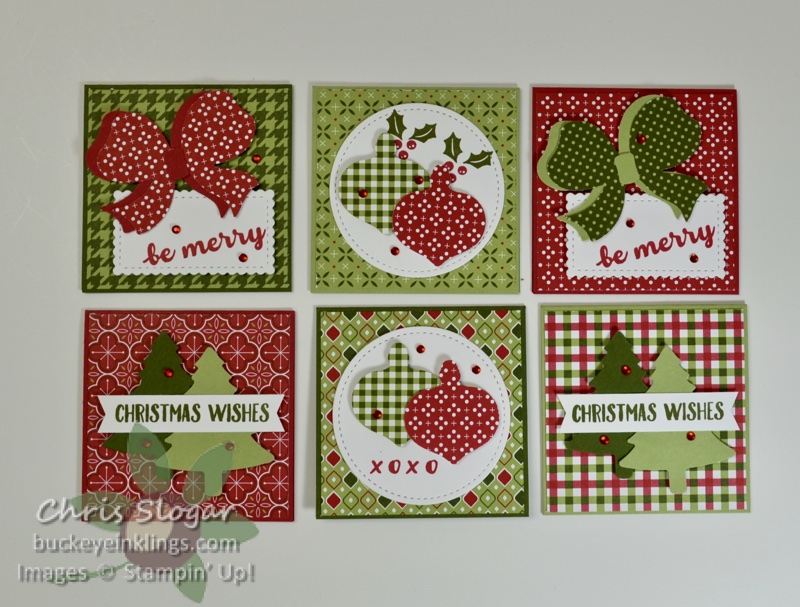
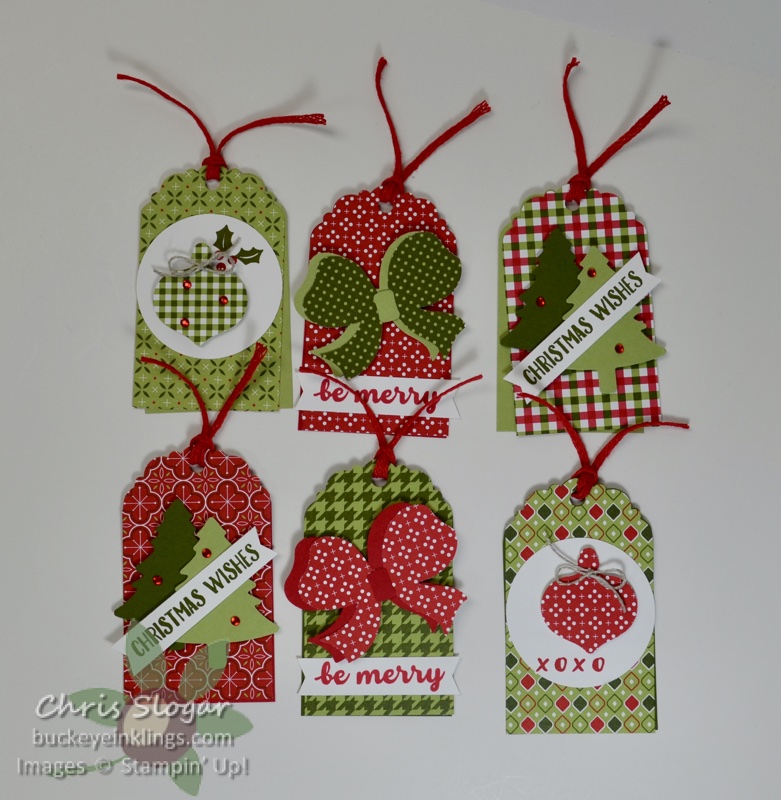
There are six tags, six mini cards, and a mini Sharpie packaged neatly inside.

I made a divider and a prop for the Sharpie with Real Red cardstock. Dimensions are as follows…

  • Divider 3 5/8″ x 6 3/4″, scored at 2 1/4″, 2 7/8″ and 3 1/2″
  • Prop for Sharpie 3 1/8″ x 2 3/8″, scored at 1/2″, 1″, 1 1/2″ and 2″

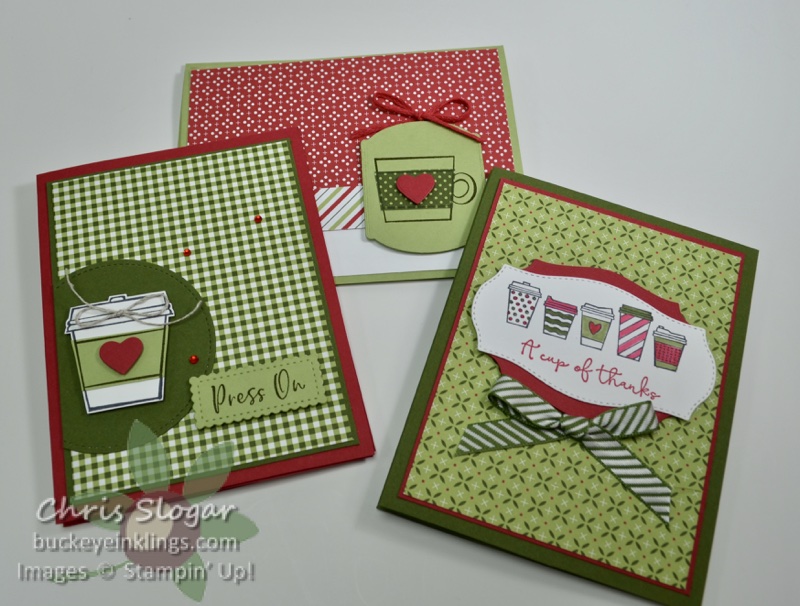
My mini cards are 2 7/8″ square. The cardstock bases measure 2 7/8″ x 5 3/4″, scored at 2 7/8″. Our 3″ x 3″ envelopes are meant for 3″ square cards, but I prefer to cut down the size to make it easier to fit layered cards.

I used a cardstock layer and a designer paper on each of my tags. Each measured 2″ x 3 1/2″ before punching with the Delightful Tag Topper punch.

Thanks for checking out my project. This post is meant as a supplement to last night’s Facebook Live. Click here for the video, and please join the Buckeye Inklings Stampers Group on facebook to get notifications of all of my live videos.

I need your help to continue to bring you new ideas – if you need any supplies, please shop in my online store or use the carousel below to be directed to a specific product used today.

Use Host Code EGWEG7FW with a $35 order in August, and I will send you a package of Snowflake Adhesive-Backed Embellishments and a handmade card. This is my way of sharing the Stampin’ Rewards with you. I appreciate your orders!

Chris_buckeye_signature_rose_final

Holiday Fun Fold

Welcome to the Trip Achievers Blog Hop for August! You may just be starting the blog hop here at my blog (Chris Slogar) or may have come from the person previous to me in the list. If you get off track at any time, the full lineup below will help you move along through all of the projects.

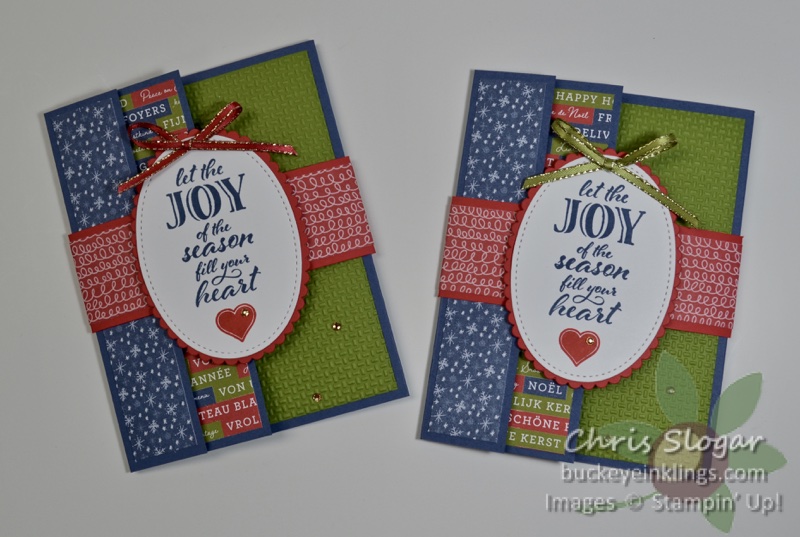
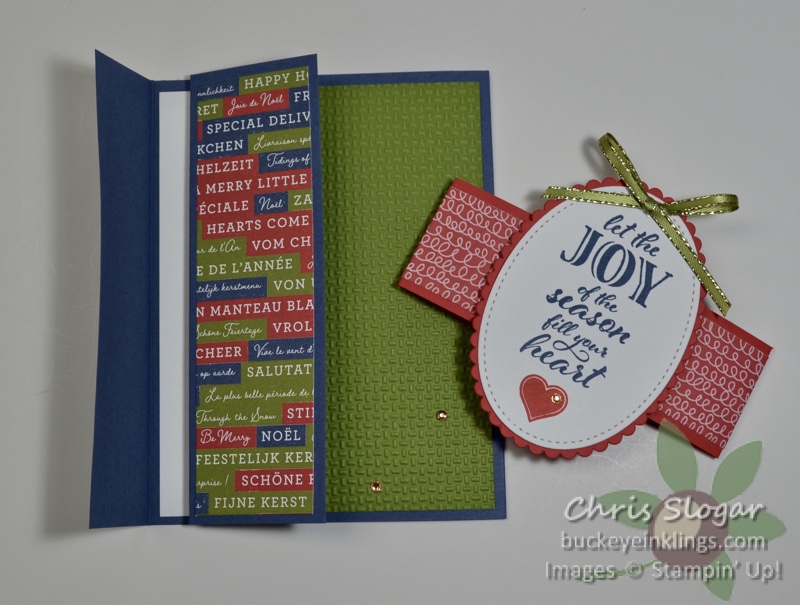
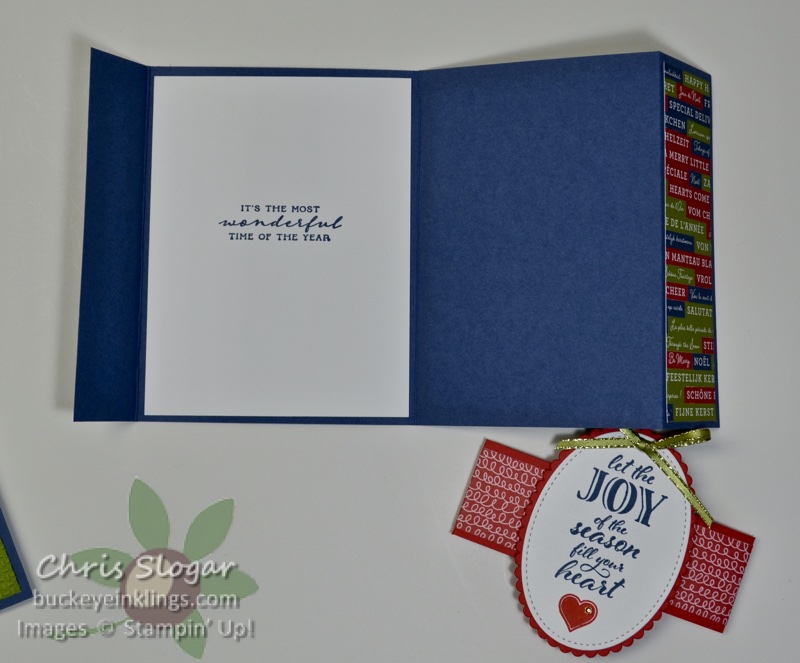
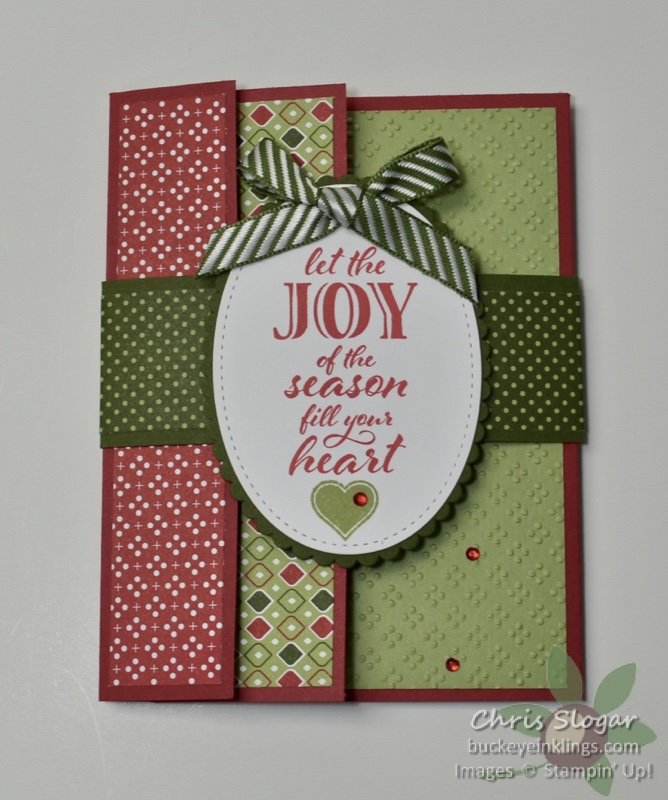
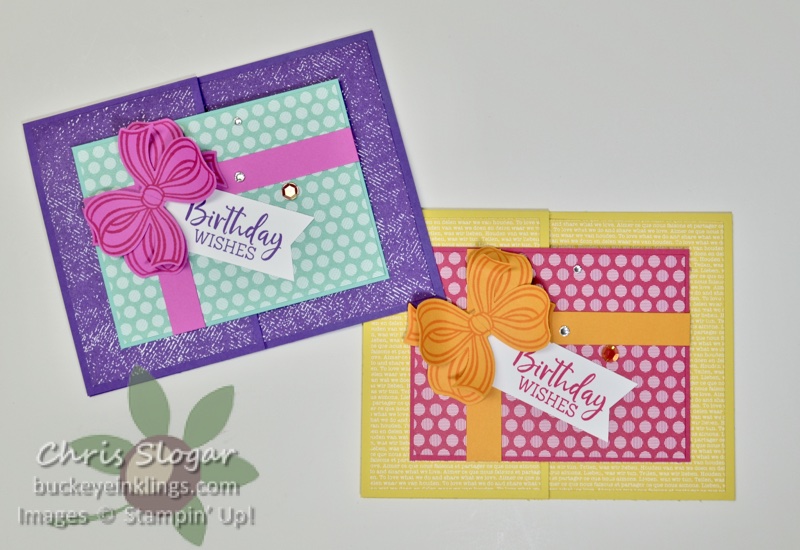
I have a fun fold to share today. My upline Mindy Gray showed us how to make this fold in a recent team meeting. It is a fantastic card to make with our coordinating designer papers – I have two examples made with holiday papers.

The first uses Trimming the Town designer series paper.

The greetings are from “Wrapped in Christmas”.

The second example uses Heartwarming Hugs designer paper. You can see full instructions in the video below. If you are receiving this post in an email, click here for the video.

Thanks so much for checking out my card today! Please use the list below to visit all of the other participants’ sites.

Chris_buckeye_signature_rose_final

Stamparatus Projects

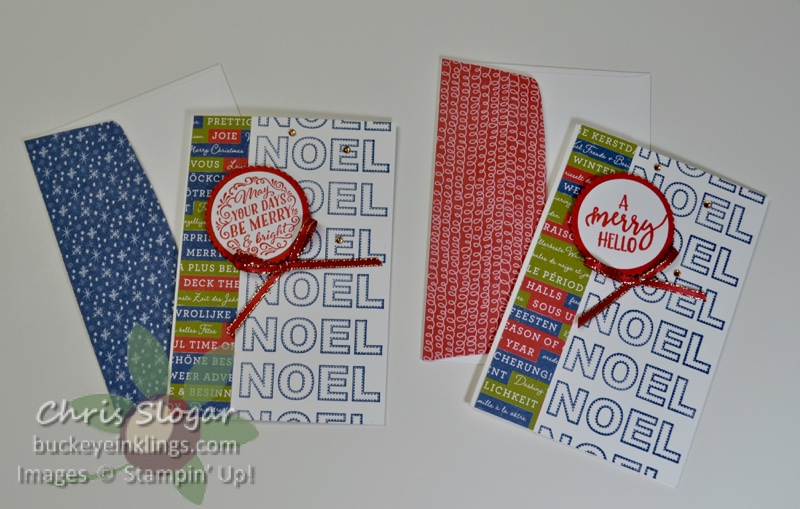
Last night on Facebook Live, I used the Stamparatus for my three card projects. Each has a feature that is made easier with the stamp positioning tool…

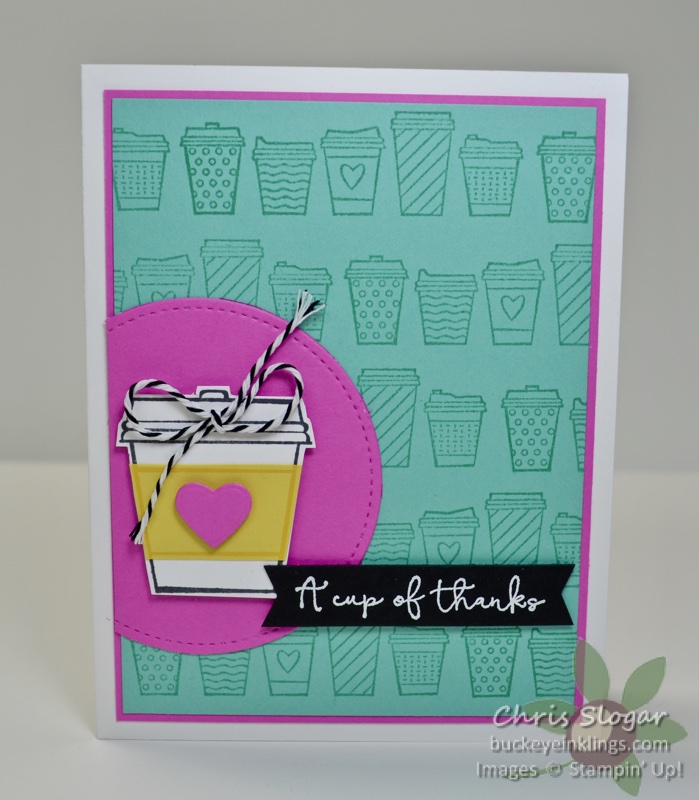
The first project uses “Press On”, a fun new coffee-themed stamp set from the Mini Catalog. I used the stamp that has five cups in a line for my background, moving the Coastal Cabana cardstock for each impression and using grid paper as a guide. Please check out the video here for more details on this method.

I also used the Stamparatus to repeat this greeting from “Wrapped in Christmas”. Again, I moved the Whisper White note card using the markings on the grid paper as a guide. The hinge step would have created a larger spacing than I wanted – each NOEL here is only 3/4″ apart.

These are super-easy cards made on our precut and scored Whisper White note cards. I simply added a 1″ strip of Trimming the Town designer paper and a greeting.

Note that the card on the right uses a greeting from “A Merry Hello”. This is the Host set that is available from the Mini Catalog, and it can be purchased with only $10 in Stampin’ Rewards (earned when you have an order over $150). If you don’t have an order this large on your own, you can get a couple of friends together to group orders to get to this level. Please contact me at stampyourworld@gmail.com, and I will then call you to set this up. Each person ordering can receive their items at their own address, and one person will get the rewards.

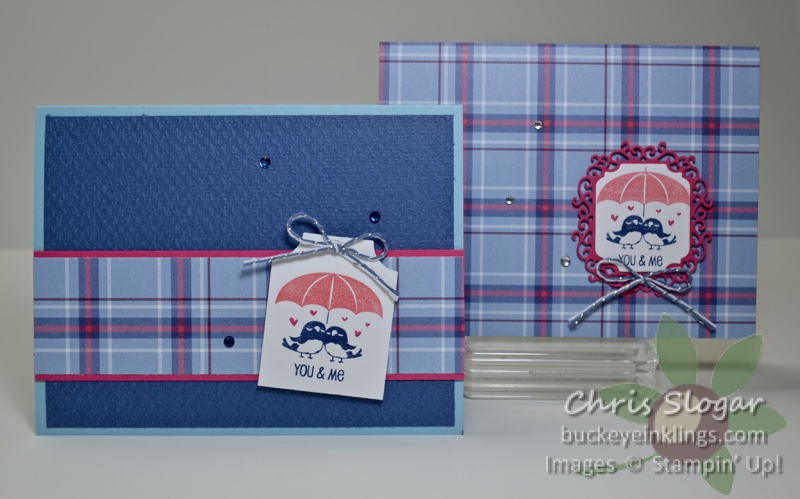
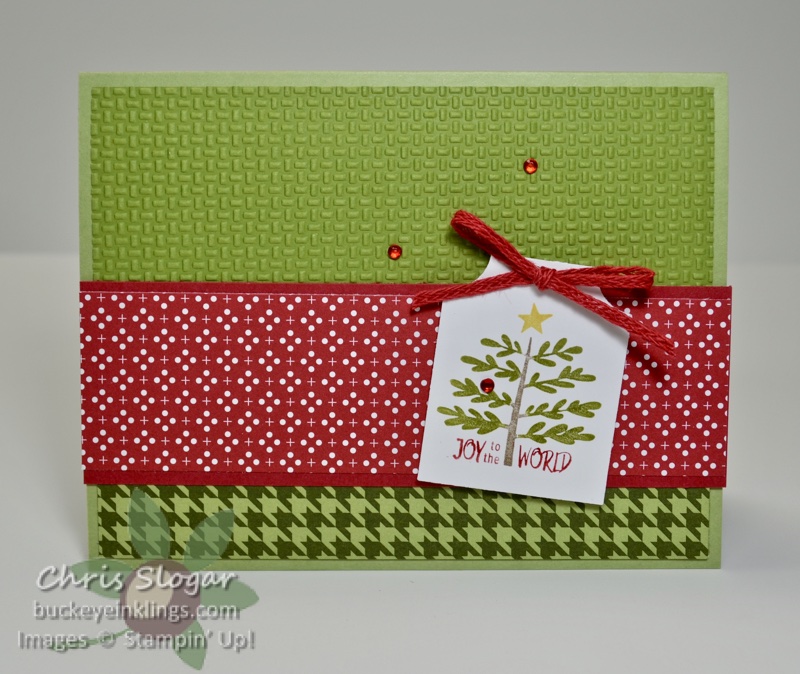
Finally I used my Stamparatus to get really great multi-color images from the stamps in “Everything Essential”. Since the Stamparatus allows you to stamp an image repeatedy in the exact same location, you can easily get the color and coverage you want from stamps inked with markers.

The designer paper here is from Plaid Tidings, and the embossing folder is Tasteful Textile.

**Reminder — you need to use Stampin’ Write markers to add ink to stamps – NOT Stampin’ Blends!

This version uses the same layout with the Heartwarming Hugs designer paper and Wrapped in Texture embossing folder.

This post is meant as a supplement to the demonstration in last night’s Facebook Live. Please check out the video for more details – and please join the Buckeye Inklings Stampers Group on facebook to get notice of all of my live videos. I appreciate your support!

I need your help to continue to bring you new ideas – if you need any supplies, please shop in my online store or use the carousel below to be directed to a specific product used today.

Use Host Code EGWEG7FW with a $35 order in August, and I will send you a package of Snowflake Adhesive-Backed Embellishments and a handmade card. This is my way of sharing the Stampin’ Rewards with you. I appreciate your orders!

The Carousel is huge today – and this often happens with my Facebook Live posts. I like to jump around to give you different ideas, with the idea that you will make the projects in your preferred suites. Of course, if you have a big wish list, pass the ideas on to your loved ones for birthday and holiday gift ideas – especially for the big ticket items, like the Stamparatus, or the marker collections. There is now a Wish List feature in the online store 🙂


Chris_buckeye_signature_rose_final

Love of Leaves

Today I have a few fall projects to share from last night’s Facebook Live…

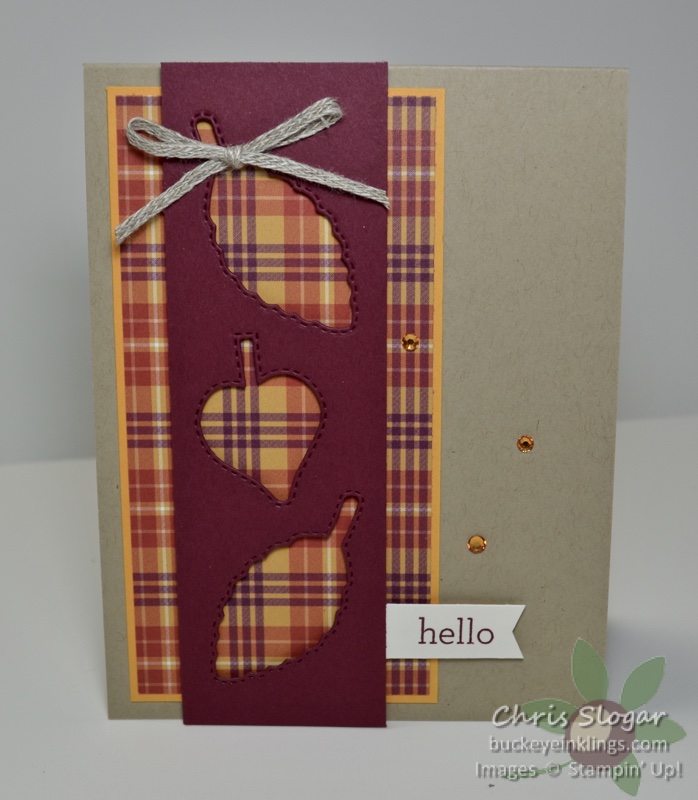
My favorite thing about the Stitched Leaves Dies is the stitching around the outside of the leaf shapes. Using the negative of a cut shape is always a great change of pace – and what a great way to highlight a beautiful paper like this plaid from the Plaid Tidings collection!

Dimensions are as follows:

  • Designer Paper 2 1/2″ x 5″
  • Mango Melody 2 5/8″ x 5 1/8″
  • Merry Merlot 1 3/4″ x 5 1/2″
  • Crumb Cake 4 1/4″ x 11″, scored at 5 1/2″

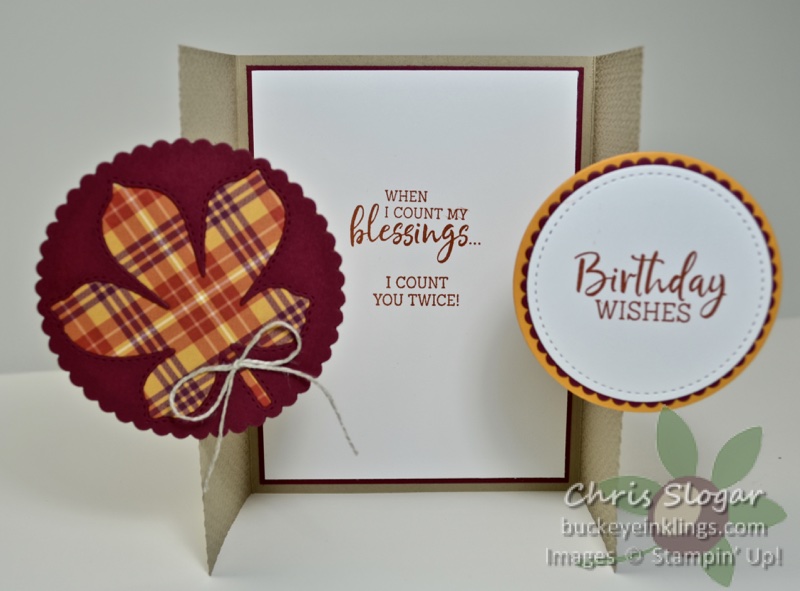
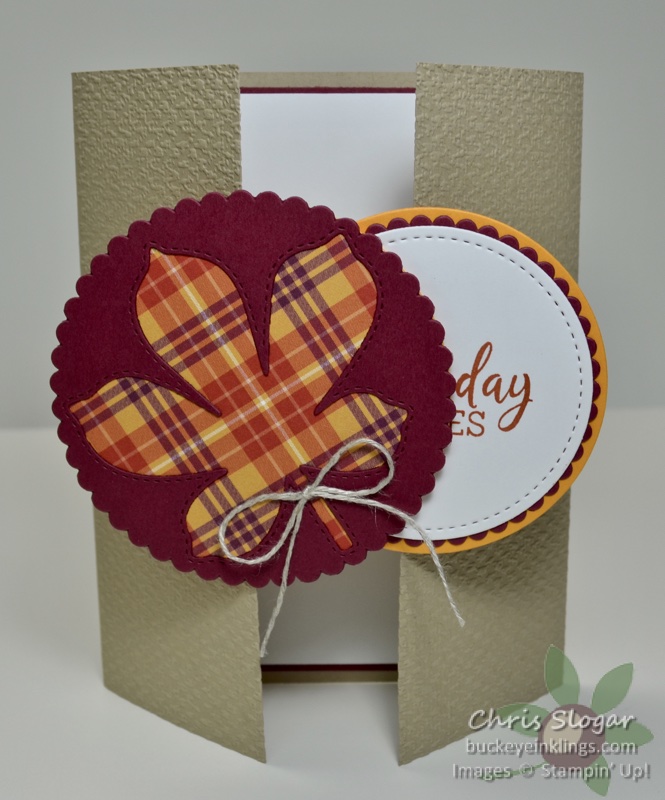
I used this same color scheme for this fun fold – a Gate Fold Surprise (layout CASEd from Jennifer McGuire).

The surprise is the second focal point panel that swings out from behind the main image.

Dimensions are as follows:

  • Crumb Cake 5 1/2″ x 8 1/2″, scored at 2 1/8″ and 6 3/8″
  • Merry Merlot 4″ x 5 1/4″
  • Whisper White 3 7/8″ x 5 1/8″
  • Designer Paper (2) 1″ x 2 1/8″
  • Crumb Cake Hinges (2) 1 1/2″ x 1/2″, scored at 1/4″
  • Merry Merlot, Mango Melody, Designer Paper and Whisper White for circles

This post is meant to supplement the full instructions presented in last night’s Live. Click here for the video, and please join the Buckeye Inklings Stampers Group on Facebook to get notification of all of my live videos.

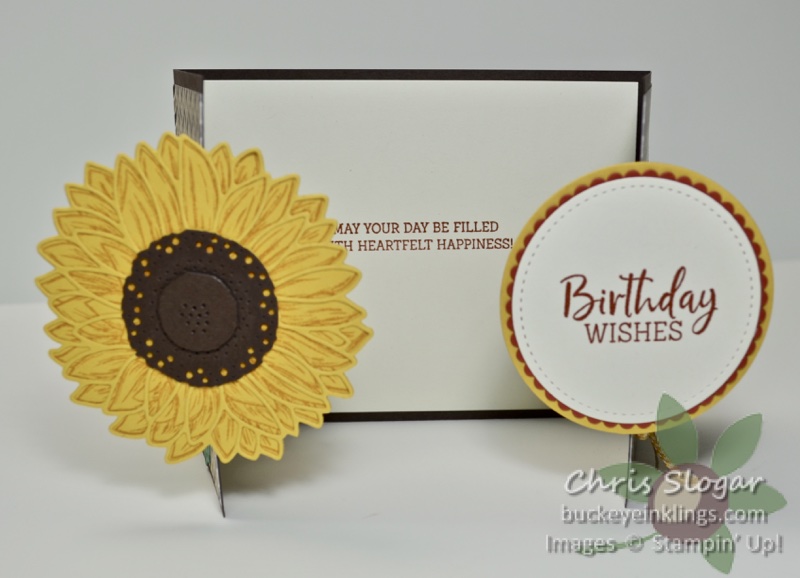
I also showed this similar card, done in the opposite orientation and made with the beautiful sunflower from “Celebrate Sunflowers”.

The lovely birthday greetings on these gate fold cards are from “Fancy Phrases”.

Dimensions are as follows:

  • Early Espresso 4 1/4″ x 11″, scored at 2 3/4″ and 8 1/4″
  • Designer Paper 4″ x 5 1/4″ (cut in half at 2 5/8″)
  • Very Vanilla 4″ x 5 1/4″
  • Early Espresso Hinges (2) 1 1/2″ x 1/2″, scored at 1/4″
  • Bumblebee, Cajun Craze, Very Vanilla and Just Jade as shown for circles and sunflower parts

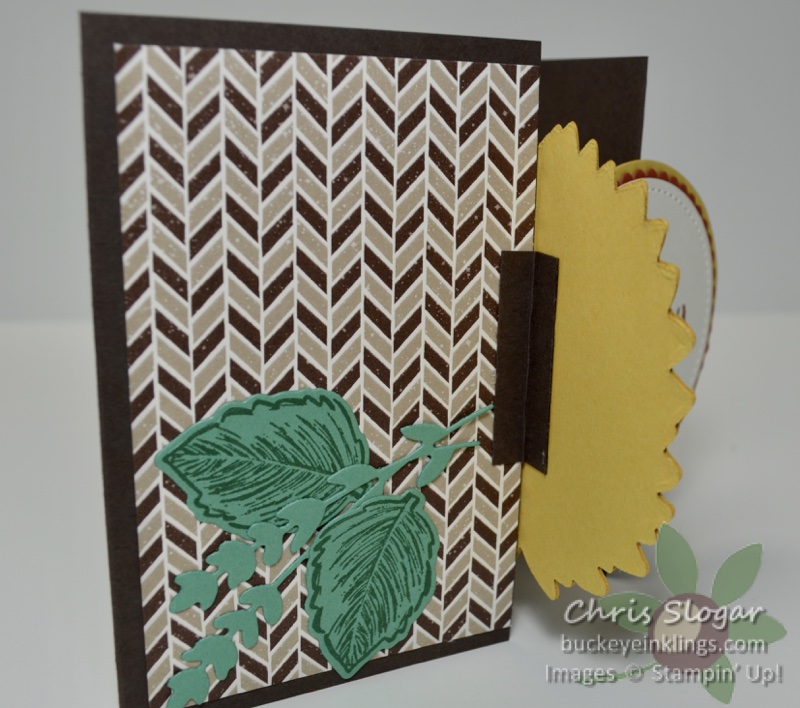
Here’s a look at one of the hinges. Please refer to the Facebook Live for more instructions. The pictures and dimensions here are meant to provide a quick reference.

Thank you so much for checking out my projects! I need your help to continue to bring you new ideas – if you need any supplies, please shop in my online store or use the carousel below to be directed to a specific product used today.

Use Host Code EGWEG7FW with a $35 order in August, and I will send you a package of Snowflake Adhesive-Backed Embellishments and a handmade card. This is my way of sharing the Stampin’ Rewards with you. I appreciate your orders!

Chris_buckeye_signature_rose_final

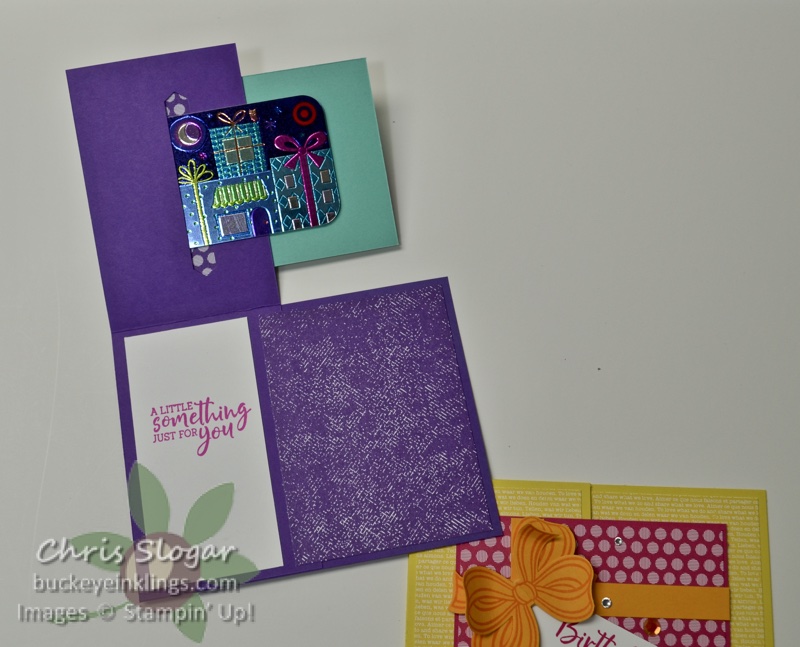
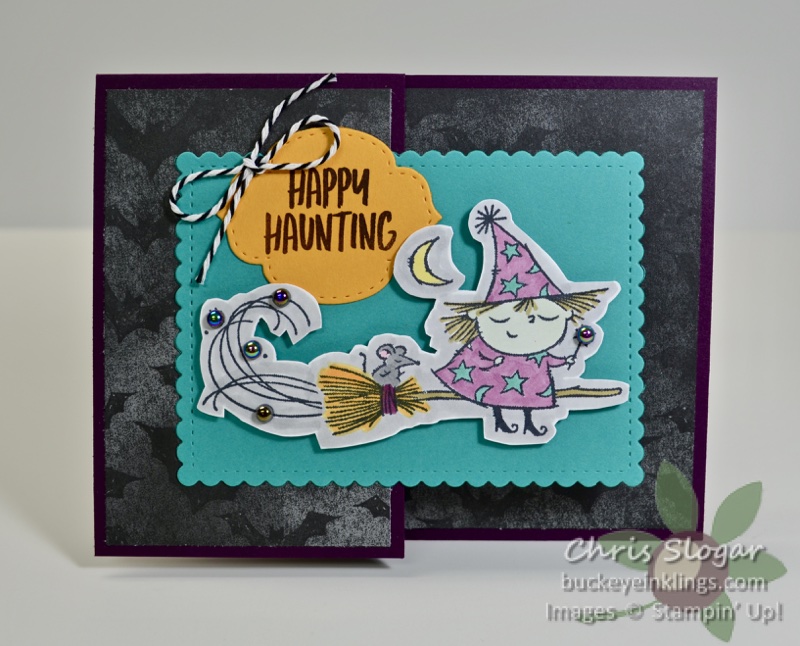
Barn Door Gift Card Holder

Products from the new August-December 2020 Mini Catalog are available now! Today I have a project made three ways using some of these new goodies.

Make sure to check out the updated store too, and please shop with me – I need your support to continue to bring you projects 🙂
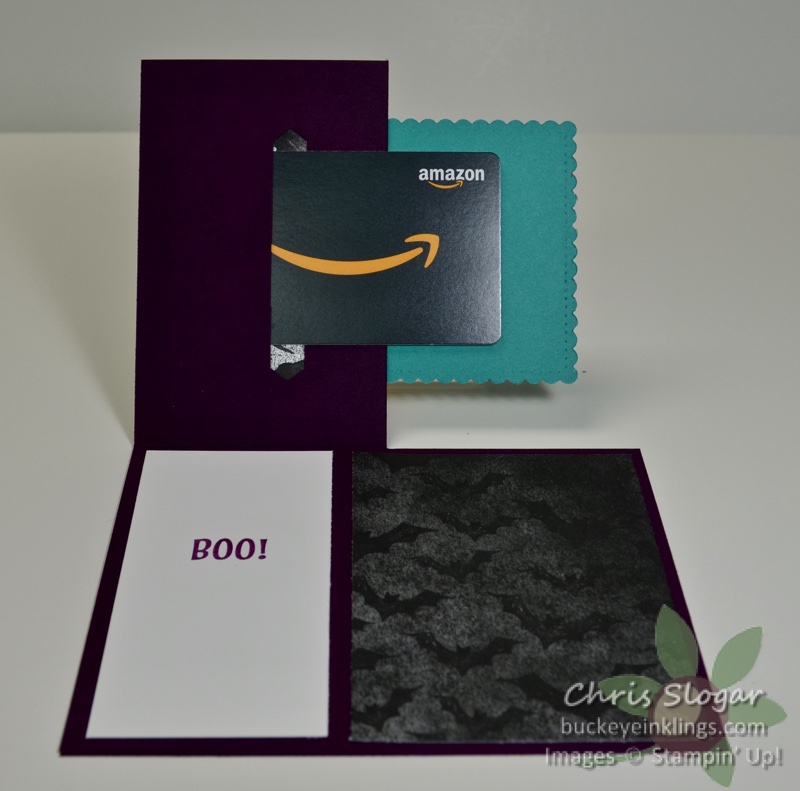
These fun gift card holders are so easy to make! We have made this card type before, but on the inside, I used the Classic Label Punch to add a slot for a gift card.

I have also used a couple of new punches from the August-December 2020 Mini Catalog – the Gift Bow Builder and the Banners Pick a Punch (for the tag). Punches are so handy for quick projects!

Dimensions are as follows:

  • Cardstock for base 4 1/4″ x 5 1/2″ and 2 3/4″ x 8 1/2″, scored at 4 1/4″
  • Designer Paper for base 2 1/2″ x 4″ and 3″ x 4″
  • Whisper White 2″ x 4″
  • Designer Paper (present) 3″ x 4″
  • Cardstock (present) 3 1/8″ x 4 1/8″ and 1/2″ strips for ribbon

The video below gives complete instructions. If you are receiving this post in an email, please click here for the video. Scroll beyond the video to see more examples.

This one is made with a scalloped stitched rectangle and the cute with from “Flight of Fancy”.

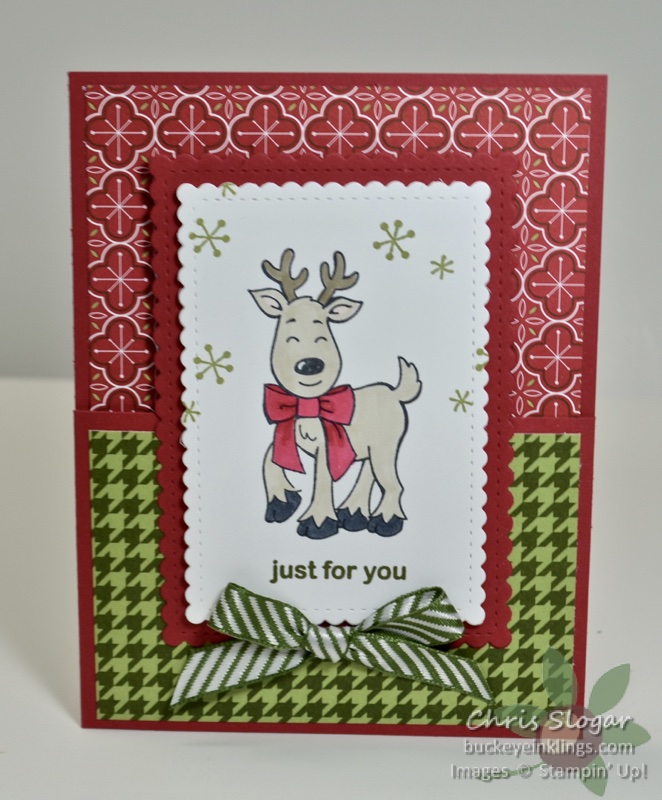
This one is made in the opposite orientation with the reindeer from “Warm & Toasty.

Thanks so much for checking out my projects! If you need any supplies, please click here for the online store, or use the carousel below to be directed to a specific product used today.

Spend $35 or more with Host Code EGWEG7FW in August, and I will send you a package of Snowflake Adhesive-Backed Embellishments and a handmade card. This is my way of sharing the Stampin’ Rewards. (Orders over $150, please take your own Stampin’ Rewards, and you will still receive my gifts.). I appreciate your orders!

Chris_buckeye_signature_rose_final

Love of Leaves

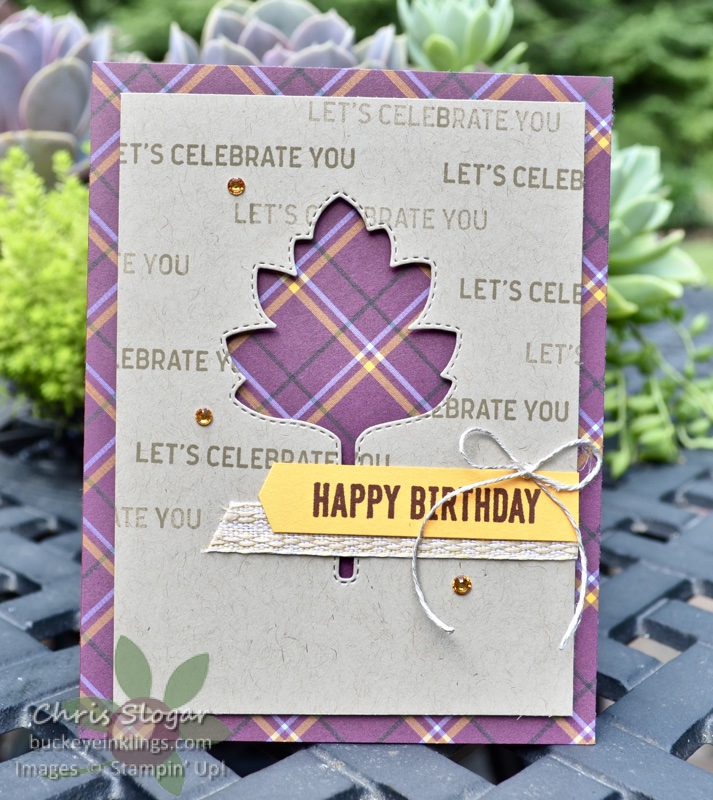
I knew my first card from the Love of Leaves bundle would be a CASE of the card shown on page 49 of the new Mini Catalog. I use more birthday cards than anything else, so I pulled my greetings from “Itty Bitty Birthdays”, and I picked a plaid from the Plaid Tidings designer paper collection.

The paper and the Love of Leaves bundle will be available August 4. Click here for the online store. My gift to you in August is a package of the Snowflake Adhesive-Backed Embellishments from the upcoming catalog. Place an order of $35 or more with Host Code EGWEG7FW, and I will send you this item with a handmade card. I appreciate your orders!

Chris_buckeye_signature_rose_final

Pop-Up Corner Card

This 4″ square card packs a surprise – it opens into a 3D corner shape with a pocket. It is a perfect card for your recipient to stand up and display.

The diagonal pocket can hold a note card, as shown, or a gift card (or both).

Dimensions are as follows, and you can find complete instructions in the YouTube video. If you are receiving this post in an email, please click here for the video.

  • Just Jade 8″ x 8″
  • Magenta Madness (3) 3 3/4″ x 3 3/4″ and (1) 3 1/8″ x 3 1/8″
  • Whisper White (2) 3 5/8″ x 3 5/8″ and (1) 3″ X 3″
  • Designer Paper (1) 3 5/8″ x 3 5/8″

I need your help to continue to bring you projects – please support my efforts in the online store. Use the monthly Host Code for a share of the rewards – in July I will send a package of Artistry Blooms Sequins and a handmade card with a purchase of $35 or more. (Host Code 673AVK7E)

I appreciate your orders!

Chris_buckeye_signature_rose_final

Christmas in July, Continued

Last night’s Facebook Live was another episode of Christmas in July. I made a fun fold card and a gift card holder; and I also showed off the Tag Buffet kit.

The card uses several patterns from the Trimming the Town designer paper collection. Terri Meehan taught us this fun fold in our Team Meeting last week. It has a swing arm on the right, and the card itself folds out to the left.

The greetings are from “Tag Buffet”, and the measurements are as follows…

  • Misty Moonlight 4 7/8″ x 8″, scored at 1/2″, 4″, 7 1/2″
  • Misty Moonlight 5 1/2″ x 4 1/4″ and 4 1/4″ x 2 3/4″
  • Misty Moonlight 1″ x 4″, scored at 1/2″
  • Designer Paper 4″ x 5 1/4″, 4 5/8″ x 3 1/4″, and (2) 2 1/2″ x 4″
  • Whisper White 4 5/8″ x 3 1/4″

Isn’t this a fabulous way to show off designer paper?! Note that this paper and stamp set are part of our upcoming catalog, with products available August 4.

Since I was using the Tag Buffet stamp set, I thought it would be good to show off the kit as well. This kit was a big surprise to me – mainly because of the size of the tags. The kit includes materials to make thirty 3 1/4″ x 4 1/4″ tags. They are large and gorgeous as tags, but they are also perfect to showcase on greeting cards.

You can appreciate the size of these tags when you see one mounted on a 4 1/4″ x 5 1/2″ card. I love the idea of making a set of cards with these tags! How quick and easy would that be?!

And finally, I made this two-pocket gift card holder with the beautiful new Heartwarming Hugs designer paper collection.

The designer paper measures 5 1/4″ x 12″, scored at 4″, 6 3/4″, 9 1/2″, and 11 1/4″. It is accordion-folded and mounted on a 4 1/4″ x 5 1/2″ piece of Real Red cardstock.

The note card pieces measure 3 1/2″ x 4 1/2″ (Pear Pizzazz) and 3 3/8″ x 4 3/8″ (Whisper White). The stamps are from “Warm Hugs”.

Thanks so much for checking out my projects! This post is meant to supplement last night’s Facebook Live. Please click here to see the video, and join the Buckeye Inklings Stampers Group on Facebook to get notice of all of my live videos.

The holiday products I used will be available on August 4. If you can support my efforts by making a purchase, I would greatly appreciate it! Click here to shop. Use the monthly Host Code for a share of the rewards – in July I will send a package of Artistry Blooms Sequins and a handmade card with a purchase of $35 or more. (Host Code 673AVK7E)

If you don’t want to wait until August 4 for these new products, why not join as a Demo? You can choose these items as part of your Starter Kit. The Starter Kit is a deal – you get to choose $125 in product for $99 + tax (shipping is included). You are not obligated to purchase anything beyond the Starter Kit, but future purchases are discounted at least 20%. Please don’t hesitate to contact me at stampyourworld@gmail.com if you have any questions – we can set up a call to discuss it.

Chris_buckeye_signature_rose_final
WordPress theme: Kippis 1.15