Flowering Foils Specialty Designer Paper

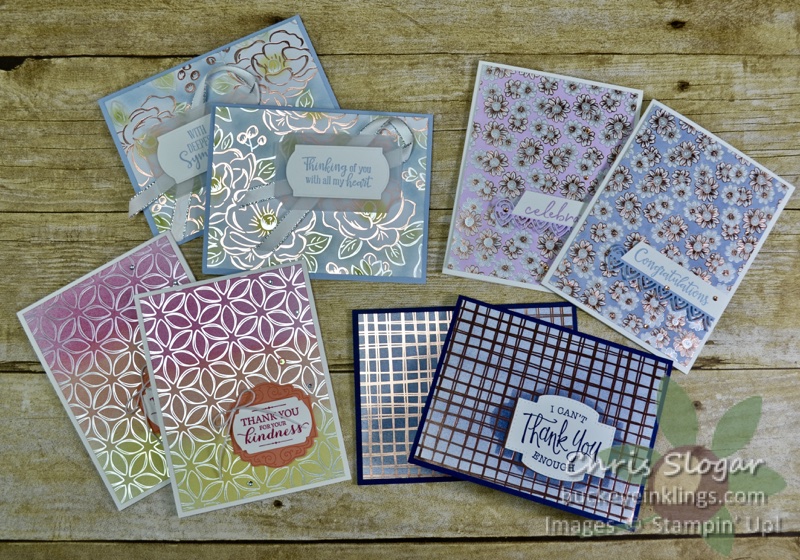
You can choose to receive Flowering Foils Specialty Designer Series Paper for free with a $50 this month (while supplies last). The beautiful designs are foil-embossed in rose gold and silver, and they can be colored.

Last night on Facebook Live, I showed a few methods of coloring these papers. Flowering Foils lend themselves to projects that look fancy and special, without a lot of work! They are also a bit difficult to photograph, but I did my best…

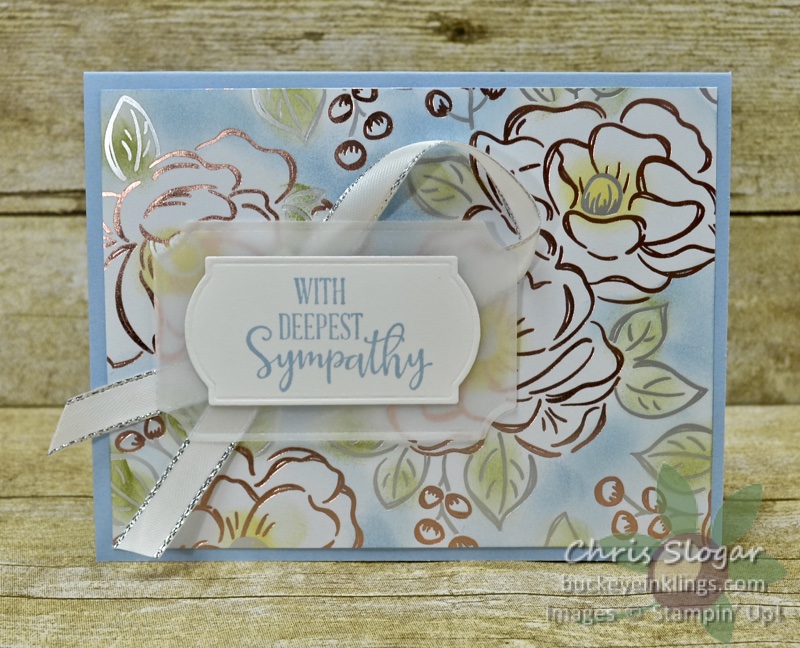
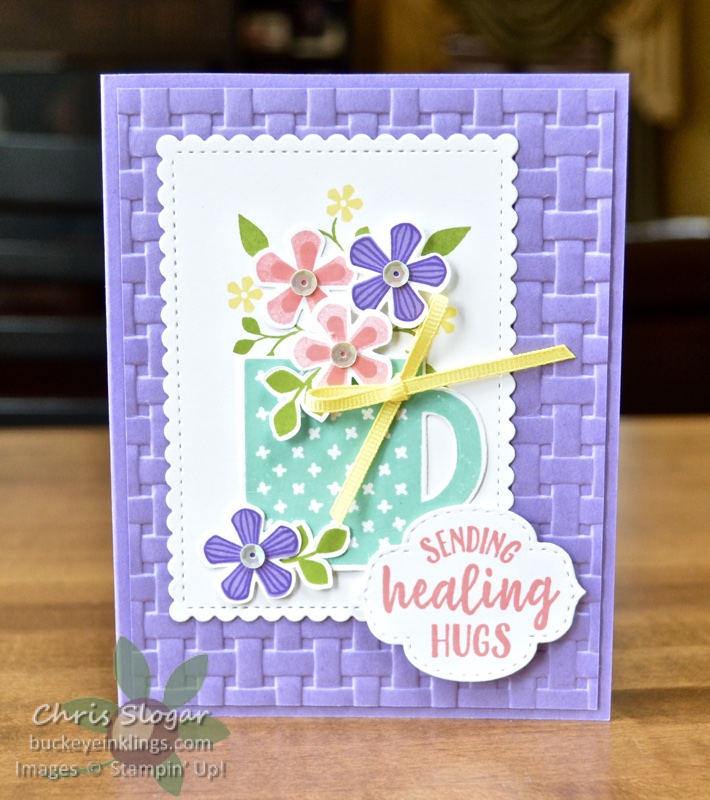
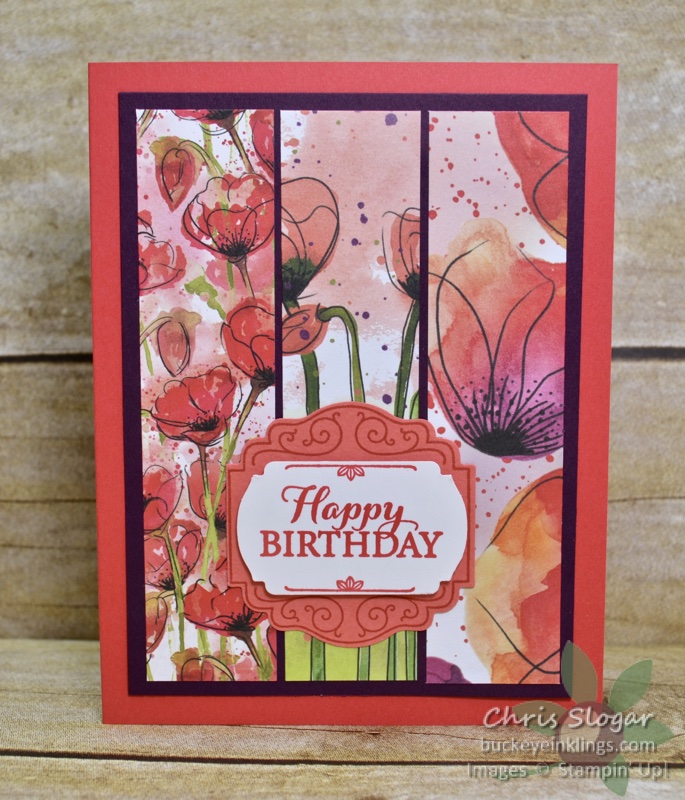
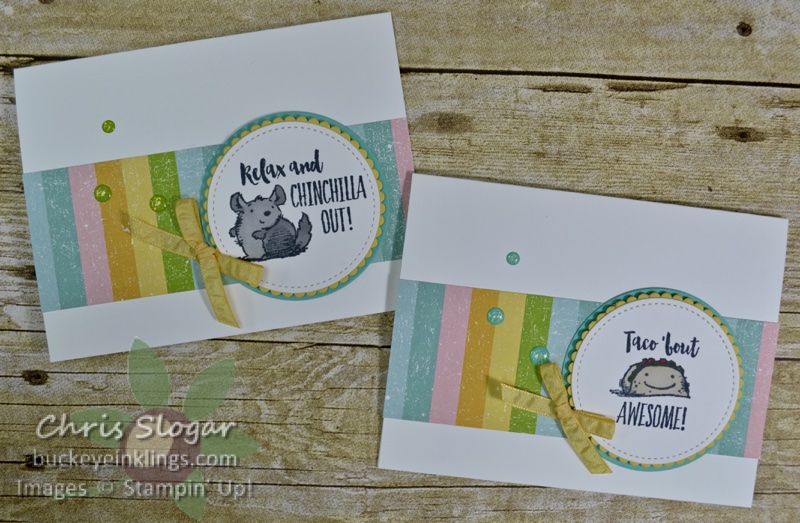
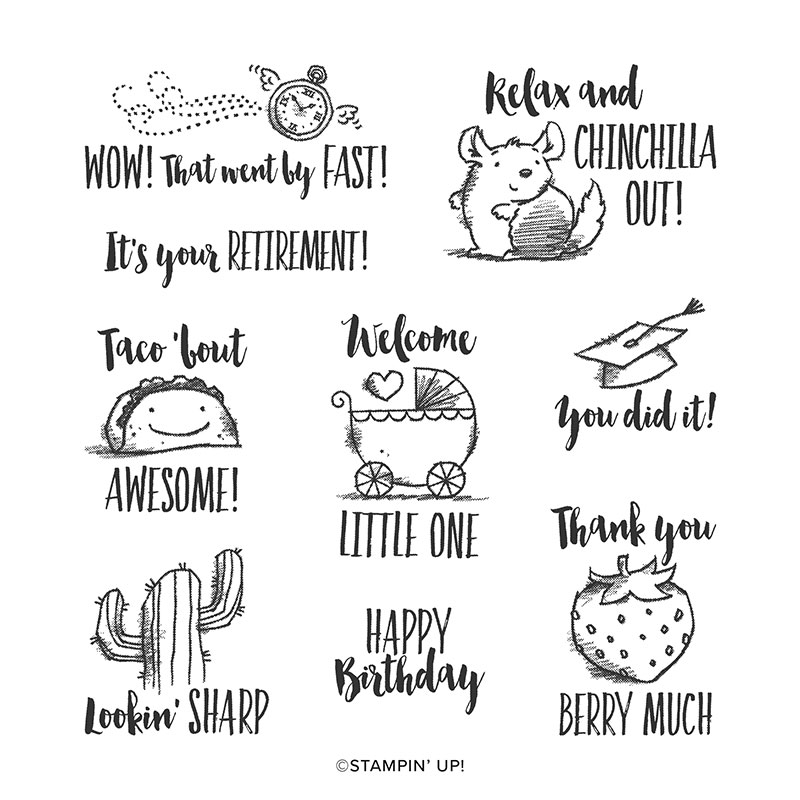
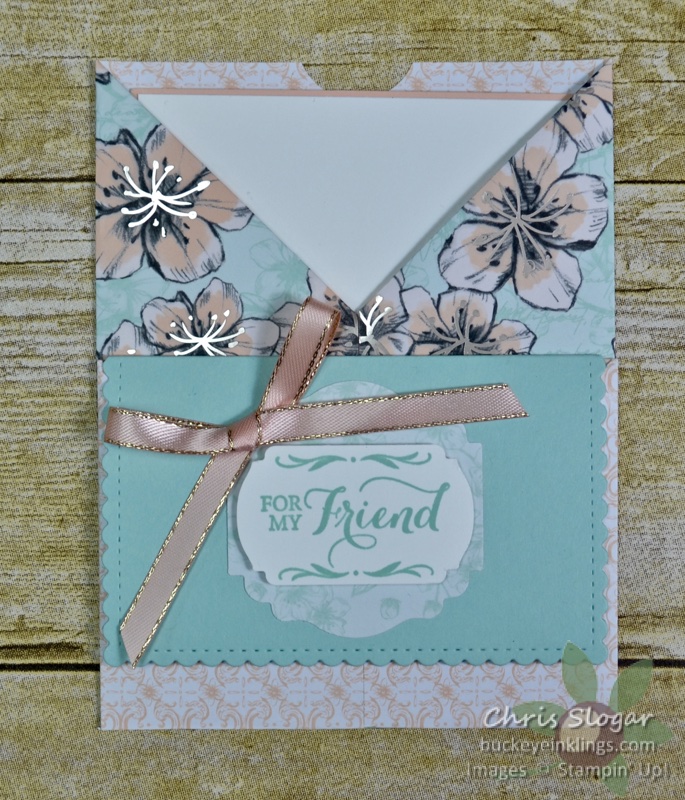
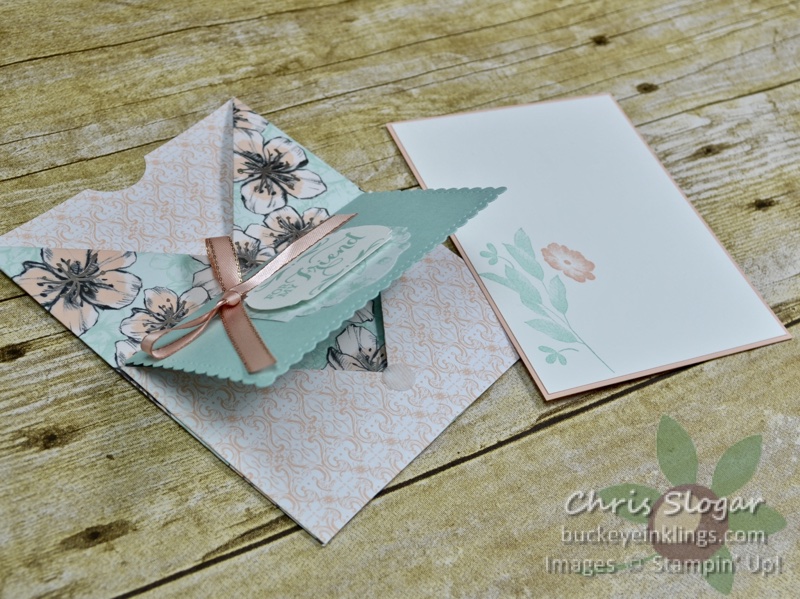
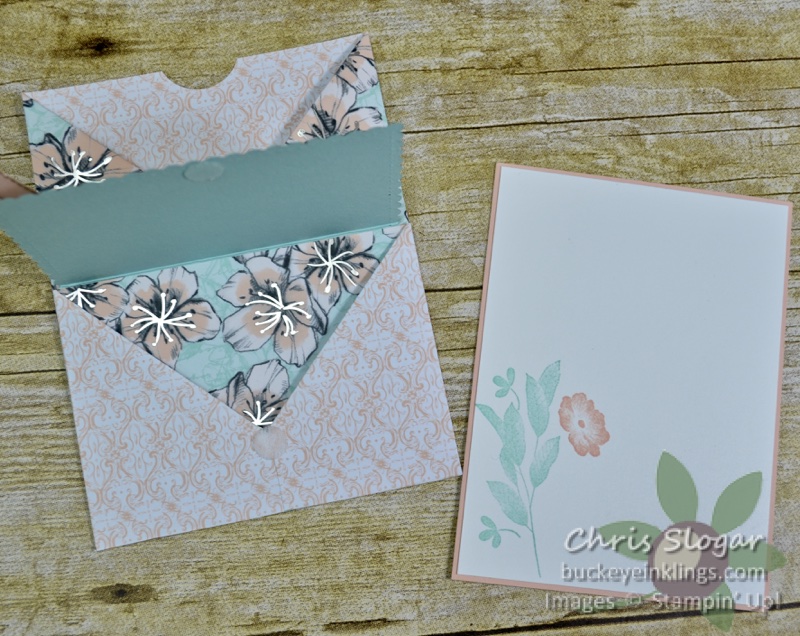
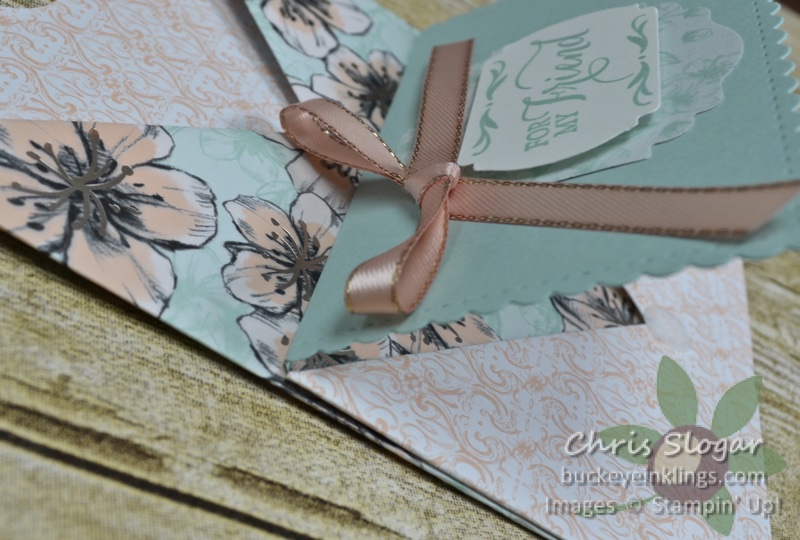
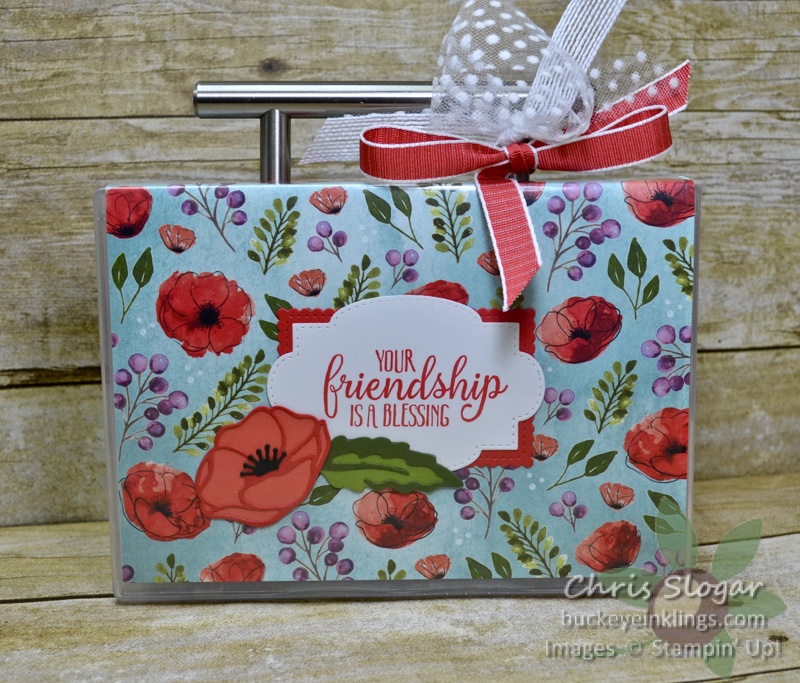
I touched color onto the paper used on these cards with sponge daubers. You cannot “color in the lines” with sponge daubers, but you can get a beautiful effect that is quick and carefree. The greetings are from “Peaceful Moments”.

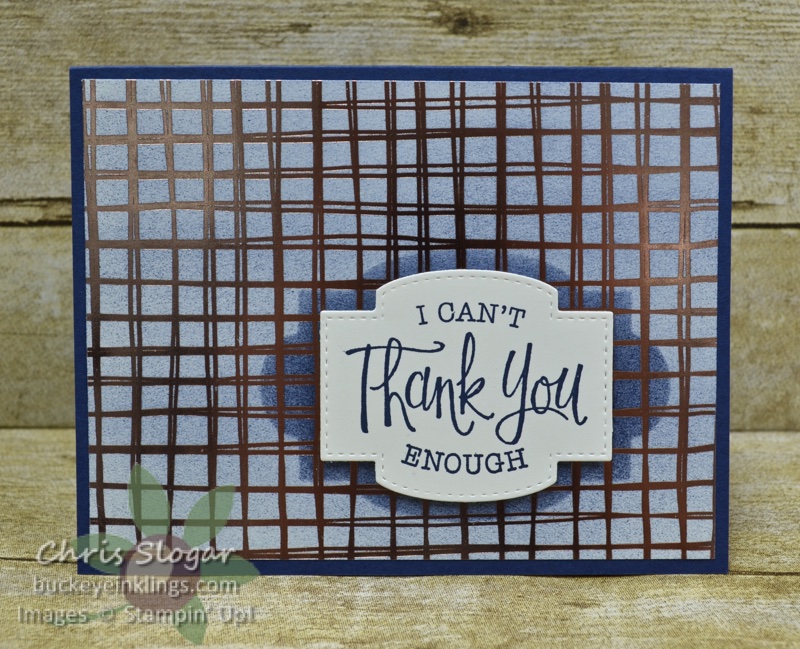
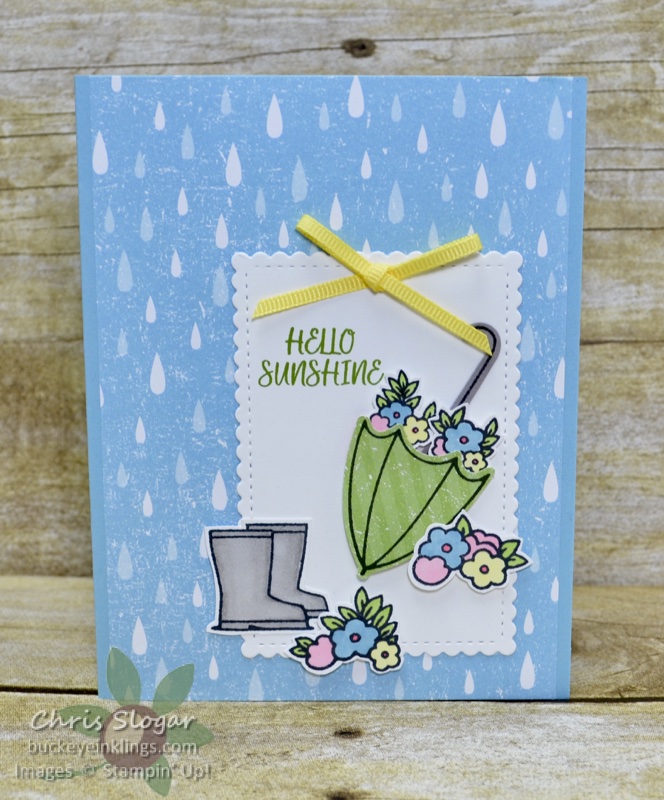
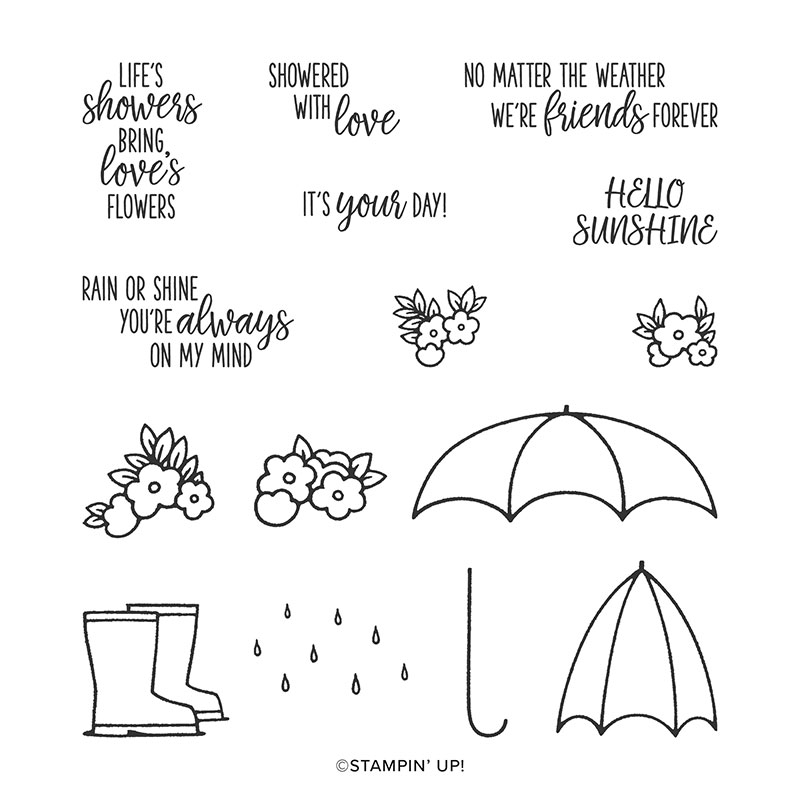
I used a sponge brayer with Night of Navy ink to color this background. The greeting is from “So Sentimental”.

I used the negative of one of the Stitched So Sweetly die cuts as a stencil, allowing me to make the darker shape behind the greeting. I used the sponge brayer on this shape first, and then I added color to the entire piece of designer paper.

This card reminds me… I advise you to have a paper towel or tissue handy when working with the foils. The foil designs resist ink, and ink can collect on the foil. You will want to wipe over the pattern to remove excess ink and reveal the shine of the foil. In the absence of a paper towel, I used my navy blue sweater sleeve in the video, but I do not recommend this 🙂

The designer paper on this card is also colored with sponge brayers – in Pineapple Punch, Grapefruit Grove, and Lovely Lipstick. The greeting is from “Layered with Kindness”.

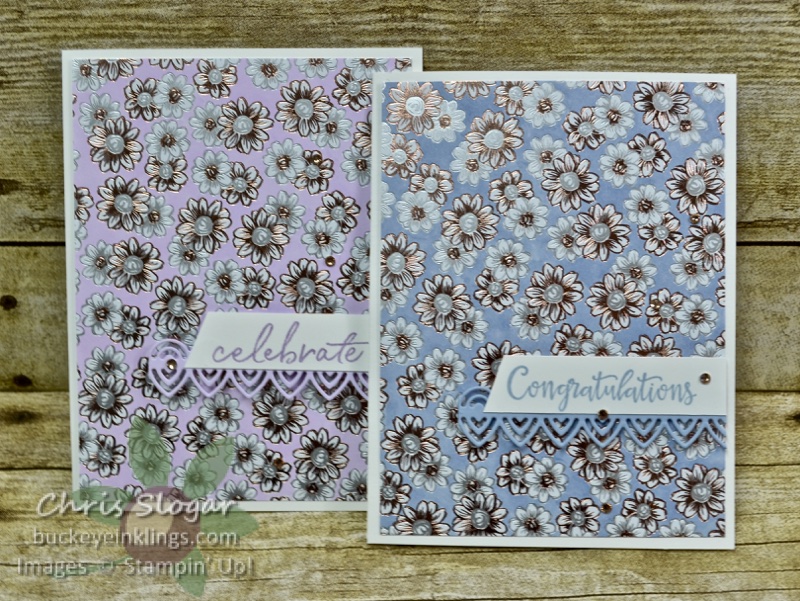
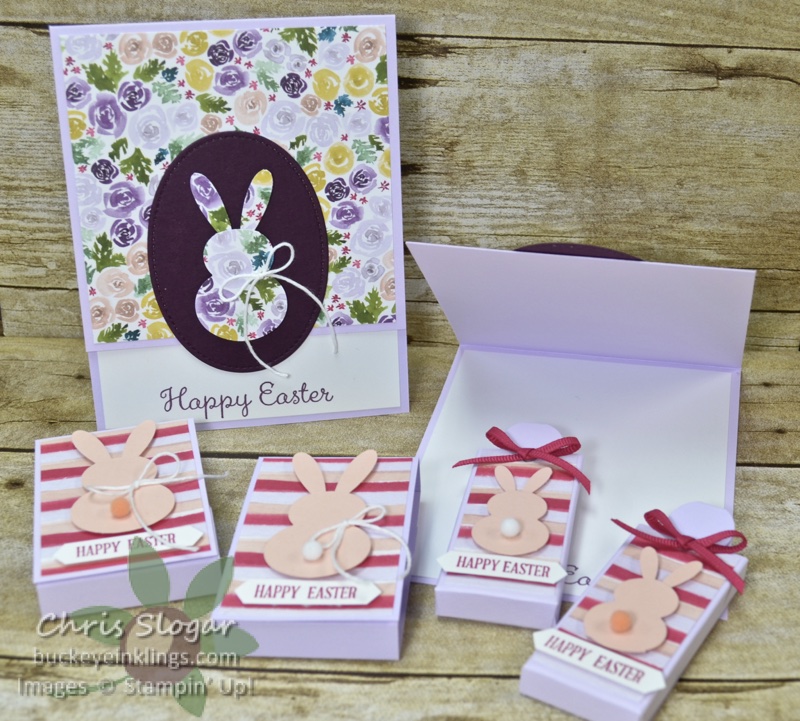
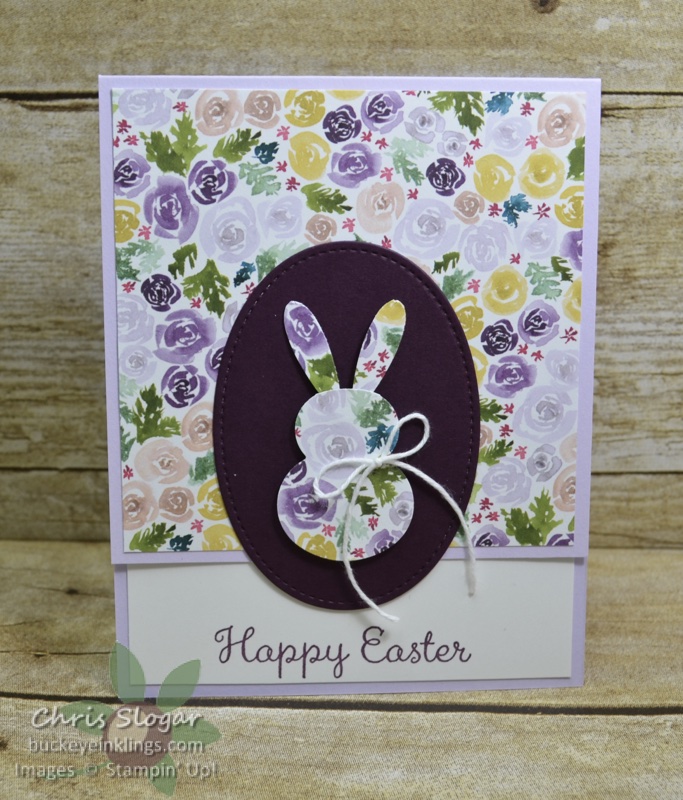
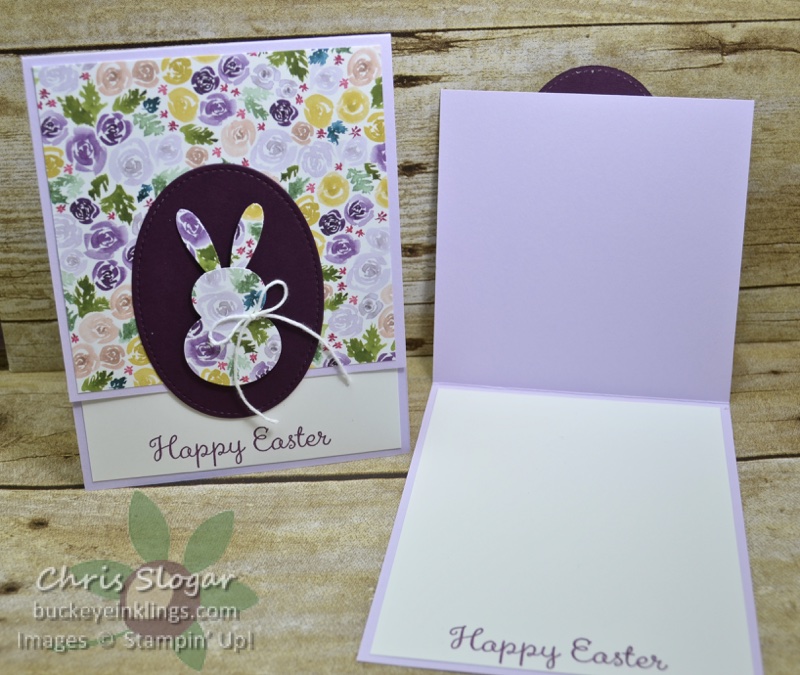
I colored these backgrounds with my Stampin’ Blends, Light Purple Posy and Dark Seaside Spray. It looks like a lot of tedious coloring, but it goes quite quickly – and coloring is very relaxing!

The greetings are from “Happy Birthday To You” and “Peaceful Moments”. That fabulous die-cut trim piece is from the Lily Pad Dies.

I’d say that these papers give a lot of bang for your buck, but that’s not really appropriate since they are free! Please keep in mind that they are only available while supplies last.

This post is meant to supplement last night’s Facebook Live video – click here to see the video.

Thanks for checking out my projects today! If you are shopping, please use Host Code EVQ97KBM with a minimum $35 order to receive this month’s gift, a package of Basic Adhesive Backed Sequins. Or, if you are spending $100 to get some of those fabulous new Sale-a-bration freebies, check out my March gift/Class To Go (pictured below).

Click here for the online store, or use the carousel below to be directed to a product used in today’s project. Thank you so much – I need your business to keep the ideas coming!

Chris_buckeye_signature_rose_final

Rise & Shine

One of the new Sale-a-bration items for March is the Rise & Shine stamp set (shown below) that coordinates with the Cup of Cheer dies from the 2019 Holiday Catalog. These dies are currently available (Item 151150, $30).

So many cute images and greetings here! You can choose to receive this set for FREE with a $100 purchase.

Thanks for checking out my card today! If you need any of our wonderful products, please click here for the online store, or use the carousel below to be directed to a product used on today’s project.

Spend $35 with Host Code EVQ97KBM for this month’s gift, a package of Basic Adhesive-Backed Sequins. Or click here for details about my special gift for March – the materials to make the Stamp Case Gift Set shown below.

Chris_buckeye_signature_rose_final

Welcome Easter

This easily could have been an Easter card, but these animals from “Welcome Easter” make adorable baby cards too! The set includes the versatile greetings.

Thanks for checking out my card today! If you need any of our wonderful products, please click here for the online store, or use the carousel below to be directed to a product used on today’s project.

Spend $35 with Host Code EVQ97KBM for this month’s gift, a package of Basic Adhesive-Backed Sequins. Or click here for details about my special gift for March – the materials to make the Stamp Case Gift Set shown below.

Chris_buckeye_signature_rose_final

Bunnies from the Snowman Punch

My projects in last night’s Facebook Live used the Snowman Builder Punch, which is held over from the 2019 Holiday Catalog. It makes really cute bunny bodies – in two sizes, and the ears come from the Daisy Punches – also in two sizes. The video shows how I made them. Please join the Buckeye Inklings Stampers Group on facebook to see all of my facebook videos.

For my first project, I made a card with a large bunny. The paper is from the Best Dressed collection. The Purple Posy card base measures 4 1/4″ x 9 3/4″, scored at 5 1/2″. The designer paper is a 4″ square, and the Whisper White measures 4″ x 5 1/4″.

The bunny is attached to a Blackberry Bliss stitched oval – the largest oval in the Stitched Shapes collection.

I also used a large bunny to decorate this favor. The project itself is a remake of projects I have done before. The Purple Posy cardstock measures 2″ x 9 1/2″, scored at 1/2″, 1 1/2″, 2 1/2″, 3″, 6″, and 6 1/2″. The designer paper, also from the Best Dressed collection, measures 1 7/8″ x 2 7/8″.

This side view shows how the folds secure a Ghirardelli chocolate. I cut a hole in the second section (between 1/2″ and 1 1/2″) with the smallest Stitched Nested Label die.

My slider version of this treat is made with the same papers. The box starts from a piece of cardstock 4″ x 3 1/4″. The 4″ side is scored at 1 3/8″, 1 3/4″, 3 1/8″ and 3 1/2″, and the 3 1/4″ side is scored at 3/8″. The designer paper measures 1 1/4″ x 2 3/4″.

This post is meant to supplement last night’s Facebook Live video – click here to see the video.

Thanks for checking out my projects today! If you are shopping, please use Host Code EVQ97KBM with a minimum $35 order to receive this month’s gift, a package of Basic Adhesive Backed Sequins. Or, if you are spending $100 to get some of those fabulous new Sale-a-bration freebies, check out my March gift/Class To Go.

Click here for the online store, or use the carousel below to be directed to a product used in today’s project. Thank you so much – I need your business to keep the ideas coming!

Chris_buckeye_signature_rose_final

Stamp Case Gift Set

I have a special gift for you as we head into the last month of Sale-a-bration. This project is my “Class To Go” this month. Spend $100 with Host Code Q6VYUURV, and I will send the supplies to decorate and fill this stamp case.

The finished project includes a tray with six greeting cards, a trio of Hershey Nuggets, and a coordinating pen. I have used the So Sentimental bundle with Poppy Parade ink to complete my cards, and I recommend those items as part of your purchase if you would like to follow my sample. However, it is possible to substitute other stamps and die shapes for the greetings.

Colors vary. Please email me at stampyourworld@gmail.com after you order if you have a color preference – Pool Party, White, or Poppy.

Chris_buckeye_signature_rose_final

Peaceful Poppies

Stay tuned for new Sale-a-bration items! Starting March 3, Stampin’ Up! will offer five additional Sale-a-bration freebies. There will be three stamp sets and two specialty paper collections. Check back on March 3 to see the new items.

I have a really simple card to share today. We made this card in a Card Ministry this month, and it is easy to make in quantity!

I simply used three strips of designer paper, each measuring 1 1/8″ x 4 3/4″, from the Peaceful Poppies. I matted those strips on a piece of Blackberry Bliss, measuring 3 3/4″ x 5″.

The stamps are from “Layered with Kindness”, and the label shapes are made with the coordinating punches “Label Me Fancy” and “Label Me Lovely”.

Thanks for checking out my projects today! If you are shopping, please use Host Code JXZMMJJW with a minimum $35 order to receive this month’s gift, a spool of Whisper White 1/4″ Crinkled Seam Binding. Click here for the online store, or use the carousel below to be directed to a product used in today’s project.

Chris_buckeye_signature_rose_final

Witty-cisms

“Witty-cisms” offers fun sentiments that are paired with cute images. These lend themselves to easy cards and note cards, like the ones I am showing today. The images are also great for coloring. I used my Stampin’ Blends.

My first card uses a 4″ x 5 1/4″ mat of Poppy Parade, embossed with the Coastal Weave 3D Embossing Folder. I added a 2″ strip of designer paper from the Pleased as Punch collection.

My next two cards are even simpler, with just the 2″ strips of designer paper on the card base. I chose two different stamps to highlight – see the full set below.

Thanks for checking out my projects today! If you are shopping, please use Host Code JXZMMJJW with a minimum $35 order to receive this month’s gift, a spool of Whisper White 1/4″ Crinkled Seam Binding. Click here for the online store, or use the carousel below to be directed to a product used in today’s project.

Chris_buckeye_signature_rose_final

Under My Umbrella

Even a rainy-day card can be so cheerful with our pretty papers and colors! I used the Pleased as Punch designer paper for my background and umbrella, and then I colored the flowers and boots with my Stampin’ Blends.

There is a coordinating punch for the umbrella pieces, and I fussy-cut the flower pieces. The greetings in the set are very sweet, but I made my second layout with a birthday greeting from “Timeless Tulips”.

Thanks for checking out my projects today! If you are shopping, please use Host Code JXZMMJJW with a minimum $35 order to receive this month’s gift, a spool of Whisper White 1/4″ Crinkled Seam Binding. Click here for the online store, or use the carousel below to be directed to a product used in today’s project.

!– wp:paragraph –>

Chris_buckeye_signature_rose_final

Double Pocket Cards

Last night on Facebook Live, I made Double Pocket Cards. The back pocket holds a note card, and the front pocket can hold a gift card, bookmark, tea bag, or other flat item. They are made from designer paper – I used patterns from the Birthday Bonanza collection here.

The “square version” is made from an 8 1/2″ square. The inner card is a 4 7/8″ x 3 5/8″ piece of Whisper White matted on a 5″ x 3 3/4″ piece of Mango Melody.

The “rounded version” is made from an 8 1/2″ circle, with an inner card of the same dimensions as above. The score lines for either version are at 2 1/8″ and 6 3/8″ (vertical) and at 5 1/2″ from the top (horizontal).

I also made a version with the Parisian Blossoms designer paper for a totally different look. I also added a flap made from the largest stitched, scalloped rectangle from the Stitched So Sweetly dies.

The scalloped rectangle is scored 3/8″ from one of the long edges, creating a tab that is tucked in between the front pocket and back pocket. Otherwise, the construction of this version is the same as the “square version” above.

Please check out the video below for full instructions. If you are receiving this post in an email, please click here for the video.

This post is meant as a supplement to last night’s Facebook Live – click here for that video. Please join the Buckeye Inklings Stampers Group to be notified of my posts and Live sessions.

Thanks for checking out my projects today! If you are shopping, please use Host Code JXZMMJJW with a minimum $35 order to receive this month’s gift, a spool of Whisper White 1/4″ Crinkled Seam Binding. Click here for the online store, or use the carousel below to be directed to a product used in today’s project.

Chris_buckeye_signature_rose_final
WordPress theme: Kippis 1.15