The Weekly Deals are shown below, and just a reminder, they change every Tuesday. As always, you can order online using the “Shop Now” button, or let me know what you would like, and I will include it when I order. I will include a completed sample of yesterday’s Retro Fresh Double Pocket Card with orders over $35. This will be mailed to you if you order online.
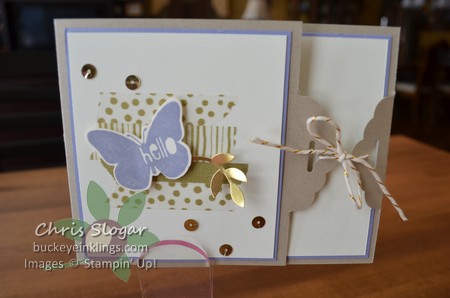
Our second card in Club this month was similar to this, using the Scallop Tag Topper punch to make a pretty closure. I got the idea for the butterfly and Washi Tape layout from a card I saw on Pinterest that was made by Heather Summers. The butterfly stamp is from the Nature’s Hello Hostess set in the Occasions Catalog. It is cut with a framelit from the Backyard Basics collection.
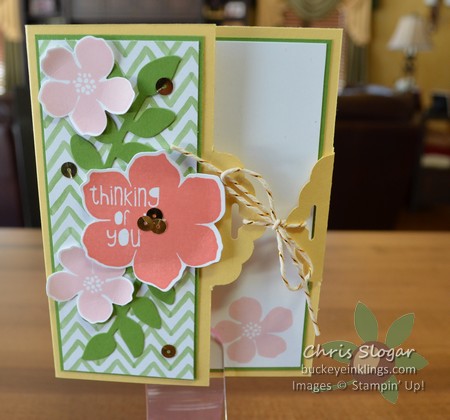
The card from Club is shown below, and it uses the large flower stamp from Nature’s Hello. That stamp coordinates with the Secret Garden framelits, and I have added flowers and leaves from the Secret Garden bundle. The designer paper is Watercolor Wonder.
While the Tag Topper Punches have a recess for 2″ wide strips of cardstock, you can also carefully slip a long edge of cardstock into the Tag Topper Punches as shown below.
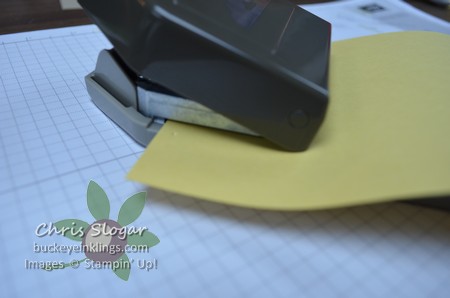
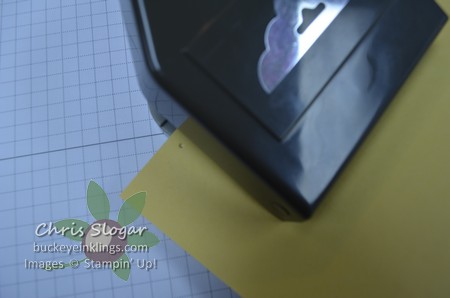
To make the 4 1/4″x 5 1/2″ card, start with a half sheet of cardstock, 5 1/2″ x 8 1/2″. Line up the edges so that the 5 1/2″ edges are together, but do not crease! Pierce a hole 1″ from the edge to use as a guide.
Align the hole with the edge of the punch as you slide the cardstock into the punch. Punch this way on each side, flipping the cardstock to do the opposite end. Don’t rotate the cardstock, flip it. You want the pierced hole to line up to the left of the punch casing on both sides so that your closure lines up.
Here’s what the cardstock looks like when you have punched both sides.
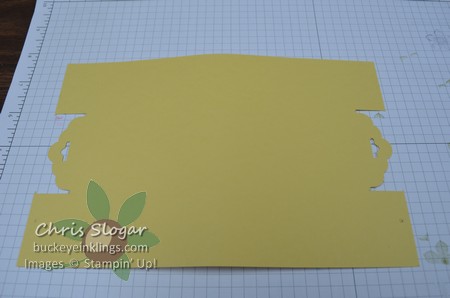
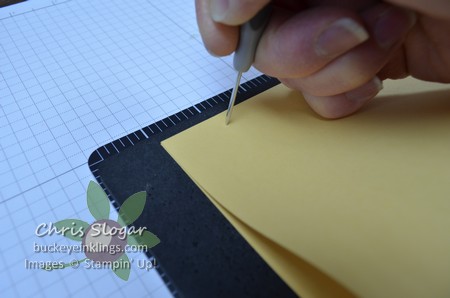
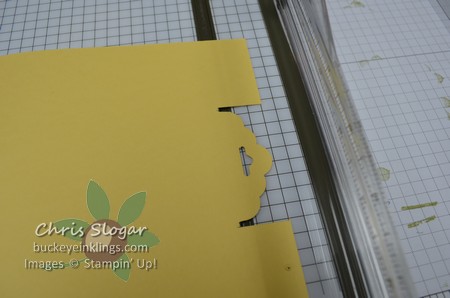
Align the cutting groove of your trimmer to carefully cut away the excess cardstock on both ends of the card.
Score along the edge of only one of the Tag Toppers, and score 4 1/4″ from that scored edge to create the card front.
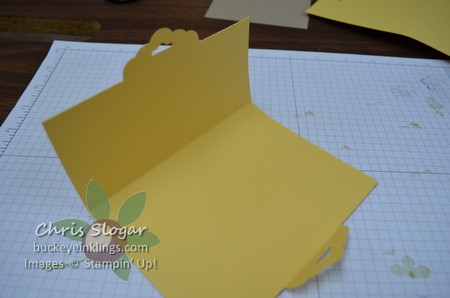
That’s the base! Then, decorate as you please.
These directions create a closure in the middle of the 5 1/2″ edge of the card. Once you see how this works, you can play with the dimensions to change the location of the closure. I pierced a mark at 1/2″ on the very similar card shown below, and the closure is not centered.
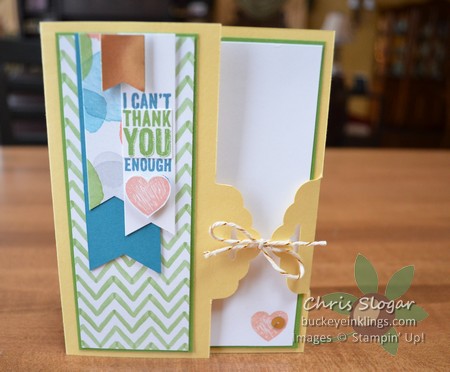
On the butterfly card at the beginning of the post, I simply made sure the punch was centered on the 4 1/4″ side of the card when I punched each side. The important thing is to flip the cardstock base over and do the exact same thing on both sides so that the punches line up.
You can use either of the Tag Topper Punches to make this kind of closure.
Have a great day!
