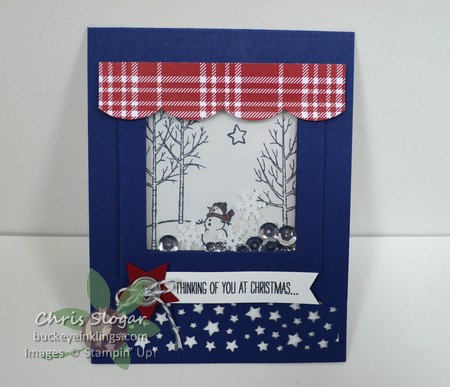
We made this shaker card in Stamp Club this weekend. We have done a few different shakers this year, but this one is different because the shaker is a clear window to the inside of the card.
So of course, it makes perfect sense to look through a window onto a scene created with “White Christmas”. “Holiday Home” would be great, too! Here’s a look at the inside…
This is easier to make than you might expect. The window is created with two of the square framelits – the 2 3/8″ and 3 1/4″ sizes.
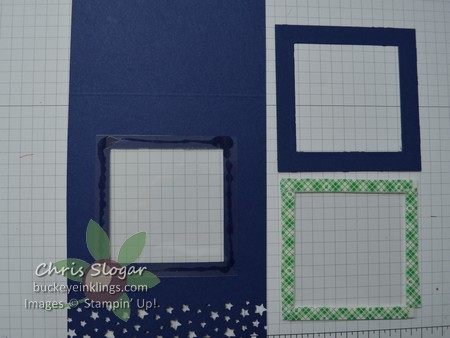
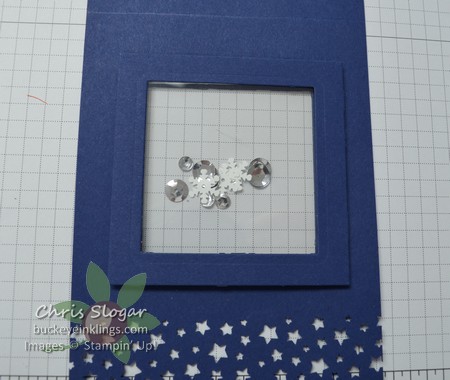
Here are the pieces for the window – on the left, the card base, 4 1/4″ x 11″, scored at 5 1/2″ and punched with the Confetti Stars punch. The opening is cut with the smaller square framelit. A piece of window sheet cut with the larger framelit is glued to the INSIDE of the card front. Since a square is an easy shape to cut, you could cut the window sheet pieces for this card on your trimmer.
At top right, a piece of cardstock cut with both square framelits to create a frame.
At bottom right, an additional piece of window sheet cut with the larger square framelit. To this window sheet, add foam tape around the perimeter. You can also use edge strips from dimensionals.
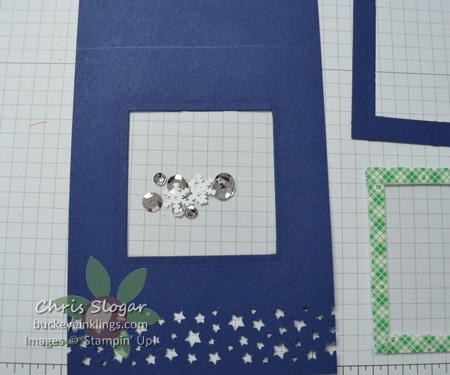
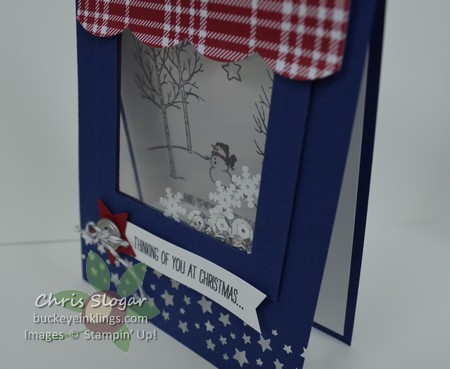
Turn the card base over and add sequins to the FRONT of the window.
Then stick the second window sheet to the FRONT of the card…
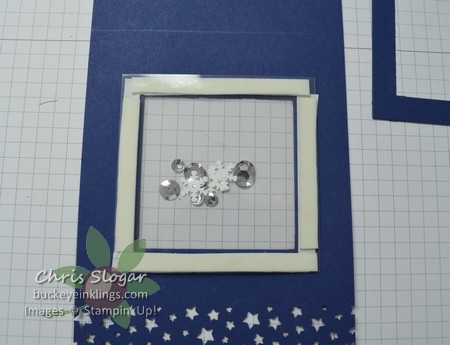
…and cover with the window frame. Decorate as you wish – I added a valence to my window and the greeting from “White Christmas”.
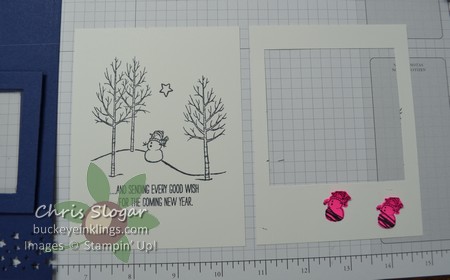
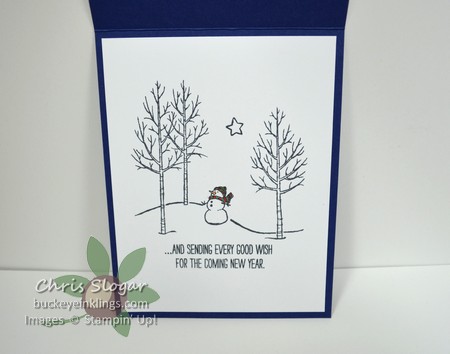
Here’s a hint for stamping the inner mat…I couldn’t stamp through the window opening because the scene on the inside was bigger than the window, so I made a mask to help place the scene. The mask is cut the same size as the inner mat (4″ x 5 1/4″), and I used the larger square framelit to cut an opening that was centered with the opening on the card front.
It takes a little planning to make sure the elements you want to see are visible through the window, but it is so fun to work with these stamps to create a scene. The pink snowmen are post-its that we used as masks when stamping our scenes.
The card below is my first attempt at this window technique, inspired by Nicole Tugrul’s fun birthday card that you can see here. Nicole has detailed instructions for this version with the star.
Here is my star shaker, for the holidays…
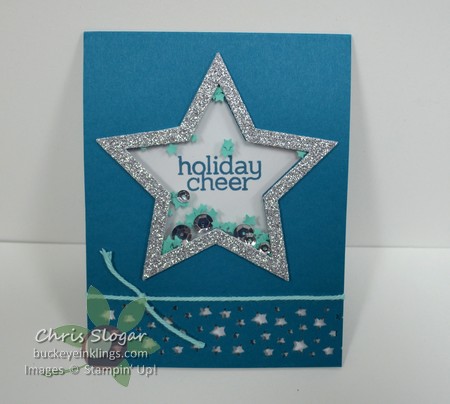
It was definitely easier to stamp this single greeting from “Cheerful Tags” on the inner mat. I simply stamped through the opening on the front of the card before adding either of the window sheets. Placing the foam tape was not harder because of the shape – it just took a little longer to get all of the edges covered. These are really fun – hope you will try one!!
