I showed several cards that use strips of cardstock or designer paper on last night’s Facebook Live. These ideas are great for using up scraps, though they are also worth cutting into full sheets of paper if you have to!
I don’t know about you, but when I have striped sheets in my designer paper packs, I tend to use them first. Stripes make a fabulous background, and when you make your own, there are so many possible color combinations!
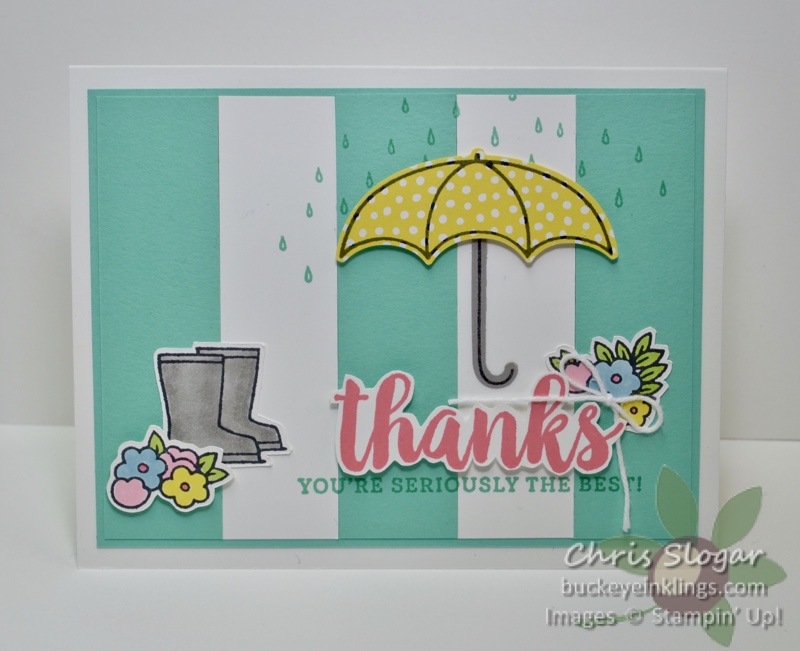
My first card uses 1″ x 3 3/4″ strips of Coastal Cabana and Whisper White matted on a 3 7/8″ x 5 1/8″ Coastal Cabana mat. The edges look perfect thanks to the mat. I assembled the strips first, and then stamped the raindrops and the Coastal Cabana portion of the greeting.
The greetings are from “Seriously the Best”, and everything else is made with the Under My Umbrella bundle.
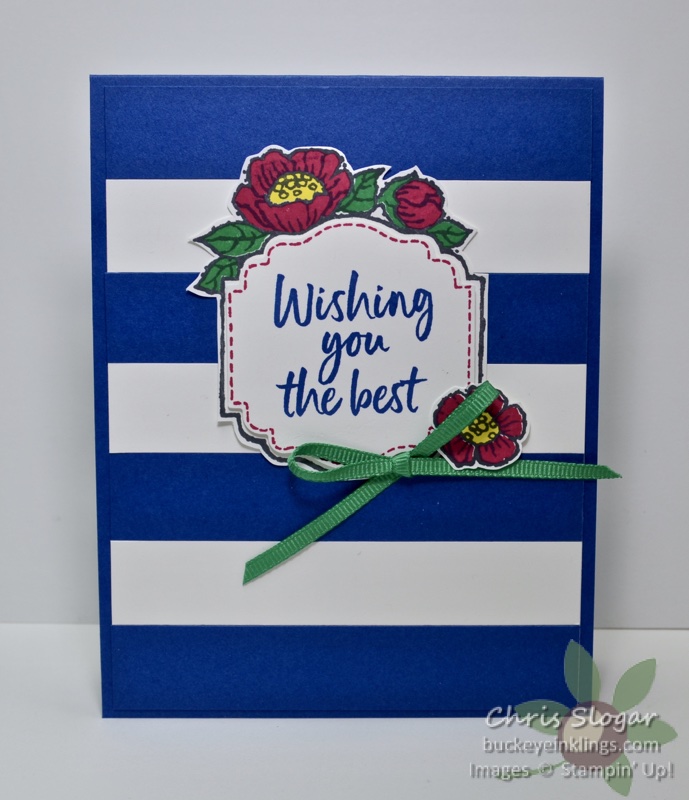
My next card uses more strips – seven 4″ x 3/4″ strips fill a height of 5 1/4″. I assembled the strips on a 4″ x 5 1/4″ mat so that I could trim the ends as necessary before attaching to the card base.
Note all of the retiring 2018-2020 In Colors on this sample. As a reminder, products associated with these In Colors are only available while supplies last. While our Annual Catalog dates extend through May, products associated with the retiring In Colors have often sold out in April. Please get any ink refills, ink pads, and cardstock that you need from this group sooner, rather than later!
The retiring colors are: Lovely Lipstick, Grapefruit Grove, Pineapple Punch, Call Me Clover, and Blueberry Bushel.
It is difficult to cut and assemble the strips to the exact calculated length. I have used a matching mat (first card) and a matching card base (second card) so that the ends blend together. You can also assemble your strips on a mat and then cut the whole mat if you need an exact size – that is what I have done in the next examples.
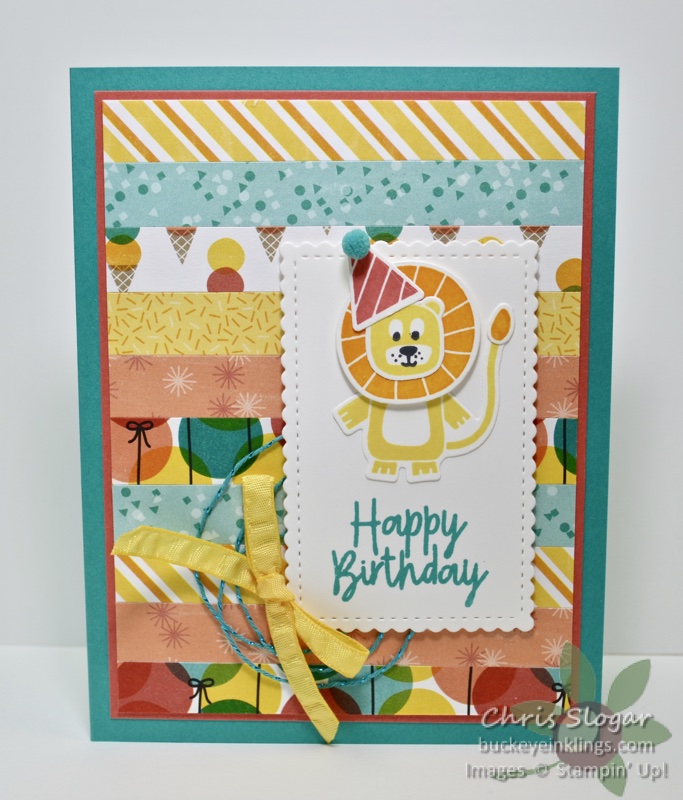
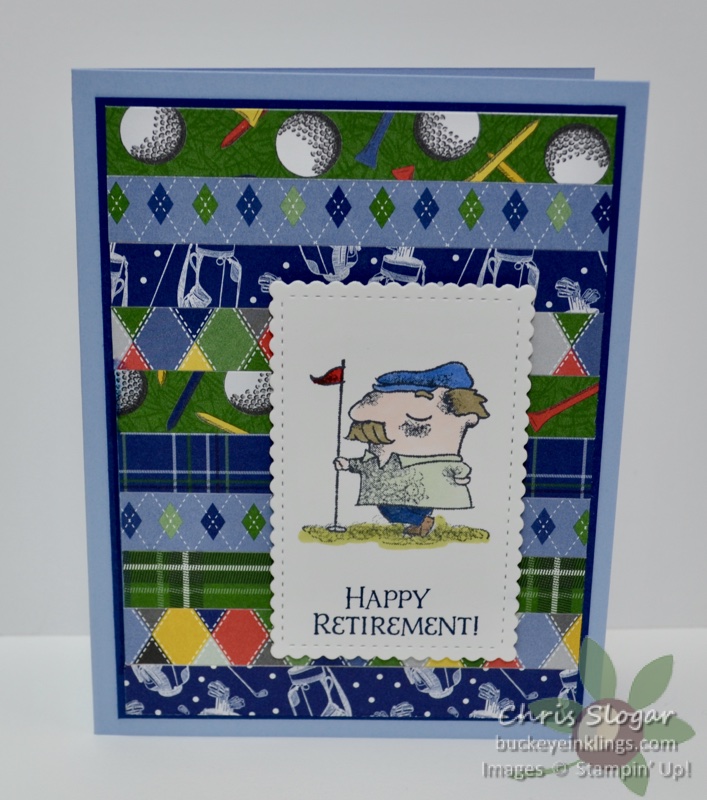
I used 1/2″ designer paper strips on my next two cards. In each case, I assembled the strips onto a 4″ 5 1/4″ piece of Whisper White cardstock, and then I cut the piece to my desired size – 3 3/4″ x 5″. I matted the piece to a 3 7/8″ x 5 1/8″ piece of cardstock in each case.
The first designer paper example uses the Birthday Bonanza Suite, and the second uses Clubhouse designer paper with stamps from “On to Adventure”.
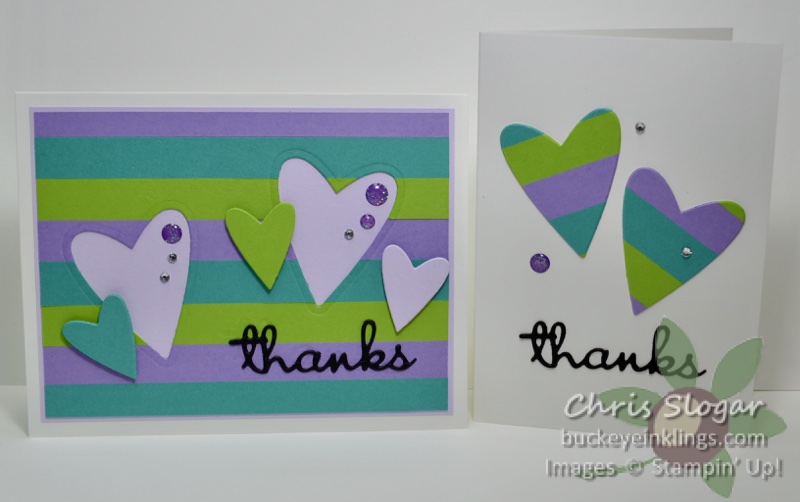
In this case, I attached 1/2″ strips of Highland Heather, Bermuda Bay, and Granny Apple Green to an oversized piece of copy paper. (I used copy paper in order to keep the thickness down.) I cut the piece down to 3 3/4″ x 5″, and then I then cut the two large hearts from the piece with a die from the Be Mine Stitched collection.
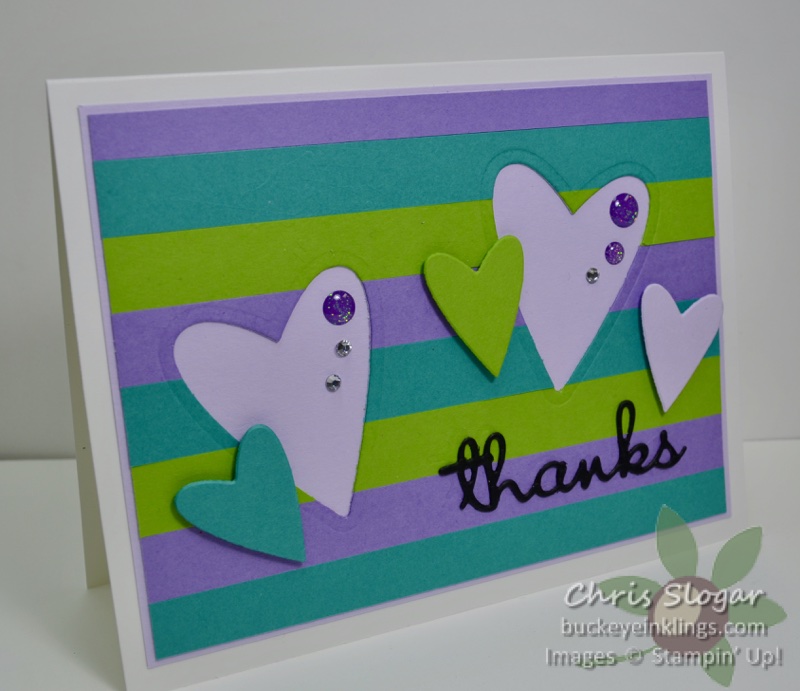
Note that the Purple Posy piece (the lighter purple) is a mat behind the striped piece with heart openings. It measures 3 7/8″ x 5 1/8″. The three smaller hearts are on dimensionals on top of the striped piece.
I used the striped hearts on the note card. The greeting on each card is from the Well Written dies.
This post is meant to supplement last night’s Facebook Live video – click here to see the video.
Thanks for checking out my projects today! If you are shopping, please use Host Code EVQ97KBM with a minimum $35 order to receive this month’s gift, a package of Basic Adhesive Backed Sequins. Or, if you are spending $100 to get some of those fabulous new Sale-a-bration freebies, check out my March gift/Class To Go (pictured below).
Click here for the online store, or use the carousel below to be directed to a product used in today’s project. Thank you so much – I need your business to keep the ideas coming!
