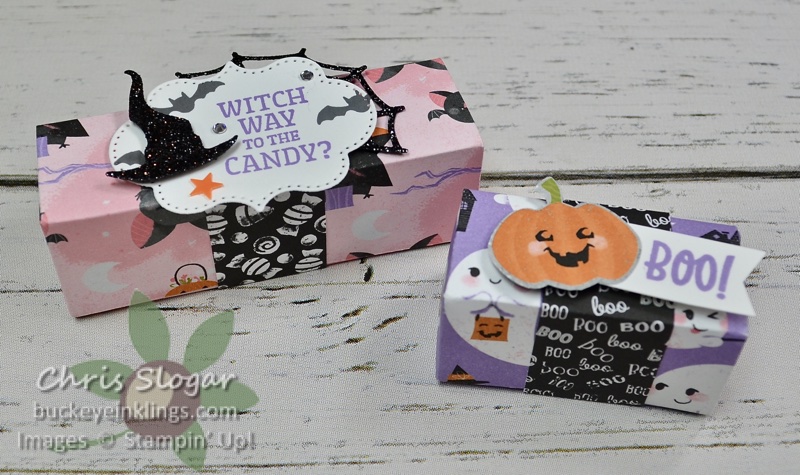
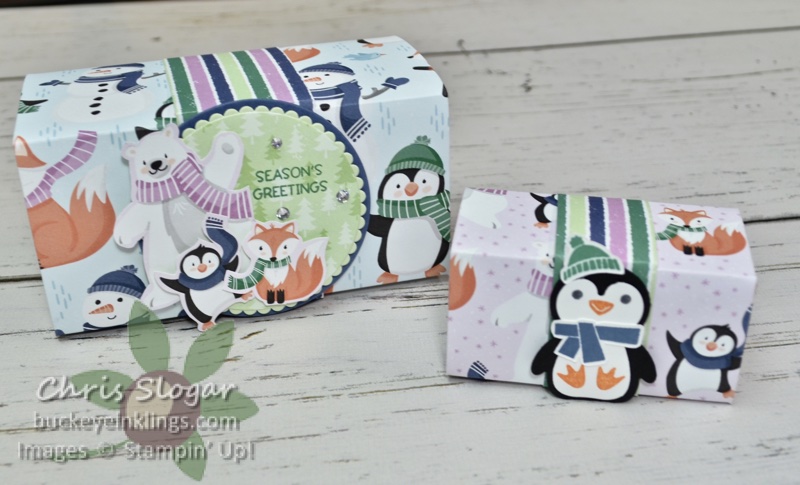
Last night on Facebook Live, I showed how to make these cute little treat boxes in different sizes. They all use product that will be available starting August 3 from the upcoming Mini Catalog.
I am adding pictures and dimensions here for easy reference, but you may need to see the video for complete instructions. Please click here to see the video – and please join the Buckeye Inklings Stampers Group on Facebook to get notifications of all of my live videos.
I CASEd this project from Bianca Oberauer, who presented it in metric. In the process of converting her dimensions, I found that I like this box in many different sizes.
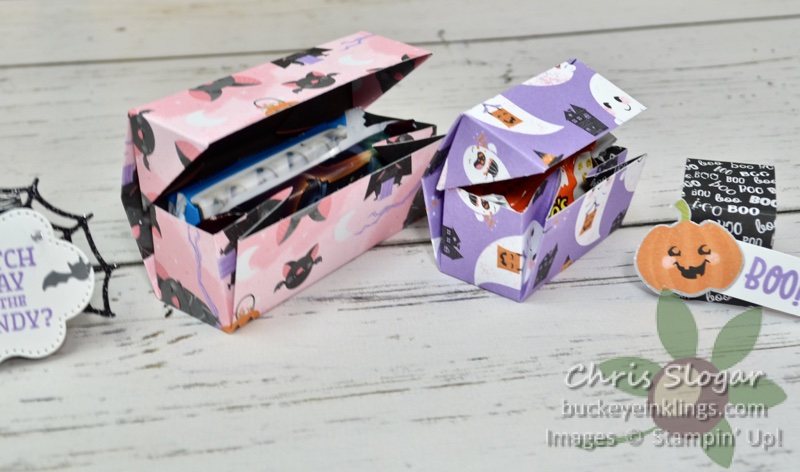
Each of my boxes is made from a single rectangle of designer paper, and they close without the need for adhesive. I will give dimensions and score lines for each of my samples, but I encourage you to think of the pattern and spacings shown below. The pattern will allow you to figure out the score lines and rectangle size for any box.
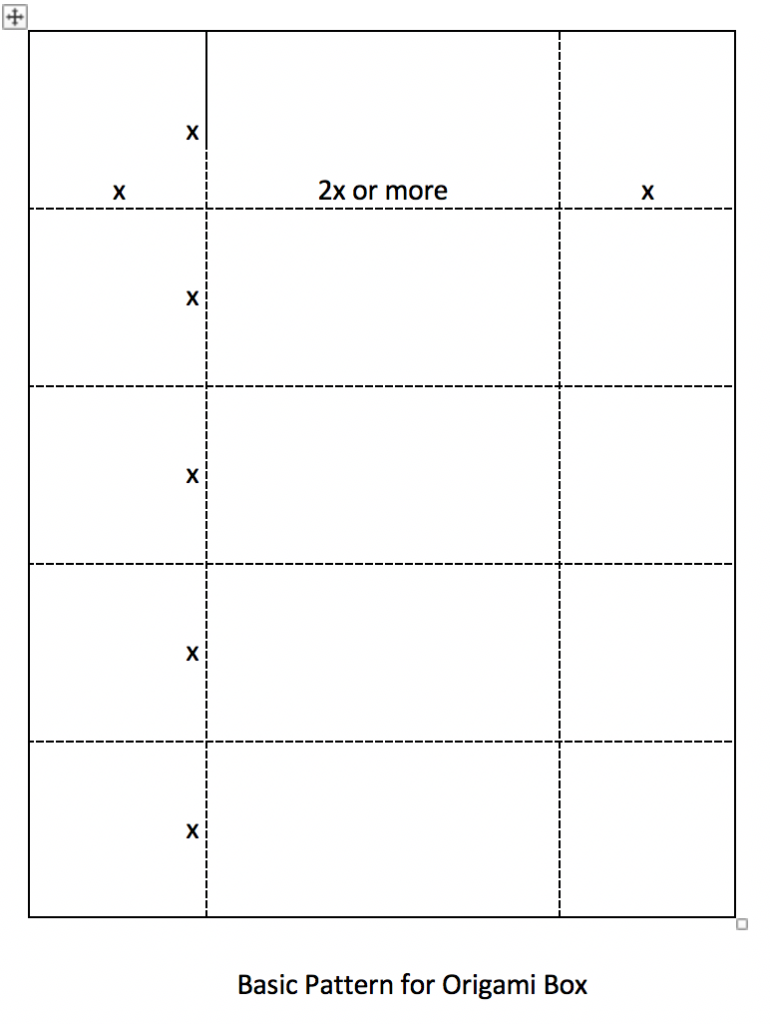
In the live video, we started with the largest box shown here. It is easier to practice the folding on the larger boxes. In the case of the large box, “x” is 2 3/8″, and the overall rectangle size is 4x wide and 5x long, or 9 1/2″ x 11 7/8″. We could have made the finished box longer by increasing the 9 1/2″ dimension.
Regardless of the dimension you use where the diagram says “2x or more”, the initial score lines need to be 2 3/8″ from each edge, on all four sides, and more score lines need to be added at a 2 3/8″ spacing along the 11 7/8″ dimension. So, along the 11 7/8″ dimension, score lines are at 2 3/8″, 4 3/4″, 7 1/8″ and 9 1/2″.
My favorite size is the smaller of the penguin boxes shown (the Fresh Freesia print). In that case, “x” is 1 1/2″, and all the dimensions are very easy. The rectangle is 6″ x 7 1/2″. The 7 1/2″ dimension is scored at 1 1/2″, 3″, 4 1/2″ and 6″. The 6″ dimension could be made longer for a longer box, and it is scored at 1 1/2″ from either edge.
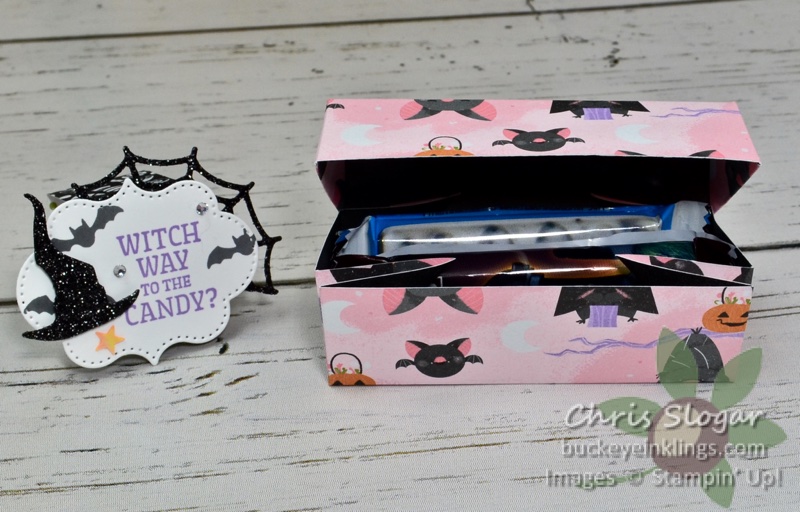
The Halloween boxes were limited by the 6″ square size of the Cute Halloween designer paper. I made the Flirty Flamingo box as large as possible, with “x” at 1 3/16″. My rectangle size is 6″ x 5 15/16″. Scoring along the 5 15/16″ dimension is 1 3/16″, 2 3/8″, 3 9/16″ and 4 3/4″. The score lines along the 6″ dimension are 1 3/16″ from either end.
Finally, the dimensions are a little easier for the Highland Heather box. With “x” at 1 1/8″, I used a rectangle 4 1/2″ x 5 5/8″, scored at 1 1/8″, 2 1/4″, 3 3/8″ and 4 1/2″. The score lines along the 4 1/2″ dimension are 1 1/8″ from either end.
I hope you’ll give these a try. Once you get the folding down, they are so quick! They check all of my boxes for favorite projects – using two sides of designer paper, adaptable for any theme, and easy.
I won’t have a carousel of products today, as most of these products are not available until August 3. If you are anxious to get them sooner – you can always join as a Demonstrator and choose them in your Starter Kit! Please don’t hesitate to contact me at stampyourworld@gmail.com if you would like to set up a call to discuss this.
In the meantime, if you are shopping, please click here to go to my online store. Place a $35 order with Host Code 73G7CNYM in July, and I will send you a package of Artistry Blooms Sequins and a handmade card. This is my way of sharing the Stampin’ Rewards with you – I appreciate your business!!
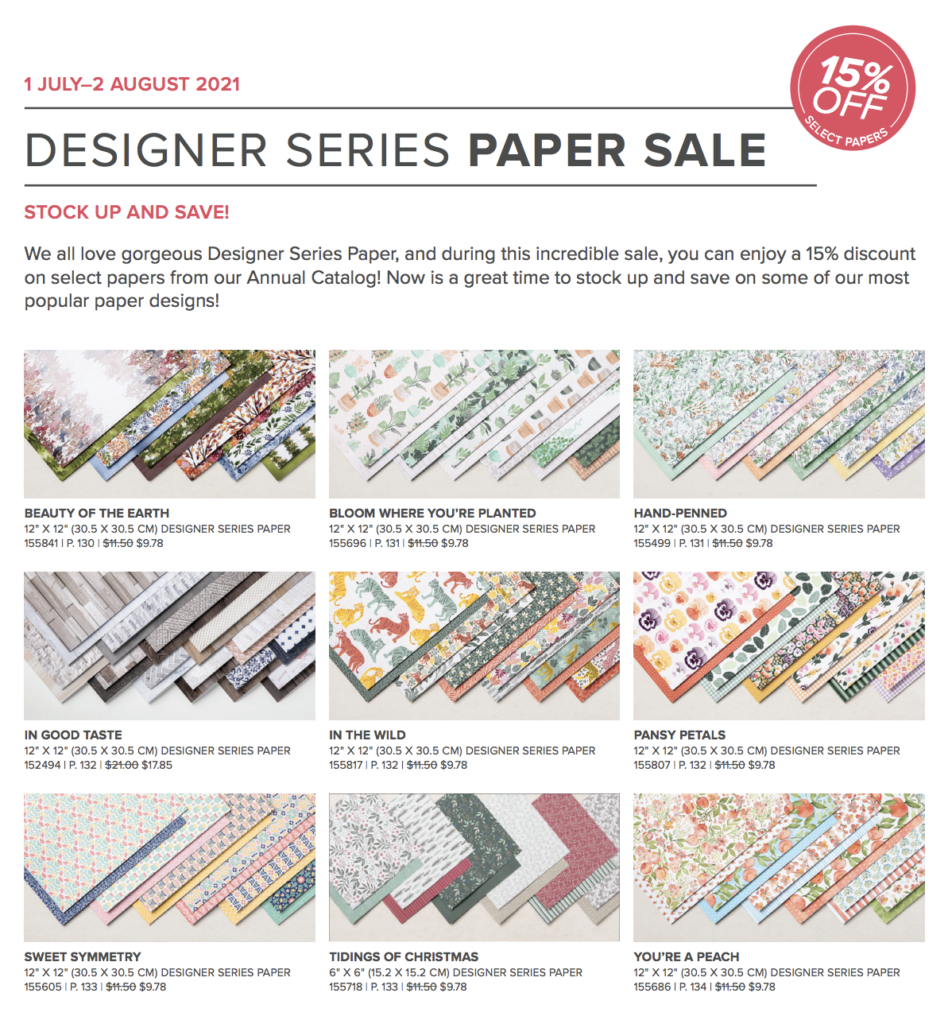
Just a reminder…the Designer Paper Sale ends August 2!