A Thankful Greeting

CCMC383

This week’s sketch is very simple, and that makes it easy to play along.  You can use any of your favorite shapes and greetings.

DSC_1652w

Since Thanksgiving Day marks the start of this challenge, I knew I wanted a thankful greeting.  Did you know that “Banner Blessings” is still available, and it is on sale this week for only $11.20 as part of the Online Extravaganza?  There are four greetings, similar to this thanks in “Banner Blessings”.

Thanks so much for checking out my card.  Please visit Create with Connie and Mary to see what my talented Thursday Challenge teammates have come up with.  Hope you will be inspired to play along!

Happy Thanksgiving!

Chris_buckeye_signature_rose_final

Seeing 3D Blog Hop

GV Blog Header

Welcome to the Grand Vacation Achievers hop for November. This month our focus is on 3D projects.

You may just be starting the blog hop here at my blog (Chris Slogar) or may have come from the person previous to me in the list. If you get off track at any time, the full lineup below will help you move along from blog to blog so you see all the projects.

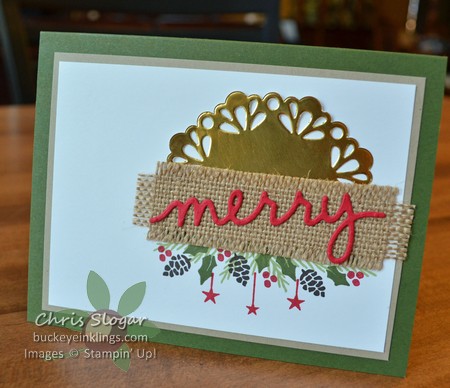
My project is a simple home decor piece that can be made in any colors or theme.  I wanted a holiday decoration, so I started with Merry Moments Designer Series Paper.  I love the variety of reds and greens in this paper!

DSC_1658w

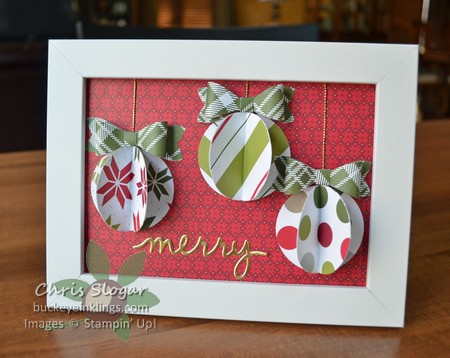
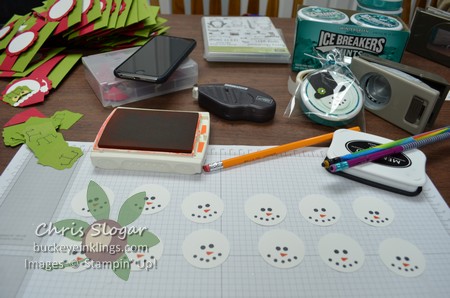
I took a 5″ x 7″ piece of designer paper and created a very simple arrangement of ornaments over it.  Each ornament is made of three 2″ circles.  Each circle is scored in half, and the three circles are attached to each other so that only one pattern shows for each ornament.

I used the Bow Builder punch and Gold Cording to create the look of pretty hangers.  Once all of the elements were in place, I took a frame apart and reassembled it with the designer paper on top of the glass.  So simple, but fun and festive!  It would make a great Hostess Gift.

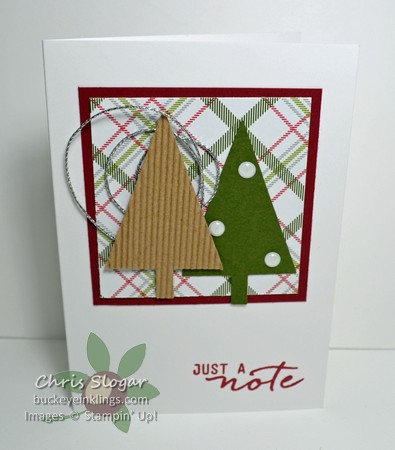
You can frame anything this way, in any size.  Many of the cards we make would be lovely home decor items.

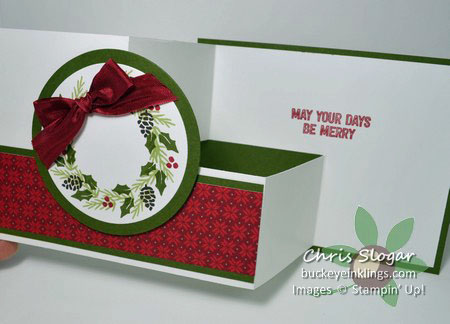
I have a two-dimensional example below.  My upline Mindy Gray gave me this years ago, and I pull it out for each holiday season.  It never fails to get compliments.

DSC_1661w

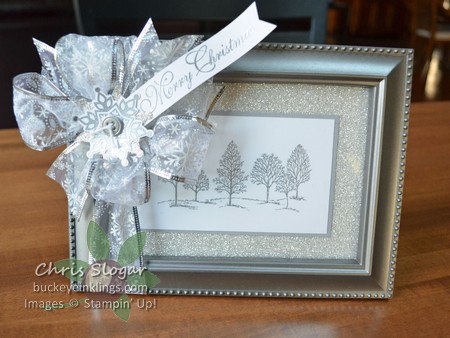
Mindy embossed the trees in silver and double-matted the scene on Smoky Slate and Silver Glimmer Paper.  In this case, it is behind the glass in the frame, and she added a beautiful bow.

I hope this gets you thinking about what images and papers you would like to frame.  You can make something simple, or a more elaborate collage.  I change the contents of my frames as the seasons change.

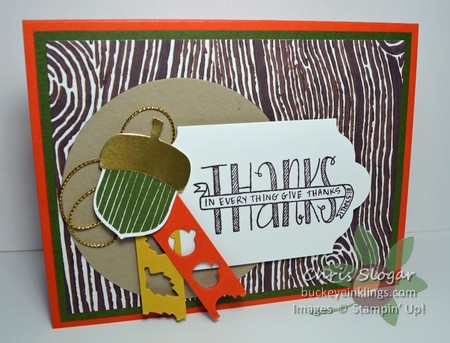
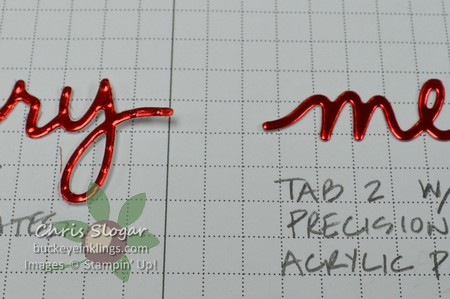
I also want to share something I learned while creating this project – the Precision Base Plate solves the problem of all of those thinlit poke-holes that can become pressed onto foil.  Here’s what I mean…

DSC_1657w

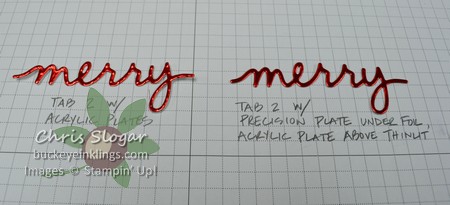
On the left, I cut the foil between two acrylic plates.  On the right, I used the Precision Plate.  See how the one on the left looks like it has measles?  The one on the right is so smooth and gorgeous.

DSC_1657zw

Maybe you are already aware of this, but it was eye-opening to me!  I don’t know why I waited so long to get this piece of equipment.  I guess I thought I was getting along just fine with my various methods involving dryer sheets and wax paper.

Thanks for taking part in our blog hop, there are so many amazing ideas here!  Remember that currently you are at my blog – Chris Slogar – so check the blog hop line up list to see who is next in the list.  Enjoy!

Chris_buckeye_signature_rose_final

Weekly Deals

Here are this week’s deals…

139756G

Embellished Ornaments Wood-Mount Stamp Set Item # 139756
Regular Price: $28.00 US/$34.00 CAN
Discounted Price: $21.00 US/$25.50 CAN

Dazzling Diamonds Glimmer Paper Item # 135315
Regular Price: $5.00 US/$6.25 CAN
Discounted Price: $3.75 US/$4.69 CAN

Berry Merry Photopolymer Stamp Set Item # 139768
Regular Price: $17.00 US/$21.00 CAN
Discounted Price: $12.75 US/$15.75 CAN

Winter Wonderland Designer Vellum Stack Item # 139594
Regular Price: $10.00 US/$12.50 CAN
Discounted Price: $7.50 US/$9.38 CAN


Chris_buckeye_signature_rose_final

Craft Show Wrap-Up

IMG_2428w

Thanks so much to everyone who came to the Jackson High School Key Club Craft Show this year, whether shopping with me or the other vendors.  Jackson HS staff and students always work so hard to raise money for good causes through this event.

IMG_2430w

Here’s a shot of my favorite Key Club volunteer.  Julia helped with tasks through the week (both at school and at home) and had an early shift on Saturday to help with setup.  I can’t say enough about how friendly and helpful the students are!

DSC_1647w

I took just a couple of pictures of the prep work that took place earlier in the week.

IMG_2423w

These little Hershey Nugget snowmen were a hit!  I got the idea from Sharon Burkert’s blog.  Super cute, huh?  I found 2″ clear bags at my local craft store and packaged them with a Cucumber Crush lace tie.

By the way, if you are local, and would like any of these items, please contact me.  I would be happy to take orders.  I ran out of some things early.

IMG_2432w.

The coffee cup gift card holder and the Icebreaker snowmen were also big sellers.  I posted directions for the coffee cup gift card holder last year – click here for that post.  I got the idea for the snowmen from my teammate Amy Kunkle.

I had many varieties of gift card holders, but can you believe I never thought to do a Buckeye-themed version?  I would like to say a special thank you to Kelly who suggested this to me at the craft show.  I loved the idea, and made one this morning!

DSC_1651w

I hope this gives you some ideas for stocking stuffers and favors.  These little projects go together quickly and are fun to make!

Don’t forget that the Online Extravaganza starts today, with special sale items today only.  Place a product order of at least $35 in my online store, and I will send you my Featured Project, currently this group of three gift card holders, assembled and ready to use.

DSC_1634w

Have a good Monday!

Chris_buckeye_signature_rose_final

Merry & Bright

CCMC382

I have been doing a lot of projects lately with traditional Christmas colors, but this color challenge gave me a reason to make a Christmas card that doesn’t include red or green.

DSC_1645w

Gold adds a festive touch to any card, and it makes the regals look even richer.   My favorite thing about this card is that the doilies come precut!!  Second favorite thing – the specialty gold vellum.  With these two supplies, it is easy to be fancy!

Thanks so much for checking out my card.  Please visit Create with Connie and Mary to see what my talented Thursday Challenge teammates have come up with.  Hope you will be inspired to play along!

Chris_buckeye_signature_rose_final

Flurry of Wishes Corner Flip

DSC_1640w

We made this card in our Team Meeting last night.  This is one of those fun folds that looks more complicated than it is.  I have seen this card type all over the internet, but didn’t try it until this past weekend.  I shouldn’t have waited so long – I love this!

DSC_1641w

The Night of Navy is one half sheet of cardstock – that is not an extra mat behind the square image.

DSC_1642w

The whole corner is flipped to the front of the card, and it covers the cut area.  It takes two cuts to create this, as shown in the pictures below.

DSC_1637w

Start with a standard card base – 5 1/2″ x 8 1/2″, scored at 4 1/4″.  Place the base on your trimmer as shown, with the front to the left, and edge placed at the 3″ mark.

Use the cutting blade to make a cut from the 2 1/2″ mark down to 4 7/8″.

DSC_1638w

Rotate the cardstock 90 degrees, and place the left edge at 3″.

This time, use the cutting blade to cut from the 3″ mark up to the 5/8″ mark.

Done!!

DSC_1639w

Carefully fold the top right corner down onto the front of the card.  Allow the cut edge to flip up to become the base for the squares you will add.  Take care to square the corner edges with the card before burnishing the diagonal creases at top and right.

I use adhesive to hold the flap in place, but be careful when you do this to only place it where it will be covered.  I use a dot of Tombow liquid under the lower left corner of the flip section.

I added the greeting from “Six Sayings”, which goes so well with the snowflakes from “Flurry of Wishes”.  The Soft Sky piece is 2 3/4″ square and the white piece is 2 1/2″ square.  You can’t tell from the pictures, but the white cardstock is our Shimmery White – for a little extra sparkle!

Hope you’ll try this – please let me know if you have any questions.

Built for Free Using: My Stampin Blog

Chris_buckeye_signature_rose_final

Weekly Deals

Here are this week’s deals.  As always, please let me know if you would like me to order for you, or click here for the online store.

Looking ahead…we have also received news of a big sale next week, along with a promise of more details later this week.  Please check back, I will post the information as it becomes available.

139645G Season To Season Wreath Project Kit Item # 139645
Regular Price: $27.00 US/$33.25 CAN
Discounted Price: $20.25 US/$24.94 CAN
Season Of Cheer Cardstock Pack Item # 139591
Regular Price: $7.00 US/$8.75 CAN
Discounted Price: $5.25 US/$6.56 CAN
Snow Friends Framelits Dies Item # 139664
Regular Price: $27.00 US/$33.00 CAN
Discounted Price: $20.25 US/$24.75 CAN
Jolly Christmas Wood-Mount Stamp Set Item # 139873
Regular Price: $27.00 US/$33.00 CAN
Discounted Price: $20.25 US/$24.75 CAN


Chris_buckeye_signature_rose_final

More Berry Merry

DSC_1629w

“Berry Merry” is a set that invites creativity.  I love the greenery in classic Christmas colors – I have used Pear Pizzazz, Mossy Meadow, Real Red and Cherry Cobbler here.  The elements are the same as used last week’s wreath – shown below (Click here for those instructions.)  – except that I added the hanging stars from “Holly Jolly Greetings”. Both are fun sets to play with.

DSC_1612w1

Thanks for stopping by – have a good Monday!

Chris_buckeye_signature_rose_final

Merry Moments Gift Bag

DSC_1616w

This tote project was created by Carol Coy from my team, and it is just packed with merry goodies!

DSC_1614w

Here are the contents – so fun and don’t you love how it all coordinates?!  Carol used Merry Moments designer paper from our Annual Catalog.  I love the fact that this paper uses two great holiday greens and two reds in addition to neutrals.

At front left, the “Little Something” is a matchbook to hold a gift card.  The Washi Tape project in the back is a notepad (directions here).  There are also four note cards and envelopes – one of the note cards is shown below.

DSC_1615w

As for the tote, if you haven’t tried making one of these yet, you really should.  They are very useful at this time of year.  Click here for tote directions.

A big thank you to Carol for sharing this fabulous project!  Have a great weekend!

Built for Free Using: My Stampin Blog

Chris_buckeye_signature_rose_final
WordPress theme: Kippis 1.15