November Paper Pumpkin

DSC_0350w

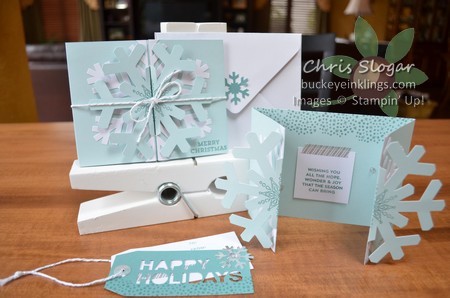
This month’s Paper Pumpkin makes these coordinating cards and tags for the holidays.  The card is a gate fold with extra flaps, each cut as half a snowflake, that come together as shown.  The kit makes 8 cards with envelopes and 8 tags.  The snowflake shapes for the cards and words on the tag are all precut – you simply stamp and assemble.  The stamps, ink, and all accessories (twine, rhinestones, embellishments) are also provided.

As you are shopping for the holidays, consider a Paper Pumpkin subscription for the papercrafter on your list…or for yourself!  The kits are $19.95/month, including shipping, and they include everything, usually with extra embellishments that can be used on other projects as well.  The stamps and ink can be used on projects beyond the kit, too.

If you would like to sign up, please click on the Paper Pumpkin in the left column to sign  up for a month-to-month subscription.  Prepaid subscriptions are also available in the online store, please see the flyer below for more info.  Prepaid subscriptions count toward Hostess Benefits.  Please contact me if you have questions about how it works!

Download (PDF, 184KB)

I’ll be back online Monday, but feel free to contact me in the meantime if you have any questions on the current promotions, or if you would like me to include your Online Extravaganza order with my order this week.

Happy Thanksgiving!!

Chris_buckeye_signature_rose_final

Weekly Deals and a Sympathy Card

The Weekly Deals are shown below.  Please contact me if you would like me to add any of these items to my order this week.  All of the Online Extravaganza prices apply through December 2 as well.  Check out yesterday’s post for the complete list of sale items – many items are 50% off!


Rosette Designer Bigz Xl Die Item # 125594Regular Price: $42.95 US/$52.95 CANDiscounted Price: $32.21 US/$39.71 CAN
Fancy Fan Textured Impressions Embossing Folder Item # 127751Regular Price: $7.95 US/$9.95 CANDiscounted Price: $5.96 US/$7.46 CAN
Alphabet Press Textured Impressions Embossing Folder Item # 130916Regular Price: $7.95 US/$9.95 CANDiscounted Price: $5.96 US/$7.46 CAN
Silver Sparkle Dazzling Details Item # 127845Regular Price: $2.50 US/$3.25 CANDiscounted Price: $1.88 US/$2.44 CAN
Argyle Textured Impressions Embossing Folder Item # 127750Regular Price: $7.95 US/$9.95 CANDiscounted Price: $5.96 US/$7.46 CAN
Label Petite Curly Punch Item # 129405Regular Price: $12.95 US/$15.95 CANDiscounted Price: $9.71 US/$11.96 CAN
Merry Monogram Stamp Brush Set – Digital Download Item # 132716Regular Price: $9.95 US/$10.95 CANDiscounted Price: $5.97 US/$6.57 CAN

  Too Kind Sympathy

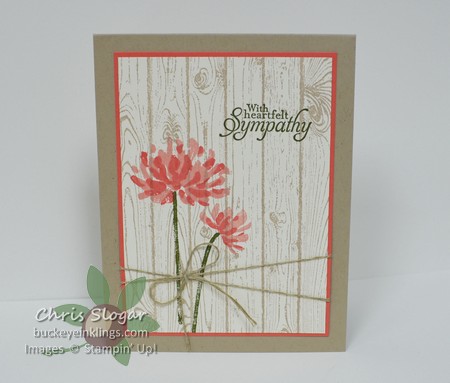
This is one of the cards we made last night at my church’s Card Ministry.  The two-step flowers in Crisp Cantaloupe and Calypso Coral are from “Too Kind”.  The sentiment is from the retired Hostess set “Simply Sketched”, and of course, that great background is “Hardwood”.

Have a great day!

Built for Free Using: My Stampin Blog

Chris_buckeye_signature_rose_final

Banner Blessings Bookmark Card

The Online Extravaganza starts today, with a set of doorbusters on top of week-long 20-50% off deals.  Scroll to the end of this post to see the complete list.

DSC_0347w

I want to highlight “Banner Blessings”, the photopolymer set that was released this month.  These monthly release sets are not in any catalog, but I post them here as they become available, and you can see them in the New Arrivals section of the online store.

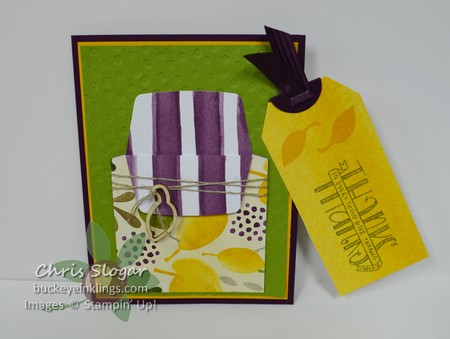
The sentiments from “Banner Blessings” fit perfectly on 2″ strips that can be punched with either of our great tag topper punches (page 221 Annual Catalog).  I used the Angled Tag Topper here to create this bookmark which tucks into the pocket I made with the envelope liner framelits.  Any of the stamps in this set would make a good bookmark – I chose this one for Thanksgiving week.

Banner Blessings Photopolymer     Item 136720   $15.95

The Online Extravaganza list is shown below – please contact me if you would like me to place your order, or simply click “Shop Now” at the top of the right column to go to my online store.

Download (PDF, 251KB)

Chris_buckeye_signature_rose_final

Good Things Coming!!

Thanksgiving week has meant amazing deals from Stampin’ Up! in the past, and Stampin’ Up! is promising an online special that will start this Monday, November 24.  Stay tuned!

The Starter Kit will also be discounted Monday, November 24 – Tuesday, December 2. Here’s what you get:

  •  Starter Kit for $74.95 – this includes $125 of your choice of product, FREE Shipping, and business supplies
  • An extra 5% Cash Back on orders placed in December in addition to the 30% discount new demos get on their first qualifying order
  • 20% off all orders, with the opportunity to earn up to 40% as volume increases
  • Access to learning tools, the online demonstrator community, demo-only events, the demo magazine, and tons of resources
  • The opportunity to preorder from each new catalog.  The Occasions preorder starts December 5, and demonstrators also have the opportunity to earn Sale-a-bration products early.
  • Plus, you will be a part of my Buckeye Inklings Team.  This is a really great group of ladies that meets regularly – our next meeting is a Christmas party on December 3.  In addition to the usual food and make-n-take fun, we will watch online streaming from the new catalog launch party at this meeting.  If you are not local, we will stay in touch online, and I will send meeting projects and info periodically.

If you have ever thought about joining or re-joining Stampin’ Up!, this will be the time.  There is no obligation to purchase anything beyond the Starter Kit.  To stay “Active”, you have until March 31, 2015 to meet the requirement of $300/quarter.  Please contact me if you would like to discuss this further – I would love to have you on my team!!

I do have a card today, too…actually a gift card holder.

  DSC_0344w

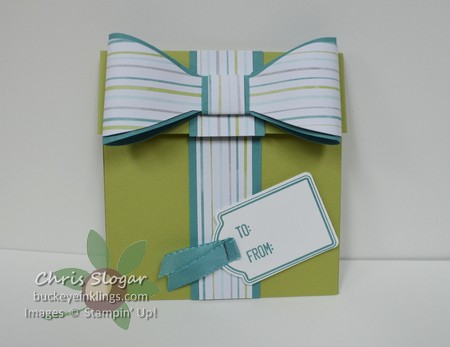
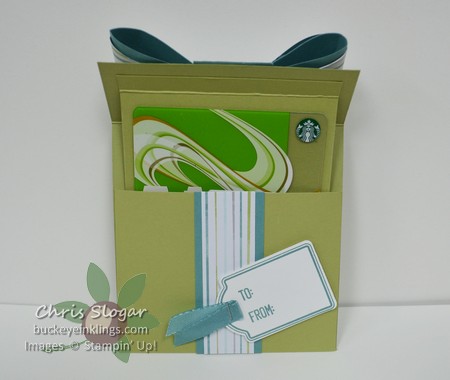
We made these in club this month, and it is not a new design, but it is my all-time favorite gift card holder.  As you open the flap, the gift card is pulled into view.

DSC_0345w

This is Lorri Heiling’s design from late last year, and she did a wonderful video on this.  Click here to go to her video.

Here is the Cherry Cobbler version we have been making in classes this fall…

DSC_1424w

Hope you give these a try.  They are on my mind because I plan to make a bunch of them today for the craft show I will be at this Saturday –  Jackson High School, 10am-4pm.

Chris_buckeye_signature_rose_final

Coffee Cup Gift Card Holder

DSC_0343w

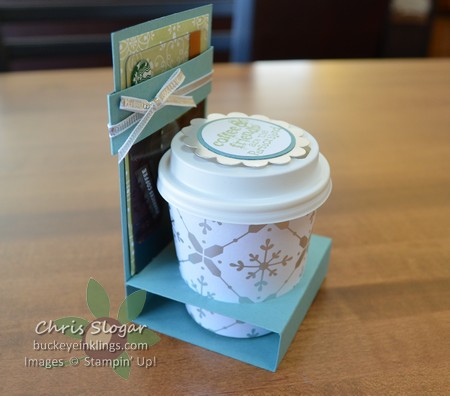
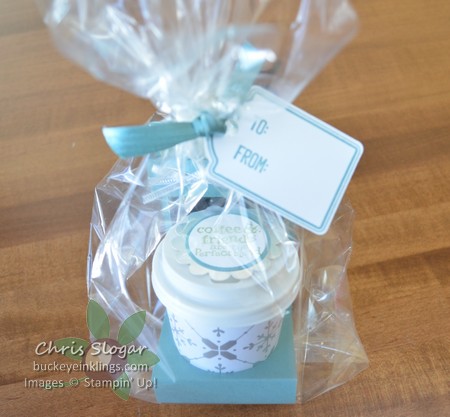
There are so many clever ways to package a gift card.  The majority involve a flat envelope, and that suits me just fine for most occasions.  However, today’s project puts a little more emphasis on the packaging, which is a present in itself.

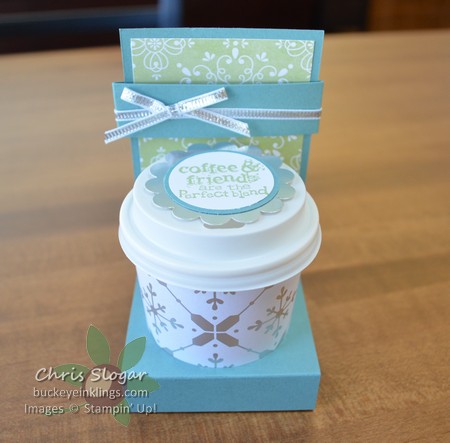
This is a 3D gift card holder that uses a 4 oz coffee cup (I get them at www.webstaurantstore.com).  They are just adorable wrapped with our designer paper!  I have shown them before, but it has been a while.

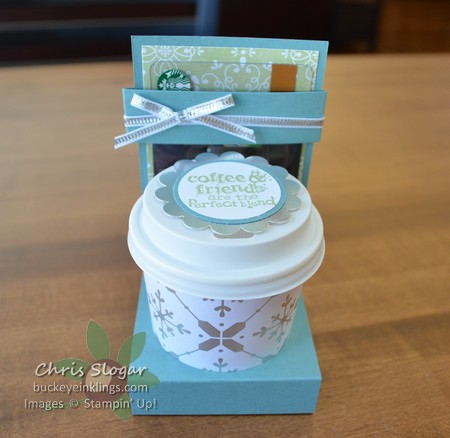
Are you wondering where the gift card fits in?  Keep scrolling…

DSC_0339w DSC_0340w

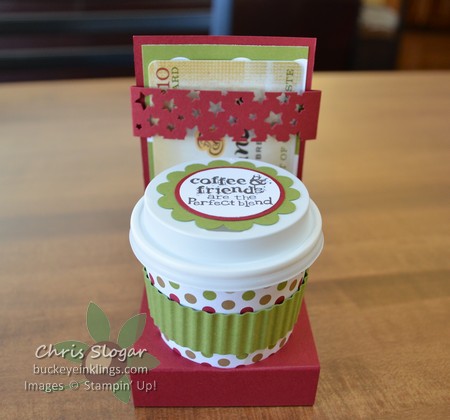
The horizontal piece is a band to hold the gift card.  Not only is this fun, it is easy; and let’s face it, no matter what your drink preference, hot cups are a universal sign of comfort and happiness – lol.  They are even more irresistible since they are miniature.   🙂

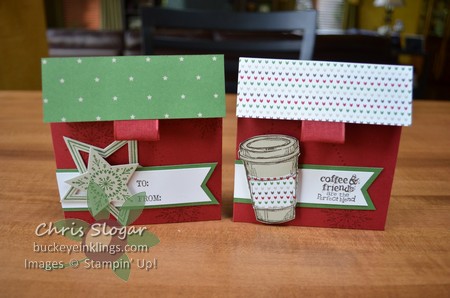
You can see another version in Cherry Cobbler below.  The band is punched with the Confetti Stars punch and I have added a sleeve to the cup.  This designer paper is retired.

DSC_0341w

I am guessing that it will take you about 10 minutes to make one of these, once you have the cups.

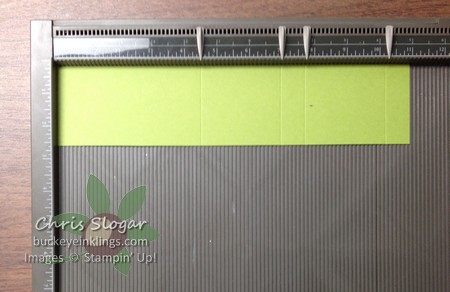
The base is 2 1/2″ x 11″, scored at 4 1/2″, 7″, 7 3/4″ and 10 1/4″.  While I have the piece on the scoring board, I make a little mark in the section that I am going to punch so that I don’t get confused when I pick it up.  That mark is 1 1/4″ from each edge, and it also helps me get the punch centered in that direction. (I hope you can see it just beyond the 7 3/4″ score.)

cupholdscorew

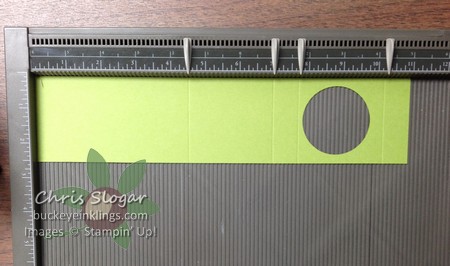
The hole for the coffee cup is made with the 2″ circle punch.  Center the punch across the width using your mark as a guide, but punch closer to the front edge of the base so that the lid will not interfere with the back of the base.

cupholdpunchw

The band is 3/4″ x 6 1/2″, scored at 2″ and 4 3/4″.  The designer paper for the background is 3 1/2″x 2 1/4″.

I am going to put chocolate in my coffee cups, but K-cups also fit.  The picture below shows how I am packaging it for easy gift-giving.

DSC_0338w

Thanks for looking!

Built for Free Using: My Stampin Blog

Chris_buckeye_signature_rose_final

Weekly Deals and Dazzling Diamond Dust

Click here to see this week’s Weekly Deals.

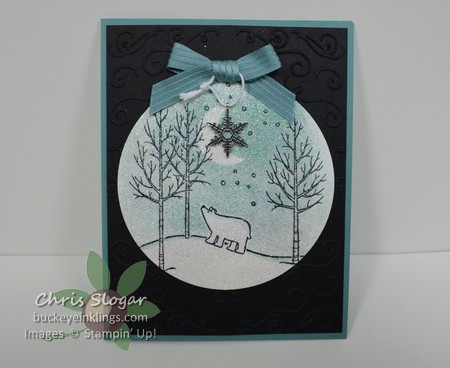
One of our club projects this month focused on the Dazzling Diamond Dust technique.  You can use this technique to create a beautiful glittery finish for your stamped images.  In our project, we used it on a “White Christmas” scene to create a wintry look.

DSC_0311w

This is a CASE of a card I saw on Pinterest by Alison Solven.  To recreate, start by stamping the scene with the “White Christmas” stamp set.  You will need two masks – one for the polar bear and one for the moon.  The polar bear mask comes in handy to mask out a section of the hill for the polar bear’s feet as you create the scene.

Once you have the trees, bear and snow stamped, put the moon-shaped mask down in the sky, and cover the polar bear with the polar bear mask.  Sponge lightly with Soft Sky and a little Lost Lagoon.  You can also add a little shadowing on the polar bear’s back and along the horizon with the Soft Sky marker.

When your scene is complete, pat your Versamark pad all over the top of the scene and sprinkle with Iridescent Ice embossing powder.  Then heat until set to get this wonderful icy finish.  Thank you so much to Alison Solven for this design!  She created a video for her card here.

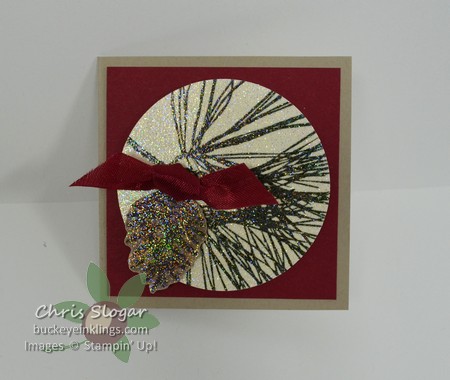
I also tried this technique on “Ornamental Pine”, and yes, it is dazzling, too!  You can see my 3″ square card below.

DSC_0317w

Have a great day!

Built for Free Using: My Stampin Blog

Chris_buckeye_signature_rose_final

Guest Stampers

You are in for a treat today!  We had Stamp Club yesterday, and several club members brought projects to share.  I asked permission to post them here, so instead of club projects today, I will share their beautiful work!  By the way, all of these are even more stunning in person – I took quick pictures and my photography skills aren’t the best, but you will get the idea.

First, from the afternoon session, Mary Jane shared these…
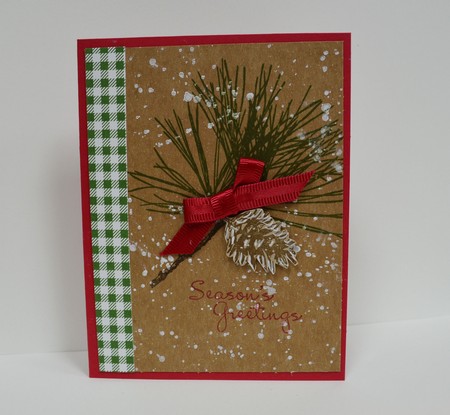
DSC_0307w

This card uses “Ornamental Pine” and “Gorgeous Grunge”.  The grunge splatter is stamped in White Craft Ink and the highlights on the pine cone are done with the Chalk Marker.  That little strip of designer paper from Trim the Tree just pulls it all together, doesn’t it?!
DSC_0306w

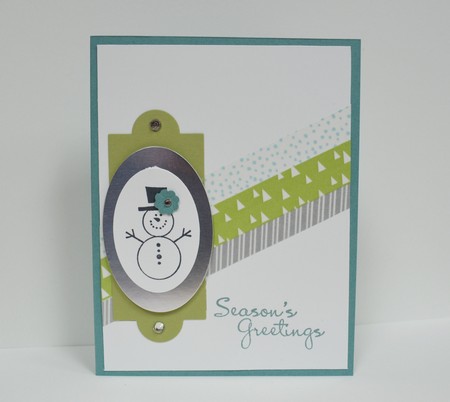
Mary Jane also shared this cute Washi Tape Card, inspired by a card Marjorie Gibson made last year.  Mary Jane’s version uses this year’s “All Is Calm” Washi Tape.

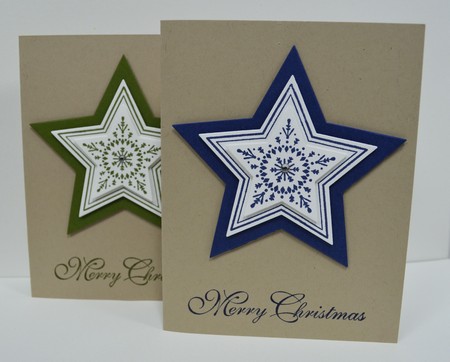
Then, from evening club, Carol shared these beautiful cards…
DSC_0318w

These are stamped with “Many Merry Stars”  from the Holiday Supplement, and the stars are layered on dimensionals.  They are made with Mossy Meadow and Night of Navy – both very crisp and elegant, but the navy was our favorite.
DSC_0320w

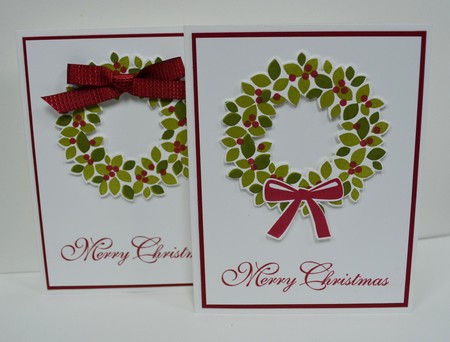
Then, the wreaths!  Can’t say enough about how beautiful the wreaths turn out!  How simple and classic these are!
DSC_0321w

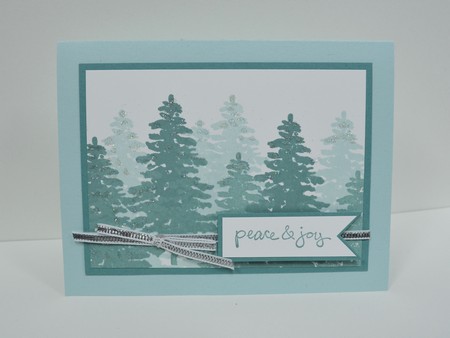
Carol’s trees are from the retired “Evergreen” set.  They are stamped in Soft Sky in the background, and Lost Lagoon in the foreground.  The two that look like a medium shade are Lost Lagoon, stamped off.  You can’t see it too well in the picture, but there is a fine dusting of dazzling diamond on the branches.  This card is much more striking in person!

Also from the evening session, Sharyn brought these gorgeous wreaths…
DSC_0322w

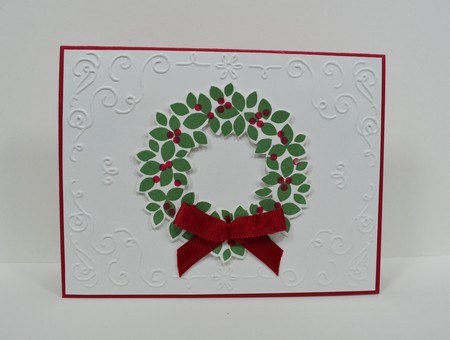
This is truly elegant – “Wondrous Wreath” is framed with the Filigree Frame embossing folder from the Holiday Catalog.  The true Christmas colors are Garden Green and Real Red, so this is also very traditional.
DSC_0323w

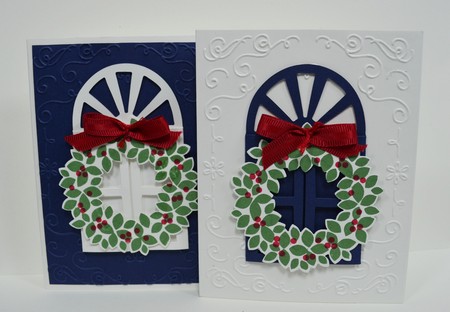
And we also loved the versions where Night of Navy was introduced.  The window shape is not from Stampin’ Up! but it does showcase the wreath beautifully.  Once again, that Filigree Frame is the perfect frame.
DSC_0324w

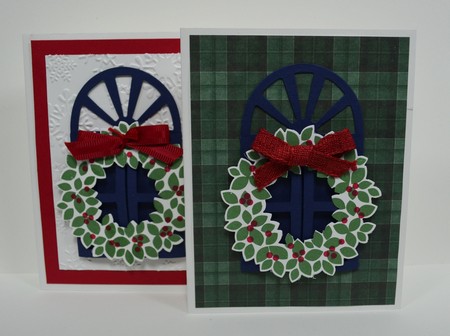
The wreath is really sharp on dark backgrounds, like the plaid, too.  Notice that some of these bows are tied without a thick knot.  Sharyn uses embroidery thread to gather the ribbon to make her bows.  The bows are pretty, and they are really nice and flat for mailing.

Thank you to my Stamp Club for sharing!  It is always so fun and inspiring to see what others are making.

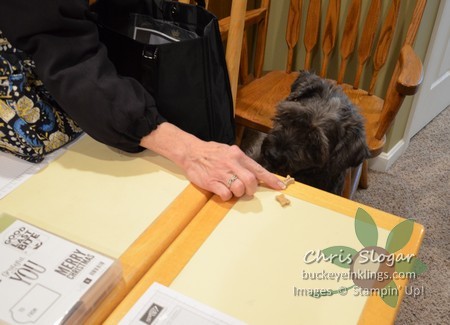
Just a side note, and since I am picture-happy today, Chip is always excited about Stamp Club, too.  Connie did not disappoint…
DSC_0327w

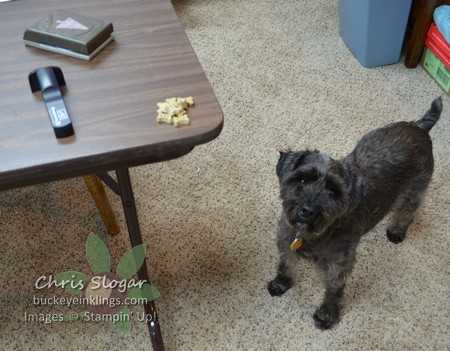
Chip got to come downstairs to visit as we were wrapping up – here he is with Connie’s hand and treats.  He is a lucky boy – Connie was here last week, too, and I have a shot of what he discovered in the other room after that visit.
DSC_0293w

I made him pose for a picture before he got the treats, and it was killing him!  And while we are talking about Chip (really rambling now!), here is what he does NOT like…
DSC_0333w

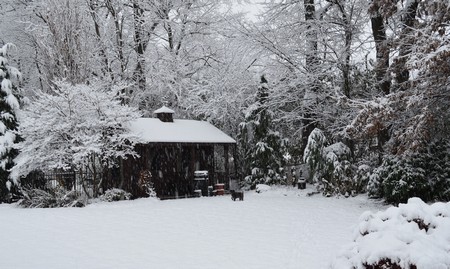
We woke up to a blanket of snow today – very pretty, but for some reason, this dog has never liked snow. My girls were so excited to play with Chip in the snow when we first got him – they were in grade school at the time.  All he would do was run back to the house.  Eight years later, he still spends as little time as possible out in the cold.

Have a great Monday!

Chris_buckeye_signature_rose_final

Holiday Home Card in a Box Video

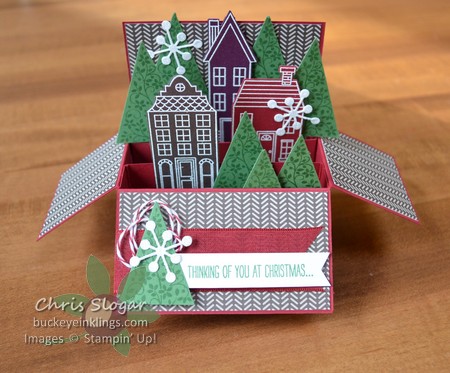
Holiday Home Card in a Box

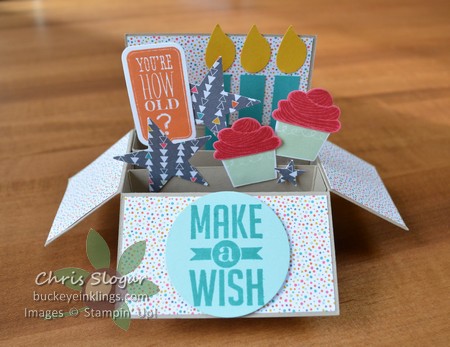
We are revisiting this Holiday Home Card in a Box today because I have had a lot of interest in it, and I have a video ready now 🙂  This gives the Do-It-Yourselfers out there a good project for the weekend.  If you are not ready to try it on your own, this is my current Featured Project, meaning that I will send you a completed Holiday Home Card in a Box and an additional base to decorate on your own with a $35 product purchase.

The supplies for this project can be found below, and they link to the store.

Built for Free Using: My Stampin Blog

I also have two pictures of the birthday version of this card that you see in the video.

DSC_0301w

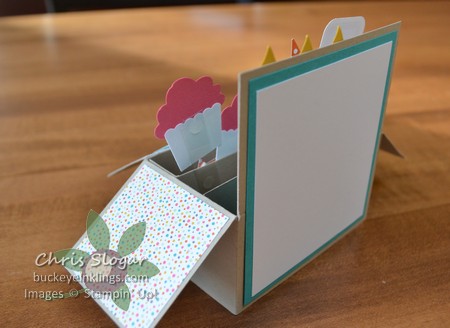
This example shows how you can use 1/2″ strips of Window Sheet to prop up elements that you would like to raise above the box top.  The cupcake on the right and the word bubble are mounted on strips of Window Sheet in this box.  The view below shows the attachment.

DSC_0302w

I used a glue dot to attach the cupcake to the Window Sheet and another to attach the strip to the divider.  You can also see the back of the box in this shot.  There is space for a message there.

This is a great card base for any occasion.  You can decorate it with the stamps and shapes that you have – the possibilities are endless.

Have a great weekend!

Chris_buckeye_signature_rose_final

Visions of Santa

DSC_0292w

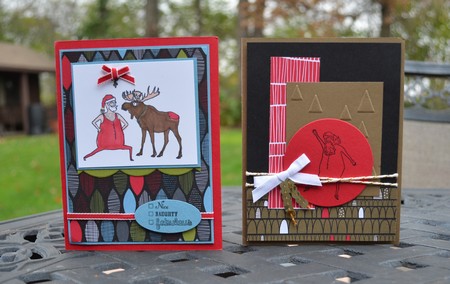
I got Happy Mail from my upline Mindy Gray yesterday, and of course I want to share.  Aren’t these fun?!  They use “Visions of Santa” from the Holiday Catalog with Santa & Co designer series paper.  The sentiments are my favorite part of this set – I will show it below so you can see them.  Hilarious!  And the images?  Well, they may not align with the visions of Santa that you have, but they definitely make it all come together!

Visions of Santa (photopolymer)     Item 135167  $15.95

Have a great day!

Chris_buckeye_signature_rose_final

WordPress theme: Kippis 1.15