Weekly Deals and a Guest Stamper

First, the Weekly Deals…and remember, shipping is FREE on any size order thru the 25th!

2013-2015 In Color Core’Dinations Item # 129958
Regular Price: $11.95 US/$14.95 CAN
Discounted Price: $8.96 US/$11.21 CAN
Large Pearl Basic Jewels Large Pearl Basic Jewels Item # 125577
Regular Price: $4.95 US/$6.50 CAN
Discounted Price: $3.71 US/$4.88 CAN
5/8 Inch Crochet Trim Victoria 5/8 Inch Crochet Trim Victoria Item # 118481
Regular Price: $6.95 US/$9.50 CAN
Discounted Price: $5.21 US/$7.13 CAN
Naturals Designer Buttons Naturals Designer Buttons Item # 127554
Regular Price: $4.95 US/$6.95 CAN
Discounted Price: $3.71 US/$5.21 CAN
Rich Razzleberry 1/4" Stitched Grosgrain Ribbon Rich Razzleberry 1/4″ Stitched Grosgrain Ribbon Item # 126876
Regular Price: $4.95 US/$6.75 CAN
Discounted Price: $3.71 US/$5.06 CAN
Pacific Point 1/4" Stitched Grosgrain Ribbon Pacific Point 1/4″ Stitched Grosgrain Ribbon Item # 126878
Regular Price: $4.95 US/$6.75 CAN
Discounted Price: $3.71 US/$5.06 CAN
Afternoon Picnic Designer Series Paper Afternoon Picnic Designer Series Paper Item # 131390
Regular Price: $10.95 US/$13.50 CAN
Discounted Price: $8.21 US/$10.13 CAN
Afternoon Daydream Kit -- Digital Download Afternoon Daydream Kit – Digital Download Item # 130861
Regular Price: $9.95 /$10.95 CAN
Discounted Price: $5.97 US/$6.57 CAN

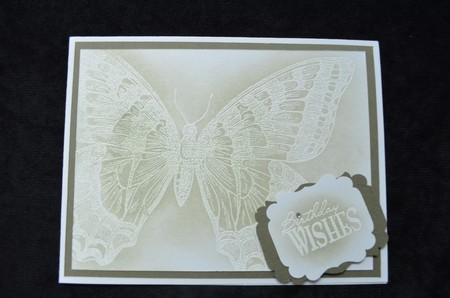
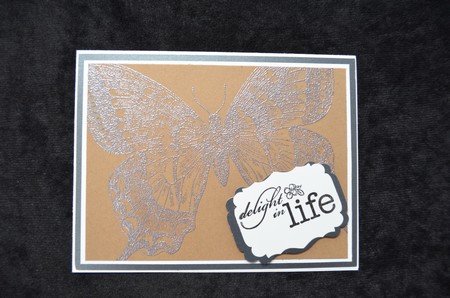
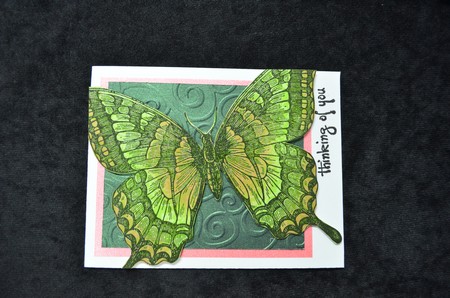
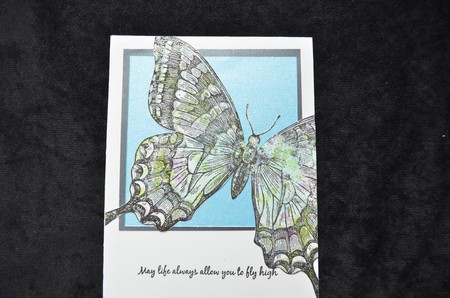
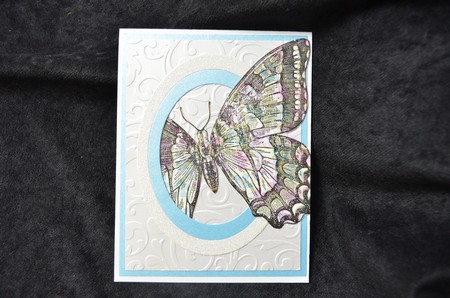
 I also want to show off these beautiful cards Jan Woitas brought to Stamp Club this month.  They all use the Swallowtail stamp, and I wish you could see them in person – the pictures don’t do them justice!
DSC_1173

The first two are heat embossed and watercolored, and I love how Jan layered the wings on the one below. DSC_1174 DSC_1175
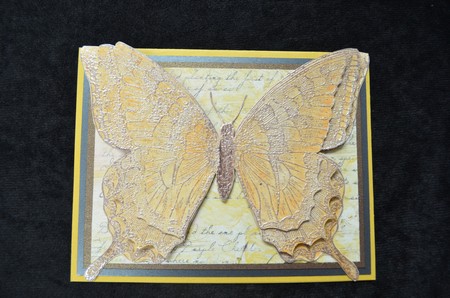
The butterfly above is embossed in white on a white background, and the color was added with a sponge.
DSC_1178

These are stamped on patterned paper, and in the card below, Jan added dazzling details to the butterfly wings.  It is really a striking effect, but unfortunately, the picture doesn’t show that detail.
DSC_1177 DSC_1180

This one is perhaps the simplest of the group, but still a striking embossed image!  Thanks for sharing, Jan!!

Chris_buckeye_signature_rose_final

One Flower, Two Challenge Cards

DSC_0074w

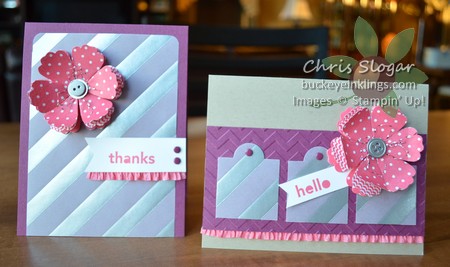
I didn’t know that I would be featuring a retired set today; it just worked out that way…”Thanks and Hello” (Item 131459, $8.95) is on the Retired List, released today and posted here.  Shop all week with FREE shipping on any size order to get your favorites before they are gone – ALL items on the Retired Lists, stamps and accessories, are only available while supplies last.

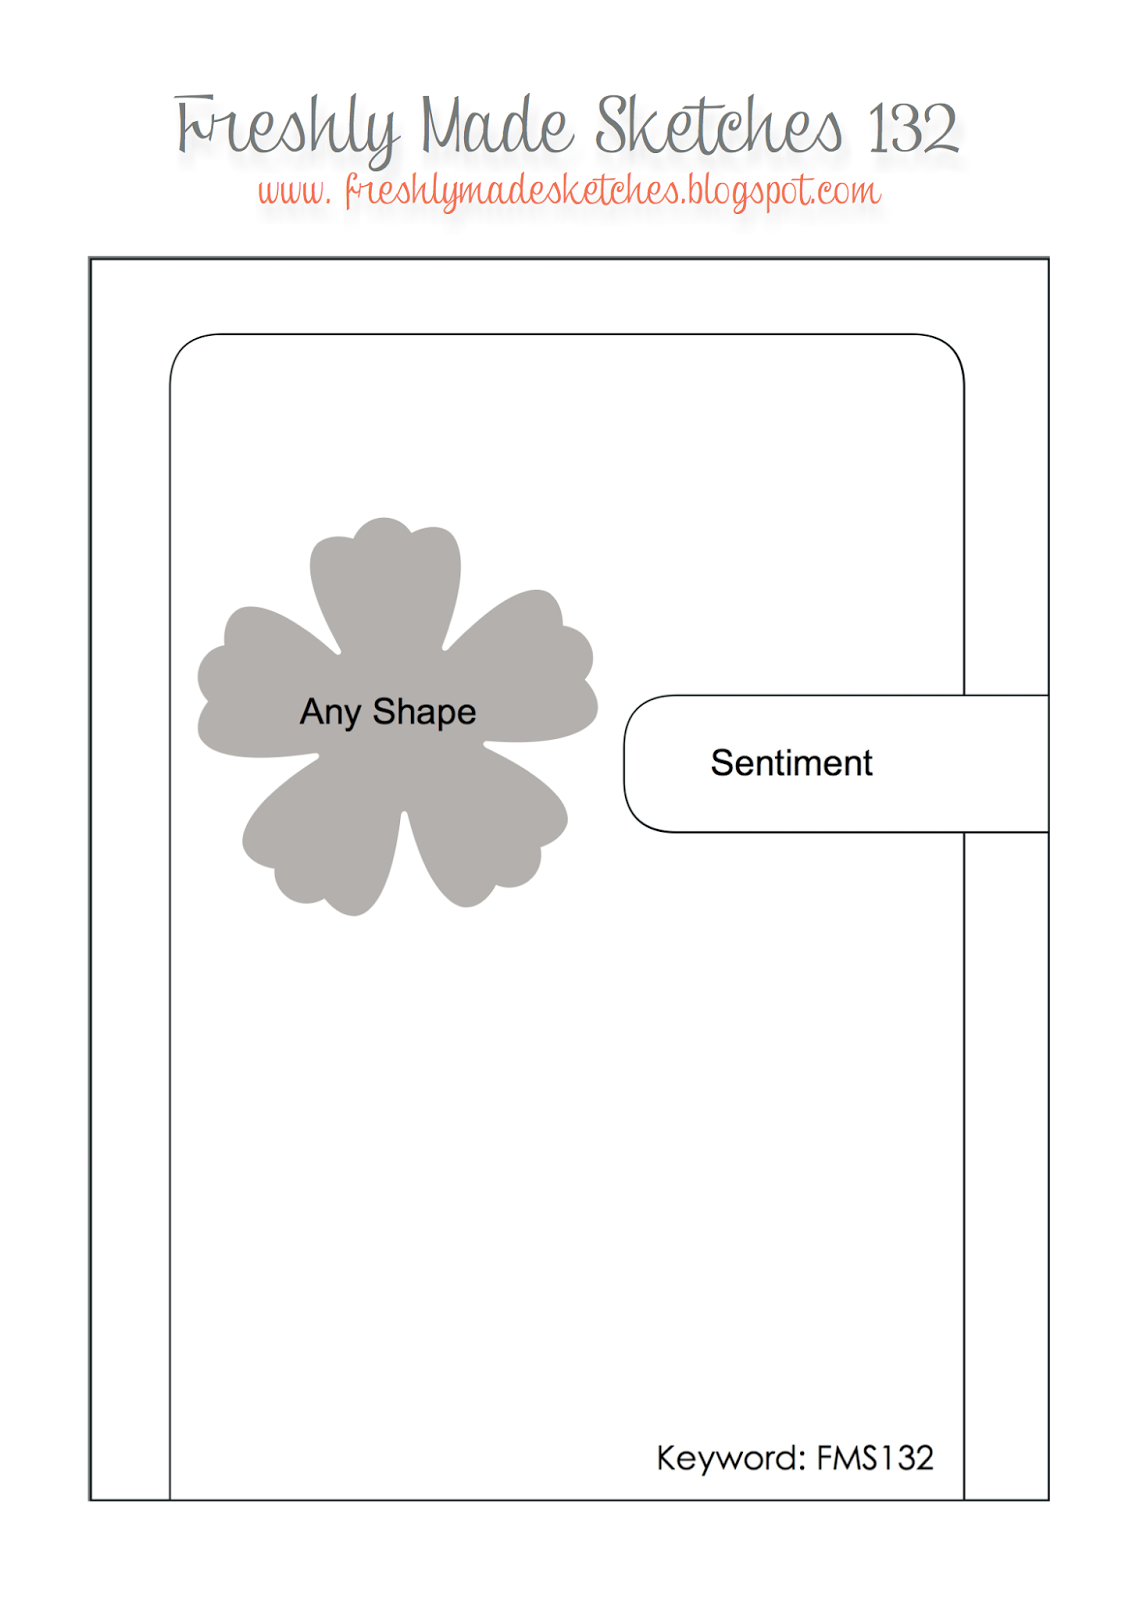
“Freshly Made Sketches” and “Create with Connie and Mary” both show a flower in their challenge sketches this week, although any shape could be substituted.  Here are the sketches:

CCMC299

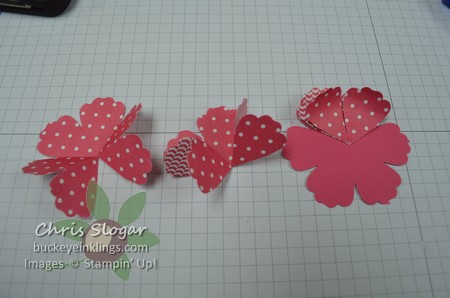
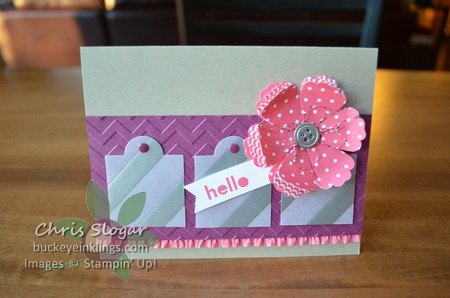
Both sketches got me thinking about flower shapes, and I really like my Blossom Punch flower as a big flower element.  However, sometimes it is just too flat.  So I played around with folds until I created something with more dimension.  To make this flower, you need to punch the shape three times out of designer paper, and once from solid cardstock.

DSC_0062

Score each of the three designer paper flowers in half three times, and snip one of the scores to the center of the flower.  Accordion fold the petals onto each other until it looks like the shape with two petals that has been attached to the cardstock flower on the right.  Repeat twice to fill in the whole flower.

DSC_0063

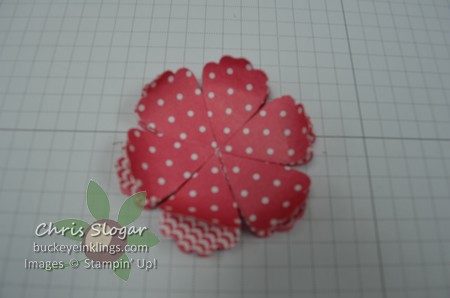
The petals pop up a bit on their own because of the accordion fold, and you can still curl the ends.  The petals look separated from each other, and I love to show off both sides of the designer paper!

DSC_0082w

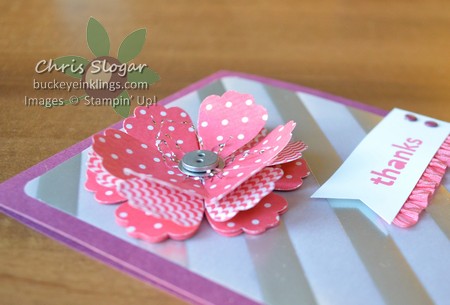
It is hard to make out in the pictures, but each flower has a length of a silver strand applied haphazardly with a glue dot behind the flower center.  I pulled that strand out of a 12″ length of our Silver Baker’s Twine.  It doesn’t take much, but it does add some nice texture without extra bulk!

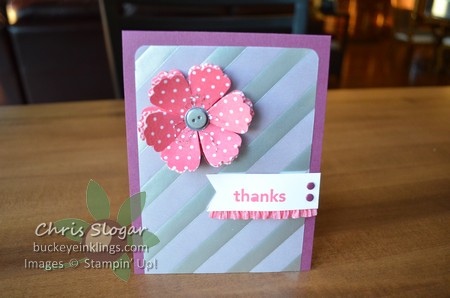
My Freshly Made Sketches card is very simple.

DSC_0079w

You can see more entries for this sketch at Freshly Made Sketches.

My Create with Connie and Mary card is shown below.

DSC_0078w

Do you recognize the shape I cut from vellum?  It is the long Apothecary Accents shape with semi-circles on each end.  I cut that shape in half to make my pieces.  You can see more designs for this sketch at Create with Connie and Mary.

Chris_buckeye_signature_rose_final

Retired Lists

MainAd_RetiredListFreeShipping_demo_April2114_US

The Retired Lists for both Stamps and Accessories are available in pdf form below.  All products, including stamps this year, are only available while supplies last.  Now is a great time to get your favorites before they retire without having to pay for shipping!!

If you order during the FREE shipping promotion, please use Hostess Code KENFQ9QK.  If the combined orders earn Hostess Benefits, all participants will be eligible for a share of them.  If your order exceeds $150 product, do not use a Hostess Code – you will receive your own Hostess Benefits.

As always, if you prefer that I place your order, please call or email your selections, and I will be happy to submit the order.

Please do not hesitate to contact me if you have any questions.

Download (PDF, 113KB)

Download (PDF, 118KB)

Chris_buckeye_signature_rose_final

Free Shipping April 21-25!

demoheader_freeshipping_demo_4.18.2014-4.25.2014_US_CA

Stampin’ Up! is offering FREE Shipping on everything (excluding expedited orders) April 21-25!  The Retired List will also be available April 21, so this will be a great opportunity to get the retiring items you want.  I will post the Retired List as soon as it is available.

Please note…there is a change this year concerning the Retired List.  ALL products (stamp sets and accessories) will only be available while supplies last.  In the past, stamp sets have been available right up thru the end of May, but Stampin’ Up! is not promising that this year.

If you order during this promotion, please use Hostess Code KENFQ9QK.  If the combined orders earn Hostess Benefits, all participants will be eligible for a share of them.  If your order exceeds $150 product, do not use a Hostess Code – you will receive your own Hostess Benefits.

As always, if you prefer that I place your order, please call or email your selections, and I will be happy to submit the order.

Please do not hesitate to contact me if you have any questions.

Have a great weekend!

Chris_buckeye_signature_rose_final

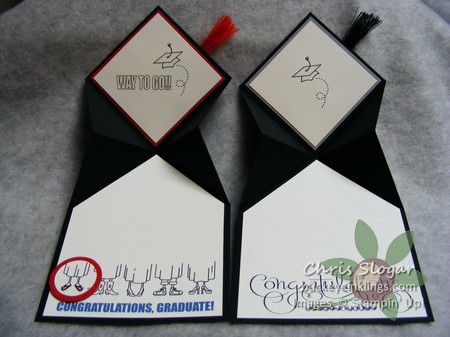
Graduation Cap Fun Fold

DSC_0041w

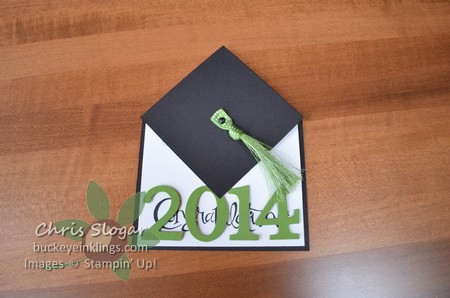
Every year about this time, we realize our need for graduation cards, and this has been one of my all-time favorites.  I was making it even before we had the diagonal scoring plate.  At that time, we had to measure to certain points and then carefully score between them.  Not anymore!  Let me show you how easy it is with the diagonal scoring plate.  And yes, these will be in Card Buffet at the end of the month.

Also, before I get too bogged down with the directions for this card, I expect to post again later today, with an announcement from Stampin” Up! about a 5-Day Mystery Promotion, so please check back later for those details.

DSC_0026

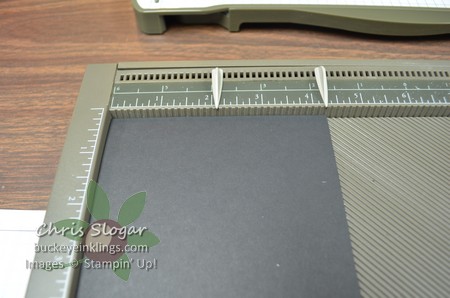
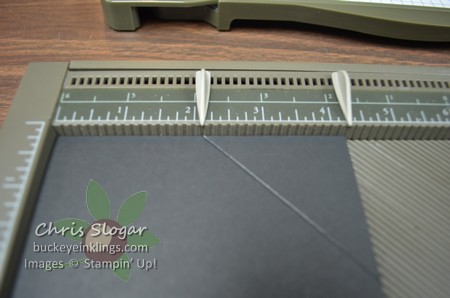
Start with a 4 1/4″ x 11″ piece of cardstock, scored and folded in half at 5 1/2″.  Put the fold along the top edge of the scoring tool.

DSC_0028

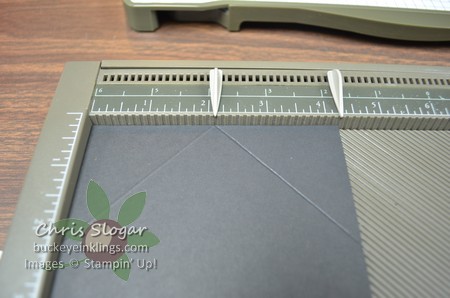
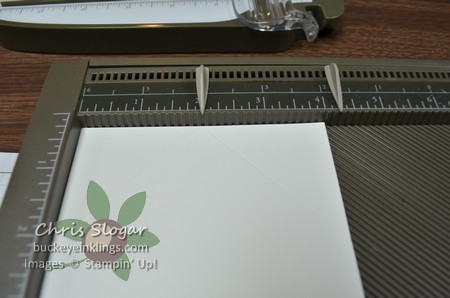
Score along the diagonal from the 2 1/8″ mark.  You have to use more pressure than usual to get the impression through both layers.

DSC_0029

Flip the cardstock and make the same score on the other side.  In the photo above, the score on the left is the first score.

DSC_0030

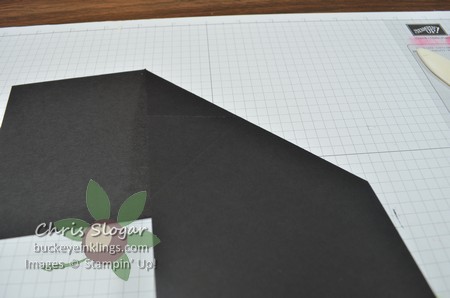
Open up the cardstock and use your bone folder to crease these diagonal scores and the original fold at 5 1/2″.  The crisper these folds, the easier this card will take shape!

DSC_0031

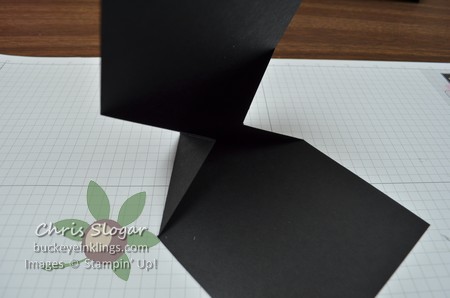
Once you have the folds nice and crisp, the horizontal center fold can be pushed inward to make the pointed end of the card.

DSC_0032

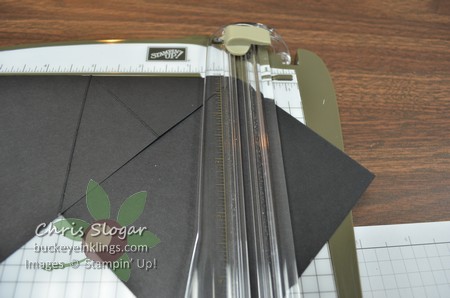
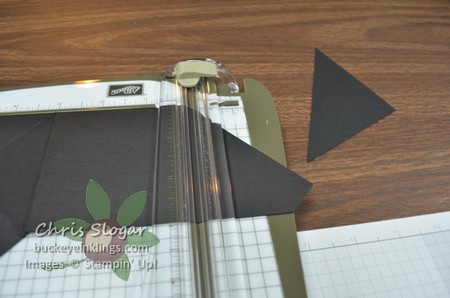
To finish the cap shape on the card front, lay your card on your trimmer as shown above and cut off the first corner of the card front.

DSC_0033

Fold along the other diagonal and repeat.

DSC_0034

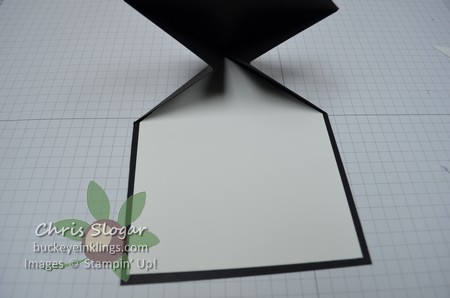
To make a white liner, I start with a 4″ x 5 1/4″ piece of Whisper White and score on the diagonal, starting at 2″ on each side.  Once again, make the first score, then flip the cardstock and make the second score on the back.  Use those score lines as a cutting guide, and you will have a piece that fits nicely into this unique shape. DSC_0035

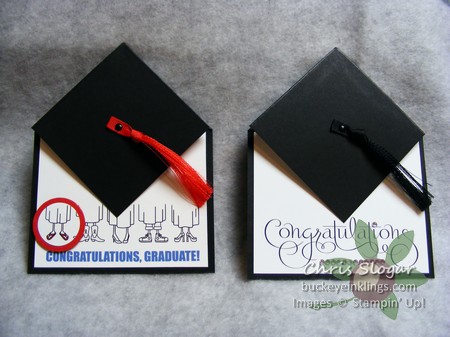
At this point, you can decorate as you like.  I always put a tassel on the top of the cap, made by fraying a length of ribbon.

DSC_0036

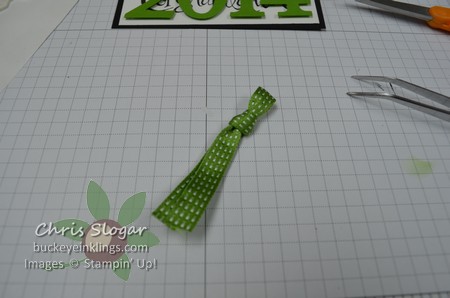
Start with an 8″ length of ribbon, knotted as shown, creating two “tails”.

DSC_0037

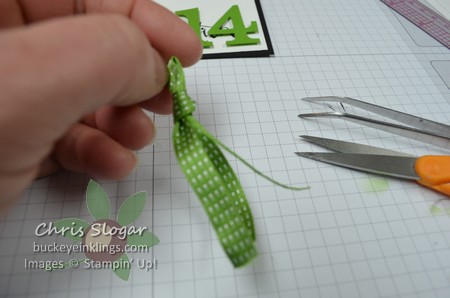
There is a binding on the ribbon that runs along each edge.  Trim off that binding, up to the knot.

DSC_0038

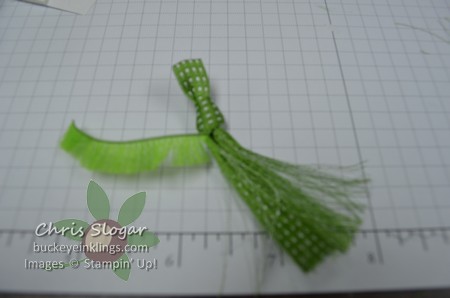
Then separate strands that run lengthwise from the strands that run across the width of the ribbon.  Trim away the other binding and cross-strands.  Repeat on the other tail to create the tassel.

Here are some other ideas, from past years.  The images were printed from MDS on both of these samples.

DSCF5116 DSCF5121

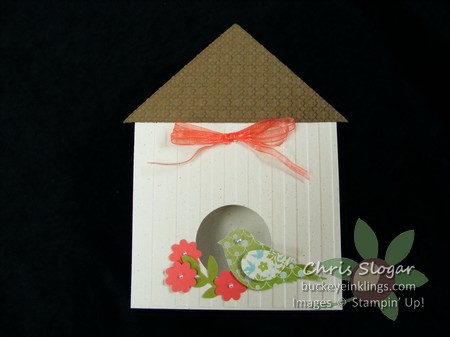
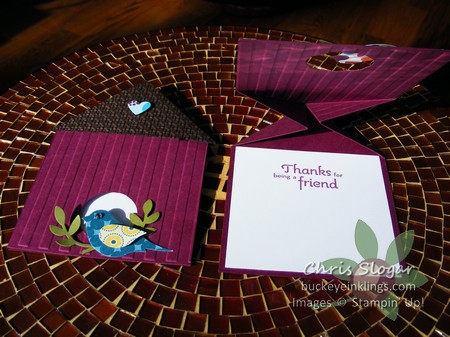
You can use the same technique to make these little house shapes, too.

DSCF5919

DSCF5708

I started with a narrower card base, with diagonal scores from the halfway point on the width so that with roofs, these would fit into a standard envelope.

Have a great weekend, and Happy Easter!

Chris_buckeye_signature_rose_final

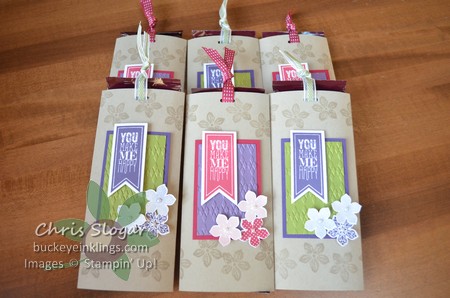
“You Make Me Happy” Chocolate

DSC_0021w

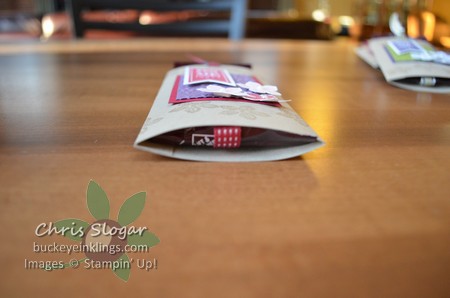
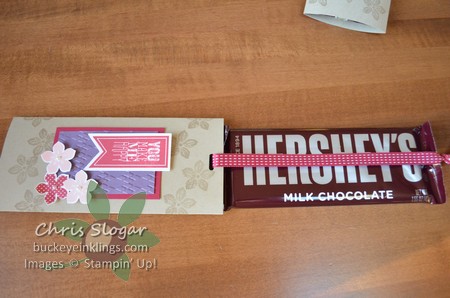
Seems appropriate that these Hershey bar sliders say “You Make Me Happy”.  This is a quick little favor that you could do for any occasion with your choice of colors and stamps.

DSC_0022w

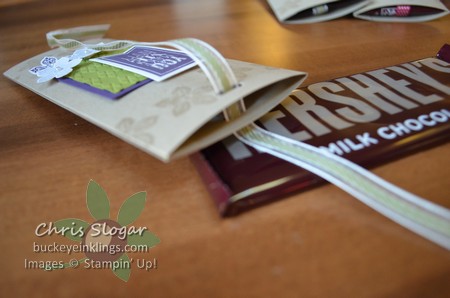
The ribbon wraps around the bottom of the candy bar so that it can be use to pull the candy out of the sleeve.

DSC_0023w

The sleeve is a 6″ square of cardstock, scored at 2 3/4″ and 5 1/2″.  I used a retired punch for a slot on the front and back of the sleeve, but you could also use a small circle.

DSC_0024w

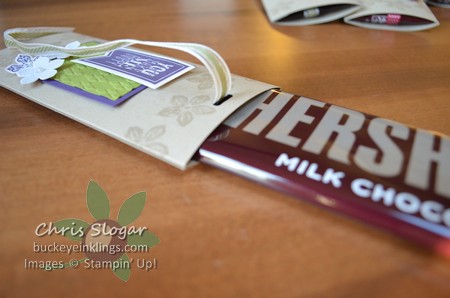
When the sleeve is decorated and ready to load, simply thread the ribbon through both holes and push the candy down into the sleeve.

DSC_0025w

I made a simple knot at the top to finish it off.  The greeting is from Perfect Pennants, cut with the coordinating framelits.  The flowers are from the Petite Petals bundle.  Both of these sets can be found in the Occasions Catalog – that’s the coral one that says”Celebrate the Everyday” on the cover 🙂

Chris_buckeye_signature_rose_final

Coming Soon…Project Life!

Today I want to share this exciting news about Stampin’ Up!’s new product line that will simplify scrapbooking.  Pocket scrapbooking is an easy approach to memory keeping, and of course, Stampin’ Up! is the leader in coordination…combined they will provide a quick and cost-effective way to create beautiful albums.  Here are the details from the Stampin’ Up! blog:


We are so so so excited to let you know we’ve partnered with the amazing Becky Higgins to bring you the real deal—authentic Project Life products, now in exclusive Stampin’ Up! colors and designs. If you’ve somehow missed the Project Life craze and are wondering what it’s all about, we’ll fill you in: it’s a super simple, totally affordable way to get your photos into albums: you just slip your photos into Photo Pocket Pages and add designed cards. It’s a back-to-basics approach to documenting your life. In a nutshell, it’s all about spending more time making memories and less time scrapbooking them.

You’ll be able to order a selection of Project Life products starting May 1! And with the launch of our new annual catalog on June 2, you’ll be able to buy from our complete line of Project Life products.

Can’t wait that long? Stampin’ Up! demonstrators will be able to order the limited selection starting April 21. So if you’re a demonstrator make sure to check the demonstrator website that day; if you’re not a demonstrator, sign up and you can order the products early too!

Here are the items you’ll be able to purchase on May 1:

Chris_buckeye_signature_rose_final

Weekly Deals and Card in a Box Cards

Here are this week’s Weekly Deals:

Venetian Romance Designer Series Paper Item # 130144
Regular Price: $10.95 US/$13.50 CAN
Discounted Price: $8.21 US/$10.13 CAN
Needlepoint Border Textured Impressions Embossing Folders Needlepoint Border Textured Impressions Embossing Folders Item # 129383
Regular Price: $7.95 US/$9.95 CAN
Discounted Price: $5.96 US/$7.46 CAN
Adorning Accents Edgelits Die Adorning Accents Edgelits Die Item # 125595
Regular Price: $9.95 US/$11.95 CAN
Discounted Price: $7.46 US/$8.96 CAN
Night Of Navy 1/4" Stitched Grosgrain Ribbon Night Of Navy 1/4″ Stitched Grosgrain Ribbon Item # 126874
Regular Price: $4.95 US/$6.75 CAN
Discounted Price: $3.71 US/$5.06 CAN
Natural 5/8" Chevron Ribbon Natural 5/8″ Chevron Ribbon Item # 132982
Regular Price: $6.95 US/$8.95 CAN
Discounted Price: $5.21 US/$6.71 CAN
Anywhere Glue Sticks Anywhere Glue Sticks Item # 104045
Regular Price: $3.95 US/$5.50 CAN
Discounted Price: $2.96 US/$4.13 CAN
Outer Space Stampin' Around Jumbo Wheel Outer Space Stampin’ Around Jumbo Wheel Item # 126938
Regular Price: $8.50 US/$10.50 CAN
Discounted Price: $6.38 US/$7.88 CAN
Floral District Photobook Template -- Digital Download Floral District Photobook Template – Digital Download Item # 127211
Regular Price: $17.95 US/$19.95 CAN
Discounted Price: $10.77 US/$11.97 CAN


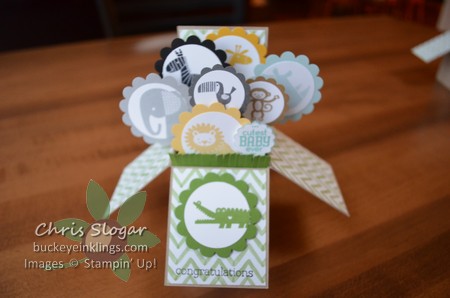
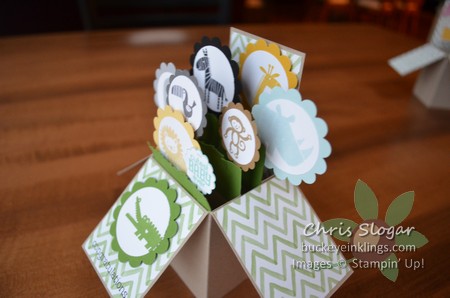
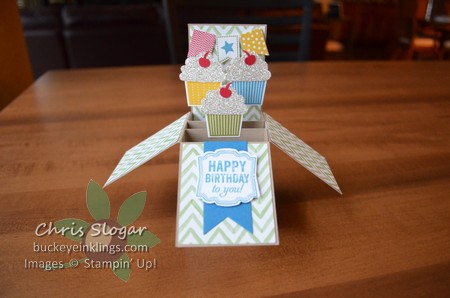
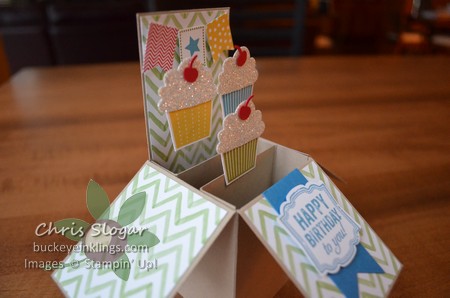
I also have two more Card in a Box Cards to show before I move on to something else.  These have been really fun!  I encourage you to try them with any stamps and punches that you have.  I have posted more samples and a link to directions over the past few days.

Also, I mentioned in Club that I had mailed one of these with just a regular stamp.  I did hear that it made it to its recipient that way and in good shape.

DSC_0013w DSC_0015w DSC_0011w DSC_0012w

Chris_buckeye_signature_rose_final

April Club Projects – Card in a Box and Easter

Flowerbox5

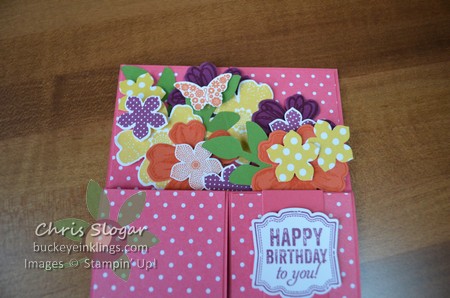
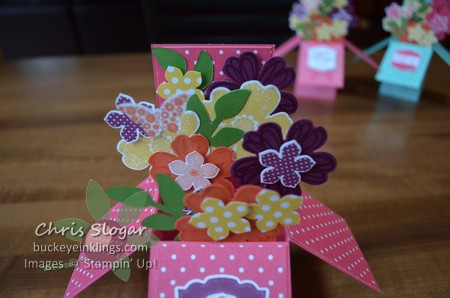
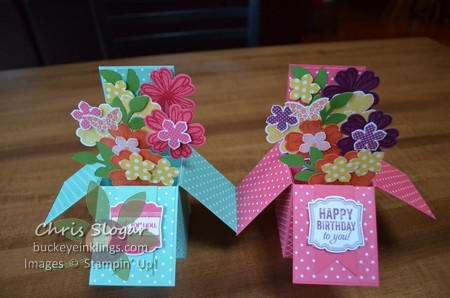
Your recipient will never expect this flat card to pop up into a little flower arrangement for display.

Flowerbox4 Flowerbox2 Flowerbox3

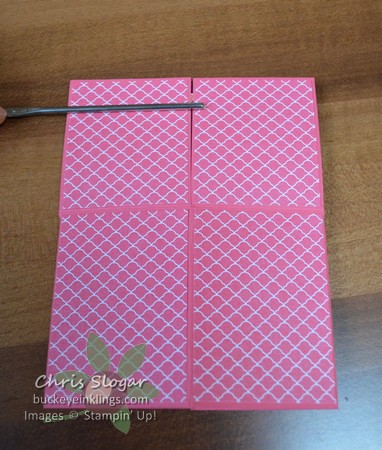
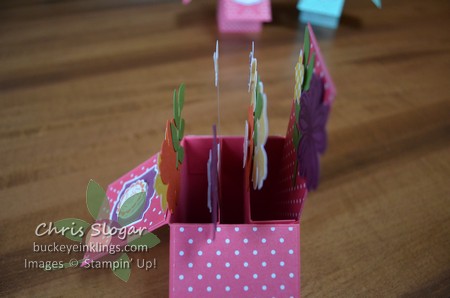
This is one of the Card in a Box cards we made yesterday in Stamp Club.  The construction of the box is easier than it looks, and I followed the directions at splitcoaststampers.com for this box that folds flat to fit in an A2 envelope (under Variations).  You can see those directions here.

Flowerbox1

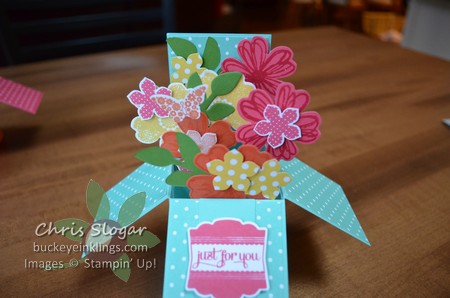
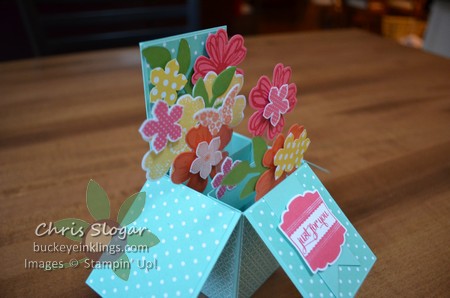
We made them in two colors – here is a closer look at the Coastal Cabana version.

Flowerbox6 Flowerbox7

In either color, most of the flowers are attached directly to the cardstock – the exceptions are the butterfly and the flower that are attached to the first divider.  Those are attached with glue dots to 1/2″ strips of Window Sheet, which are attached to the divider with glue dots.

For more ideas, you can see the Card in a Box designs that I posted last week here.

DSC_0008w

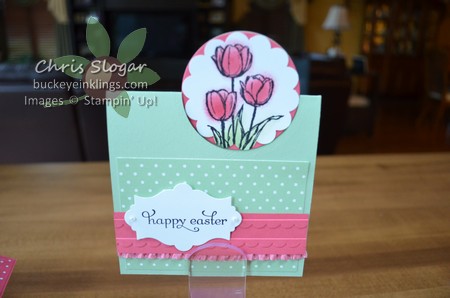
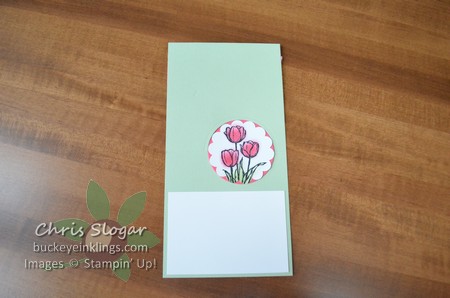
We also made a flat card, a CASE of a card I saw by LeeAnn Greff.

DSC_0002

Here is what is looks like opened up.  I used a circle framelit to cut half a circle in the card, creating the pop up semi-circle shape where the tulips are mounted.  Here’s how to make the base:

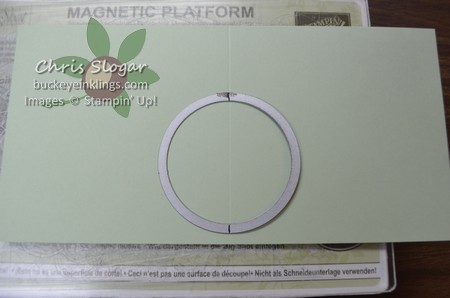
DSC_1184

The card base is 8 1/2″ x 4 1/4″, scored in half at 4 1/4″.  I lined up the middle of the 2 3/8″ circle framelit with the score line.

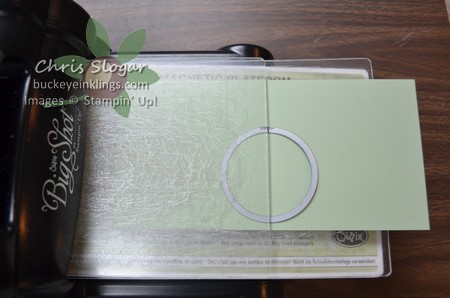
DSC_1185

To only cut half, I aligned my acrylic plate with the same score line so that pressure would only be applied to that point.

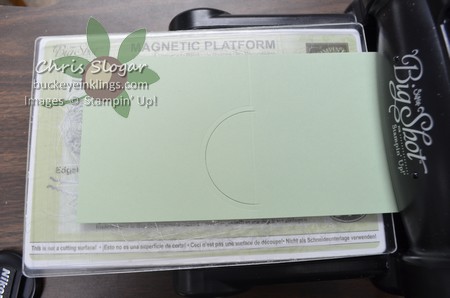
DSC_1186

This is the cut that results.  I folded along the score, except at the circle to create the pop-up section.

DSC_0009w

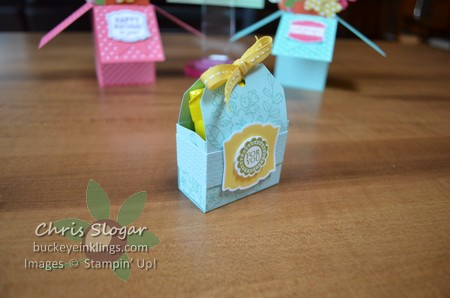
And finally, this cute favor holds a little Reese’s egg, but you can modify the length of the wrap to fit other treats.  The wrap piece measures 2″ x 6 1/2″, scored at 2 3/4″ and 3 3/4″.  Each end of the wrap is punched with the Angled Tag Topper.  The end pieces are 1 1/2″ squares, scored on two opposite sides at 1/4″.  They are attached to the wrap with sticky strip.

Thank you for checking out my club projects!  Club meets once/month on Sunday, and there is still a permanent spot available in each of my club sessions – 2 pm and 6:30 pm.  We are just getting into our new session.  If you join in May as a member, you can still receive a free stamp pad and Hostess benefits at one meeting.  If the spots are not taken by a permanent member, they will be open to guests.  Contact me for more details.

Chris_buckeye_signature_rose_final

Three Spree for PP190

Paper Players PP190

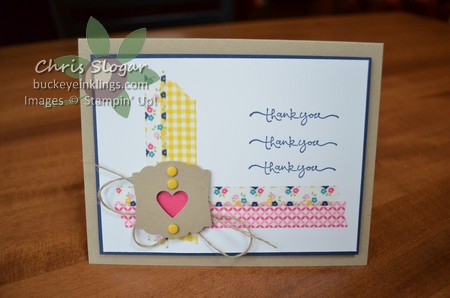
This week’s Paper Players challenge requires the use of three of anything.  My original thought was to have three greetings, and “thank yous” make a great repeated greeting.  I also ended up with two more groups of three as well.  Can you find them?  So I have three groups of three – it must be a natural tendency for me to work with threes!

This card goes together quickly – just start with some lengths of Washi Tape on a Whisper White mat.  Add a greeting and the punched shape (punch the little heart first, then the Artisan Label).  I used a 1″ Melon Mambo circle with sticky strip on the back to hold down my loops of Linen Thread.  The label punch is mounted with dimensionals.

The other “threes” are the Candy Dots and the loops of Linen Thread. You can see more entries into this challenge at The Paper Players.

I have a guest spot available in each session of my Stamp Club on Sunday, 2 pm or 6:30 pm.  Guests can either pay $10 for the meeting and projects, or order $25 product.  One of our projects this month is a floral Card in a Box using the construction shown in yesterday’s post.  Please contact me if you would like to join us.  Here’s a little tease of what that project will look like, closed up (lol) – they fold amazingly flat!!

Flowerbox5

Have a great weekend!

Chris_buckeye_signature_rose_final
WordPress theme: Kippis 1.15