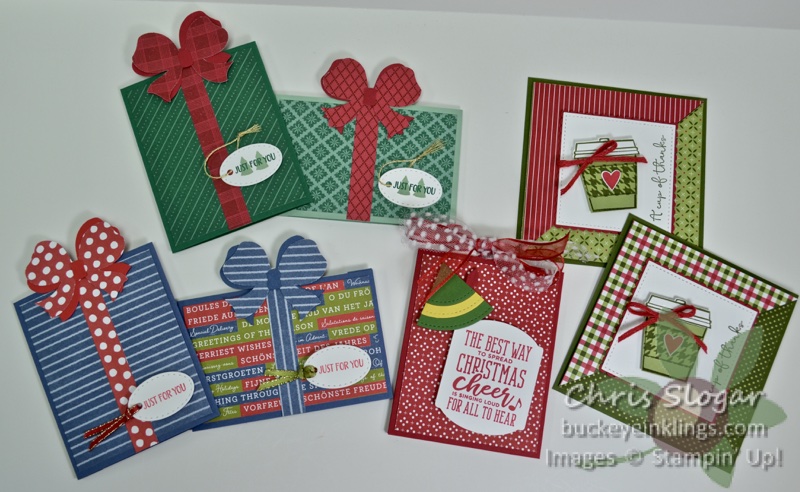
Since gift cards have become a typical gift, we need lots of ways to dress them up! Last night’s Facebook Live presented a few, and I have the pictures and details to share with you today.
This post is meant as a supplement to last night’s Facebook Live. Please click here to see the video – and please join the Buckeye Inklings Stampers Group on Facebook to get notifications of all of my live videos.
I also have a YouTube channel with many different videos from what you will see on Facebook. Thank you for any support that you can give in these platforms and in the online store. I need your help to continue to bring you new ideas!
Now to the projects…
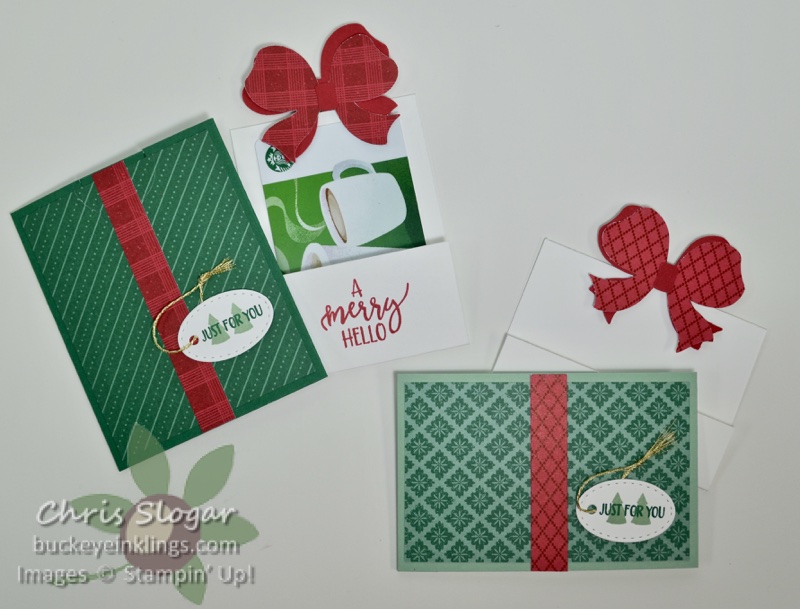
The bows of the gift boxes pull up a folded insert where you can tuck a gift card. I made the gift box in two orientations. The ones shown above use paper from the ‘Tis the Season Collection, and the ones shown below use Trimming the Town designer paper.
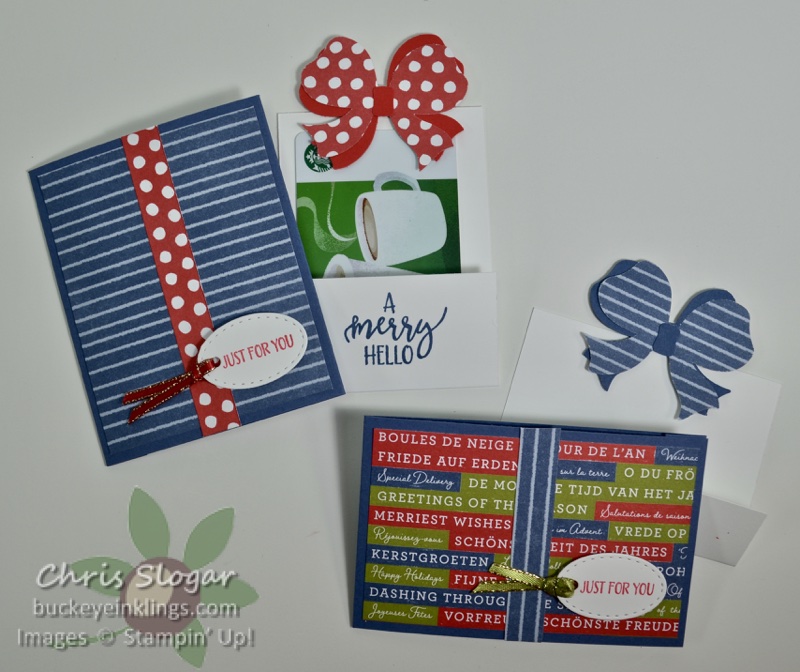
The bow is mounted on dimensionals, making it easy to slide over the top of the bases. This also prevents the insert from sliding through the base piece, which is not closed at the bottom. Dimensions are as follows:
Taller Present
- Cardstock 4″ x 7″, scored at 3 1/4″, 6 1/2″
- Thick Whisper White 2 3/4″ x 5 1/4″, scored at 3 3/4″
- Designer Paper 3″ x 3 3/4″ and 1/2″ strip
- Cardstock and Designer Paper for bow
Wider Present
- Cardstock 2 3/4″ x 9″, scored at 4 1/4″, 8 1/2″
- Thick Whisper White 3 1/2″ x 3 1/2″, scored at 2 1/2″
- Designer Paper 2 1/2″ x 4″ and 1/2″ strip
- Cardstock and Designer Paper for bow
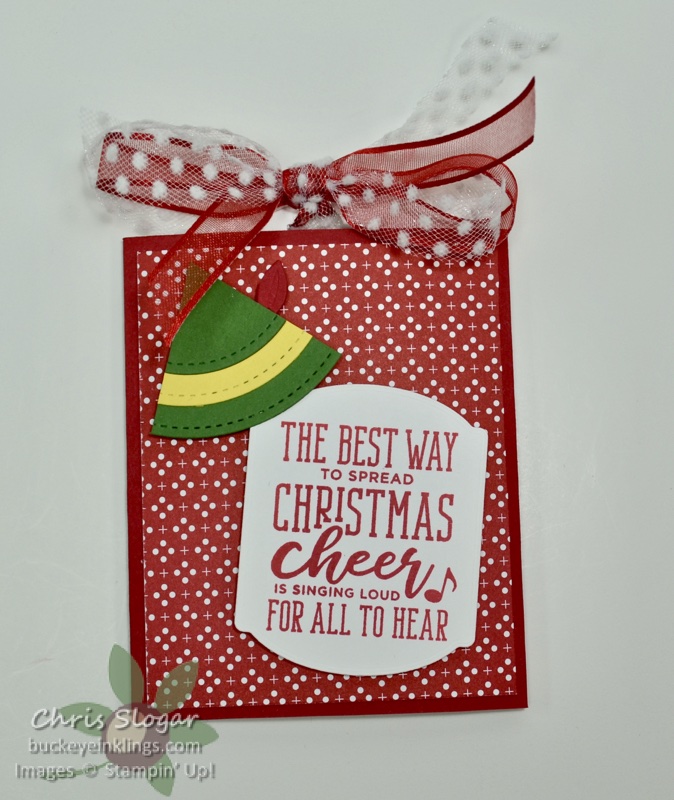
I modified the insert piece for my Elf version. The wrap is made the same way as the Taller Present above, but the Whisper White piece is longer (2 3/4″ x 6″, scored at 4 1/2″). The top edge is punched with the Fancy Tag Topper Punch.

I placed some Real Red cardstock under the insert piece so that you could see the punched top edge. The 2 3/4″ width of cardstock does not fit into the track of the punch, but if you slide it gently over the top of the track and into the punch mechanism, you can still punch the shape on this width. A little trimming finishes the top edge, and this is a great place to tie a bow.
The second type of gift card holder I presented last night was this fun fold. It uses a piece of designer paper that is folded to reveal both sides on the front.

The designer paper measures 4″ x 12″, scored at 4″ and 8″. The Mossy Meadow base piece measures 4 1/4″ x 4 1/4″. The scalloped square is 2 3/4″, and the stitched square is slightly smaller. The YouTube video below shows this gift card holder only. If you are receiving this post in an email, click here for the YouTube video.
Thank you for checking out my projects! If you need any of our fabulous products, please click here for the online store, or use the carousel below to go directly to a product used today. Again, thanks so much for any support you can give me on Facebook or in the online store!
Place a $35 order with Host Code EGS7SXBU in December, and I will send you a package of Stampin’ Dimensionals and a handmade card (orders over $50 will also receive a pack of Mini Stampin’ Dimensionals). This is my way of sharing the Stampin’ Rewards with you – I appreciate your business!!
