Peaceful Prints Projects

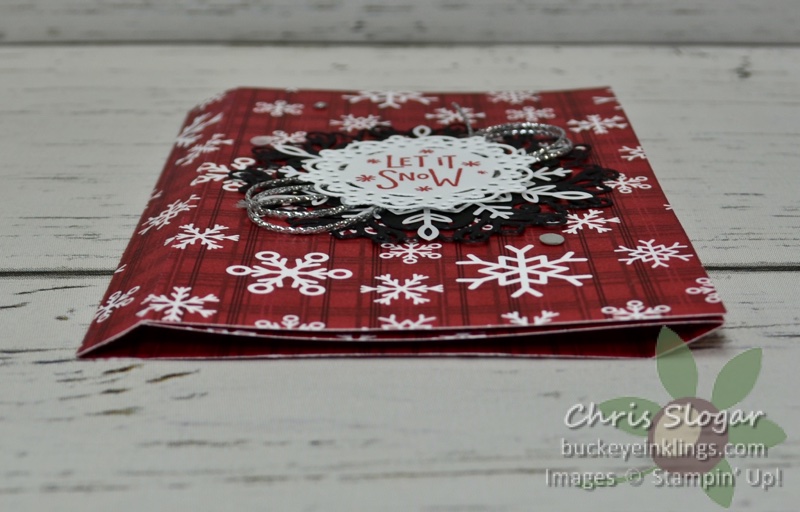
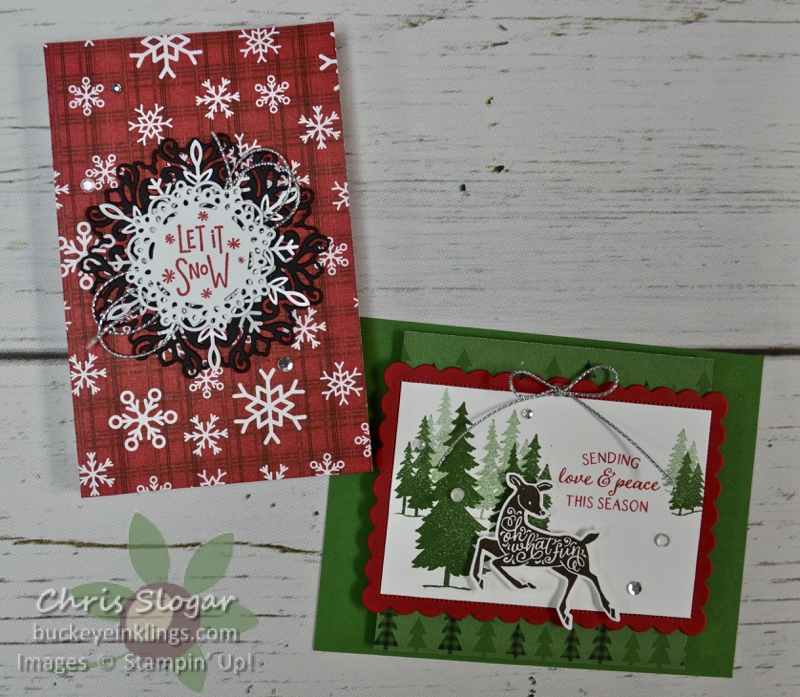
With just a week left of Sale-a-bration, I chose to use one of our beautiful Sale-a-bration paper collections for my projects in last night’s Facebook Live. It is called Peaceful Prints, and it is free with a $50 purchase through the end of September. It has elements that coordinate with the Peaceful Deer bundle from our current Mini Catalog.

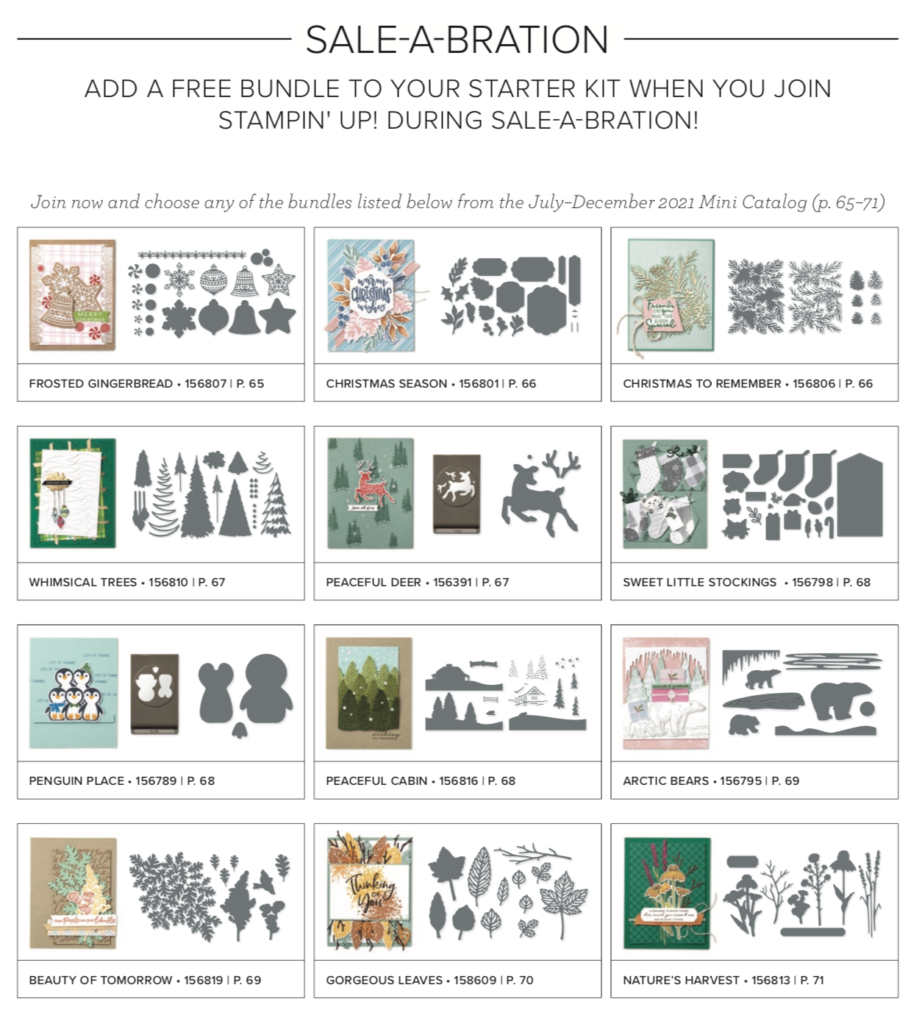
Peaceful Deer is one of the bundles that you can choose for free with a Starter Kit during Sale-a-bration. I mentioned that I would post the full list of these bundles today…

You can choose any of these bundles for no extra cost with the Starter Kit during Sale-a-bration. Buying the Starter Kit gives you Demonstrator status, which means a discount of at least 20% on future orders. There is no obligation to purchase anything beyond the Starter Kit, and no obligation to sell.

The Starter Kit costs $99 + tax (shipping is free), and you get your choice of products up to $125 along with the bundle. Please email me at stampyourworld@gmail.com if you would like to discuss this – we can set up a call to answer your questions. Click here if you know you would like to order a Starter Kit.

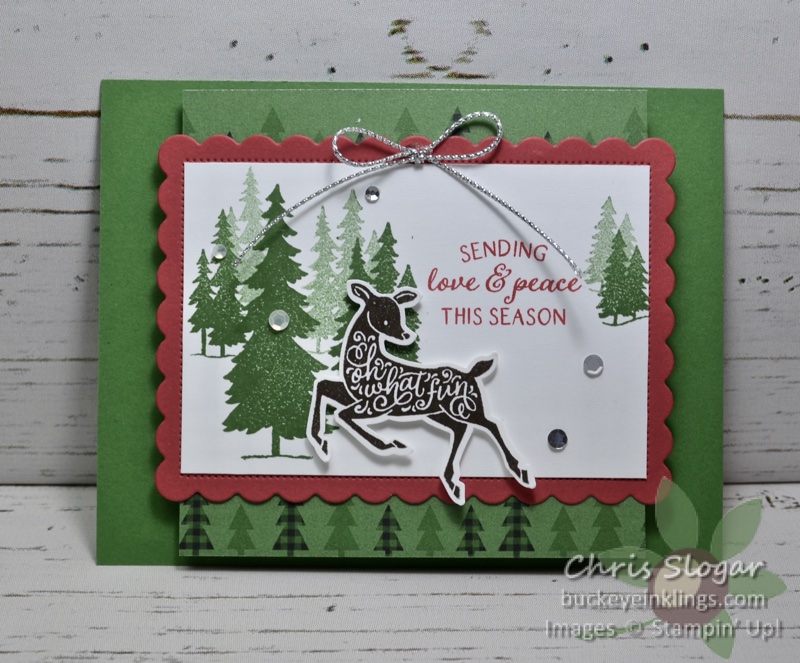
I showed two fun folds using Peaceful Prints. I am showing pictures and dimensions here for easy reference, but you may need to see the video for complete instructions. Please click here to see the video – and please join the Buckeye Inklings Stampers Group on Facebook to get notifications of all of my live videos.

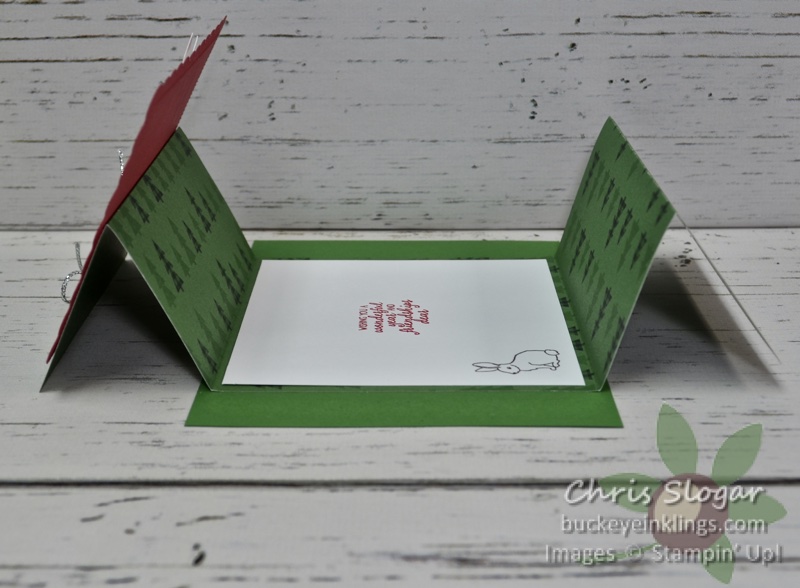
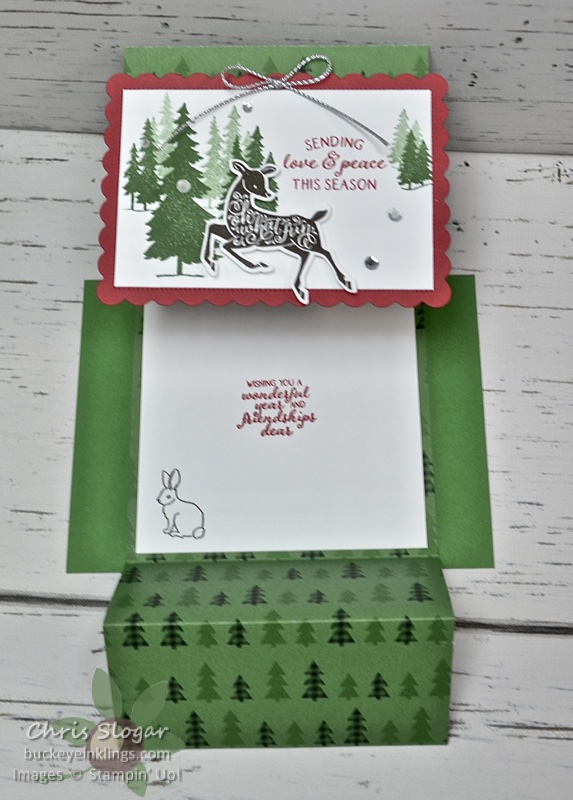
The first uses a 4″ width of designer paper that pulls open as shown below.

The folded edges come together like a gate fold, and they are covered by the scalloped rectangle. Dimensions are as follows…

  • Deisgner Paper 4″ x 12″, scored at 2″, 4″, 8″, 10″
  • Garden Green 4 1/4″ x 5 1/2″
  • Basic White 2 5/8″ x 4″ and 3 3/4″ x 3 3/4″

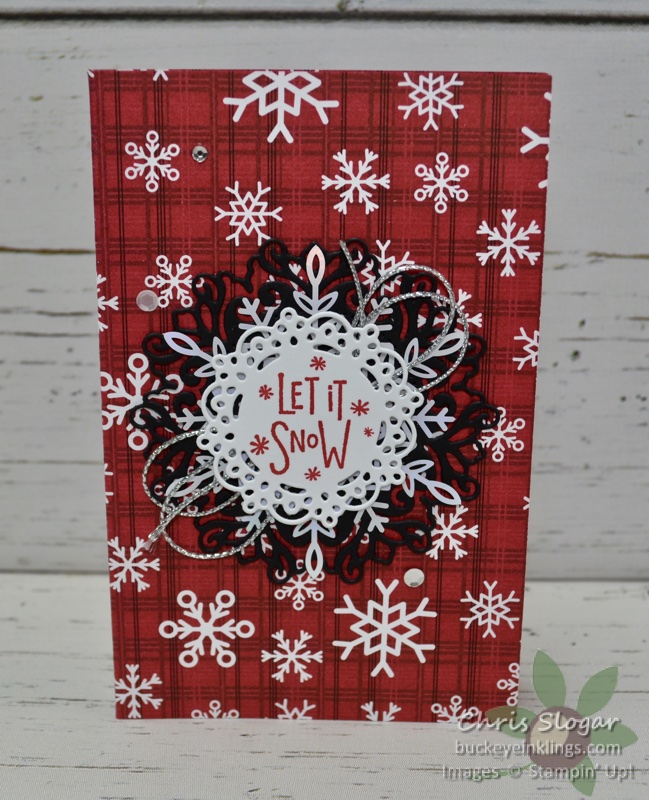
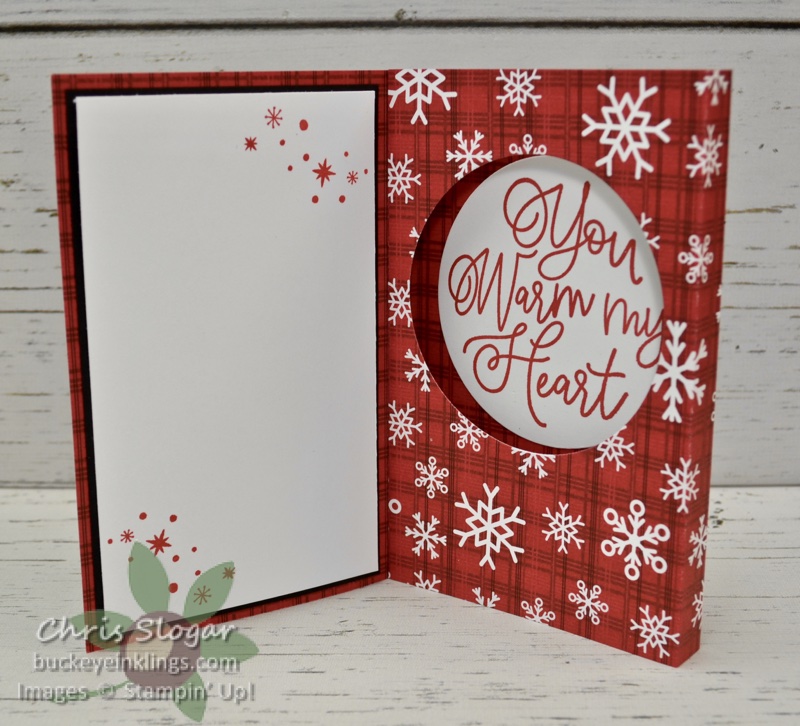
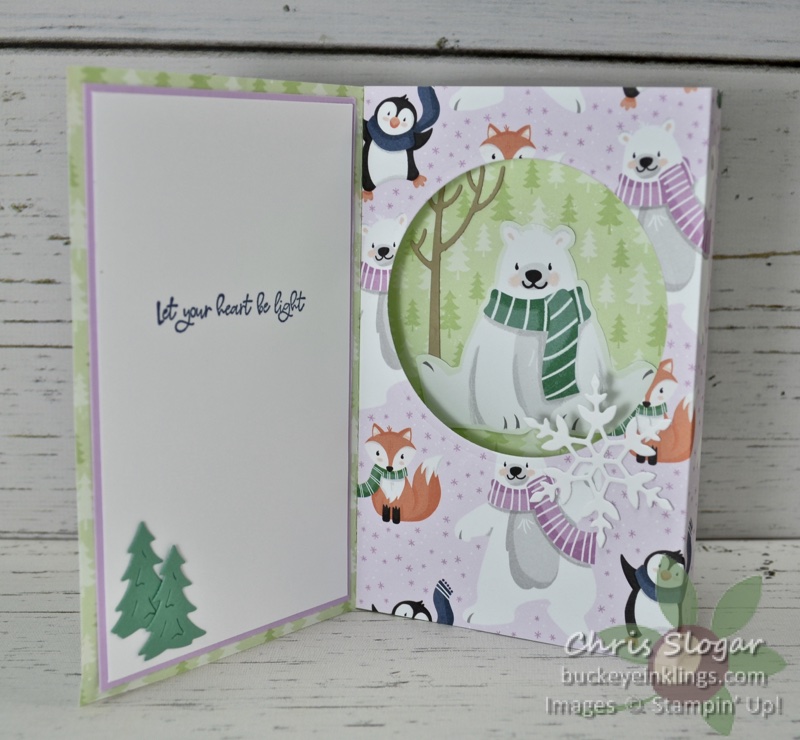
My second project is this Pop-Up Shadow Box. I used the Encircled in Warmth stamp set with the coordinating Encircled in Beauty dies to create the beautiful card front.

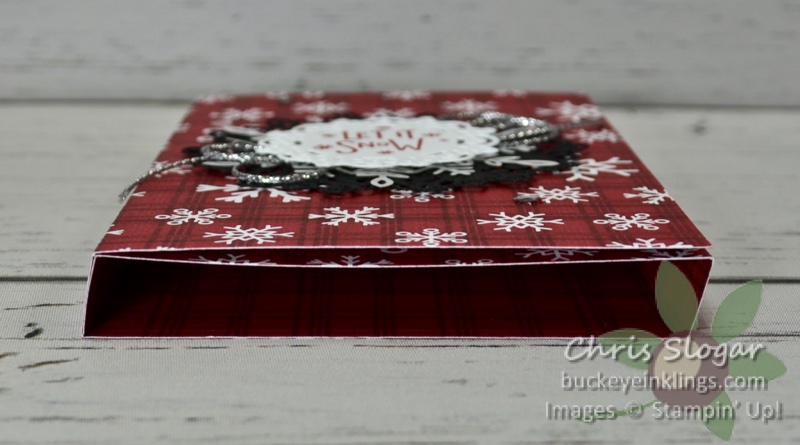
A 3D shadow box effect is created when the card is open.

It collapses to a flat profile for mailing. Dimensions are as follows…

  • Designer Paper 5 1/2″ x 12″, scored at 1/2″, 4″, 4 1/2″, 8″, 8 1/2″
  • Basic Black 3 1/4″ x 5 1/4″
  • Basic White 3 1/8″ x 5 1/8″

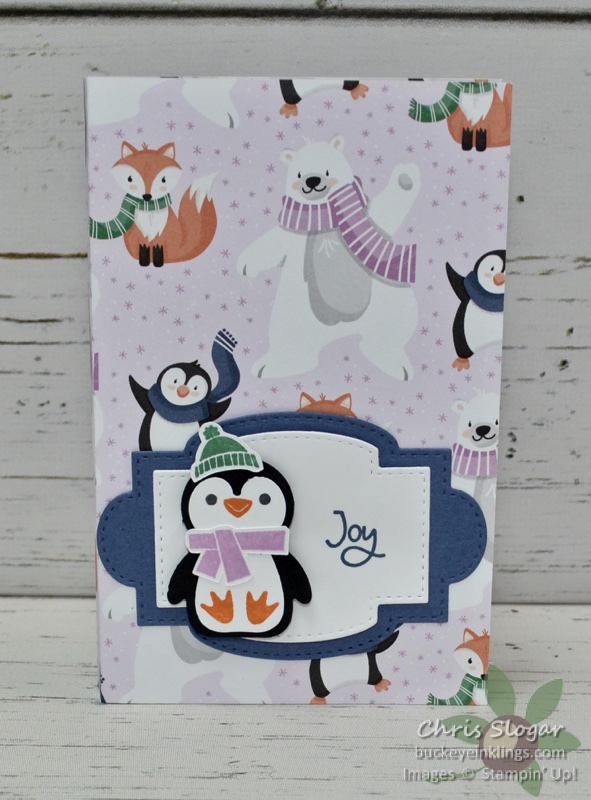
I also made a fun version of this card with the Penguin Playmates designer paper, which is also free with a $50 order during Sale-a-bration.

Thank you for your interest in my projects! I would appreciate your support in Likes, Shares, Follows and also purchases in my online store. I need your help to continue to present free project ideas.

Place a $35 order with Host Code D7RXCP69 in September, and I will send you a package of Wonderful Snowflakes and a handmade card. This is my way of sharing the Stampin’ Rewards with you – I appreciate your business!!

Chris_buckeye_signature_rose_final

Designer Paper Pocket Card

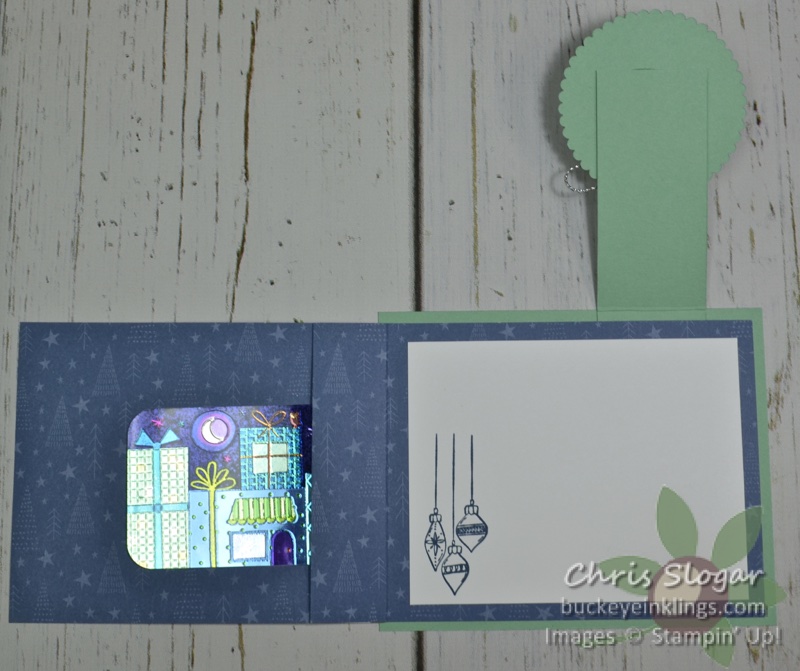
I love, love, LOVE these gift card holders that Terri Meehan showed at our Team Meeting on Monday night. Not only are they super-easy and adaptable to any occasion, but they show off both sides of the designer paper – and they use the paper very efficiently too!

I made them last night on Facebook Live, and also adapted the directions slightly for 6″ designer paper. I am showing pictures and dimensions here for easy reference, but you may need to see the video for complete instructions. Please click here to see the video – and please join the Buckeye Inklings Stampers Group on Facebook to get notifications of all of my live videos.

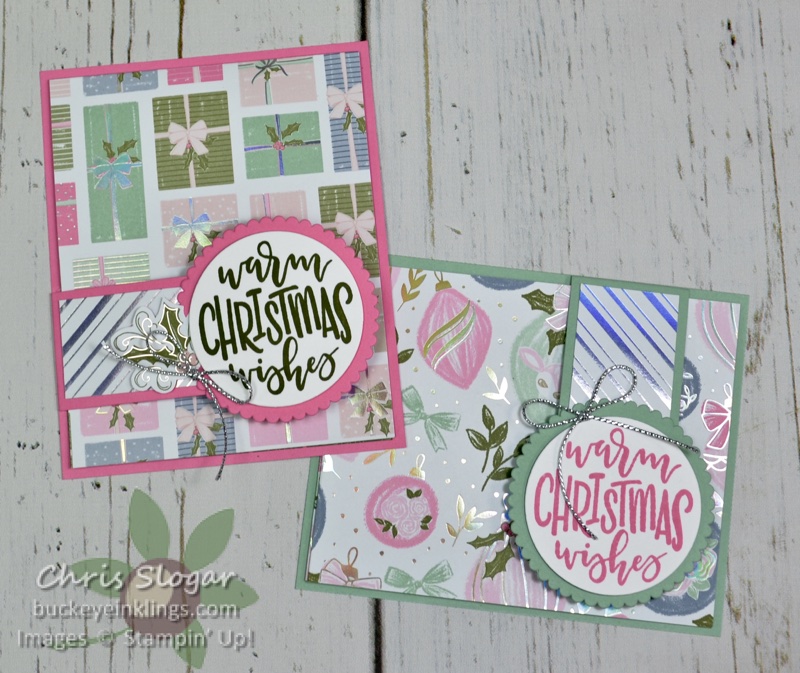
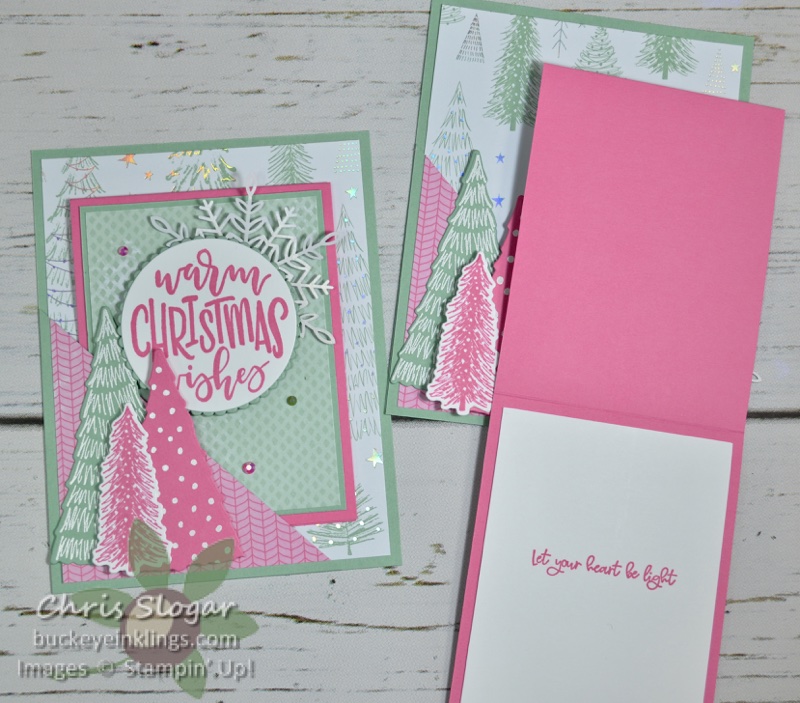
In each of the Whimsy & Wonder versions, a 4″ x 12″ piece of designer paper opens to reveal a pocket with a gift card. In the Polished Pink version, the designer paper is only directional on one side, so the paper does not look like it is upside-down when the front is flipped up and open.

The paper on the Mint Macaron version is directional on both sides, so I cut the 4″ dimension to make the card in the opposite orientation.

Dimensions are as follows…

  • Card Base 4 1/4″ x 5 1/4″
  • Swing Arm 1 1/2″ x 4 1/4″, scored at 3 1/4″
  • Designer Paper 4″ x 12″, scored at 5″, 6″, and 7″
  • Designer Paper 1 1/4″ x 3″
  • Basic White 3 1/2″ x 4 1/2″

I also made some samples with paper that only comes in a 6″ square. In this case, I had to piece together the papers within the fold. The fold is on the long side, allowing the card base to be our typical size – 4 1/4″ x 5 1/2″.

Dimensions follow, and again, you may need the video to see how this was done. Watch directional patterns carefully when scoring and cutting.

  • Card Base 4 1/4″ x 5 1/2″
  • Swing Arm 1 1/2″ wide, length as needed
  • Designer Paper for front 5 1/4″ x 4 3/4″, scored at 3/4″
  • Designer Paper for inside 5 1/4″ x 6″, scored at 4″, 5″
  • Basic White 3 1/2″ x 4 3/4″

I did finish my Halloween version, too. In this version, I made the swing arm to open exactly opposite the fold in the designer paper.

As you can see, a lot of variations are possible with this style of gift card holder – both in theme and layout. I hope you’ll try this with your favorite product suite!

Thank you for your interest in my projects! I would appreciate your support in Likes, Shares, Follows and also purchases in my online store. I need your help to continue to present free project ideas.

Place a $35 order with Host Code D7RXCP69 in September, and I will send you a package of Wonderful Snowflakes and a handmade card. This is my way of sharing the Stampin’ Rewards with you – I appreciate your business!!
Chris_buckeye_signature_rose_final

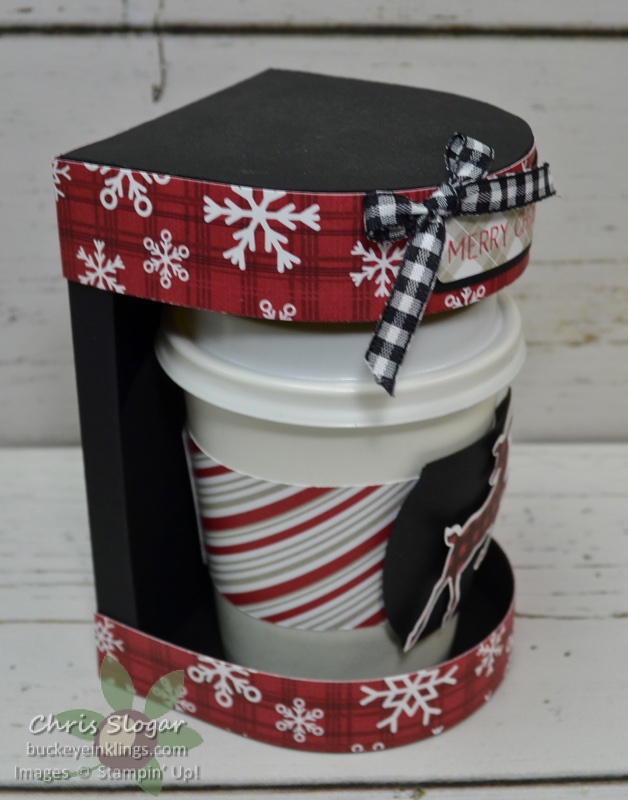
Mini Keurig for a Mini Coffee Cup

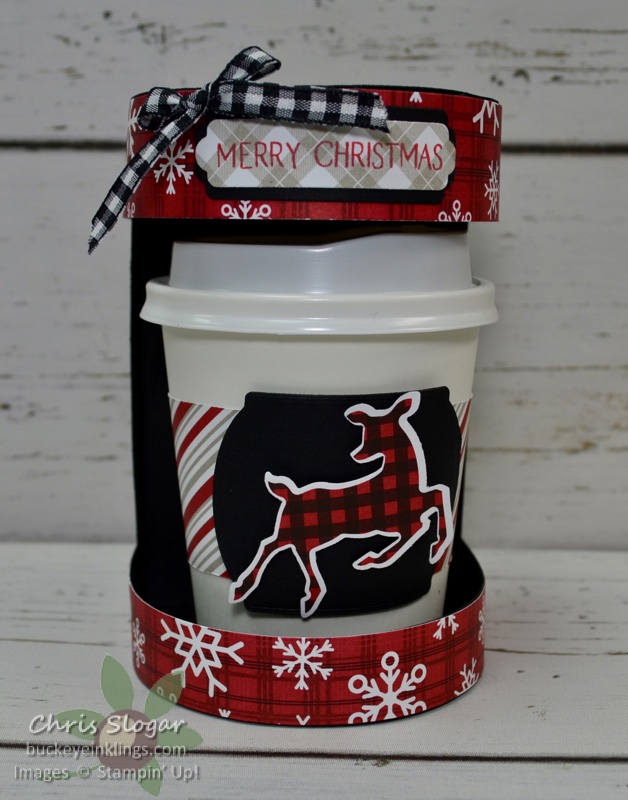
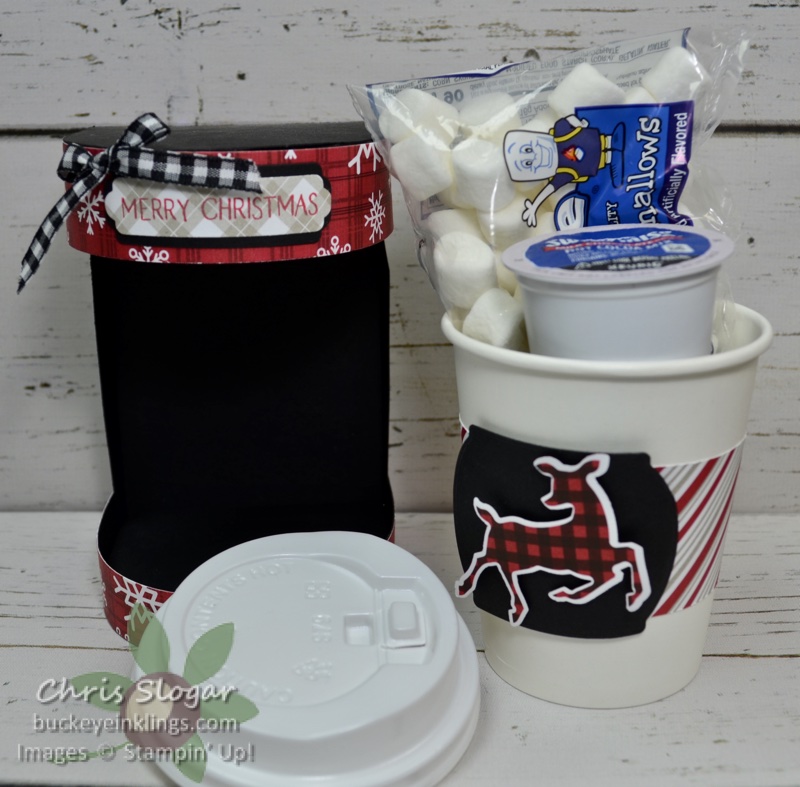
You may have seen the adorable coffee cup holder on page 33 of our Annual Catalog, pictured with the stamp set “Brew Some Fun”. I used Stampin’ Up!’s directions to make this version for a team even last month.

My version uses paper from the Peaceful Prints collection along with the Peaceful Deer bundle. The bundle is available from our mini catalog, with dates through the end of the year, but this beautiful paper is only available through the end of the month – while supplies last. It is one of the items that you can select for free with a $50 order during Sale-a-bration.

At our team event, we filled the coffee cups with a 1oz bag of mini marshmallows and a hot cocoa k-cup. Gift cards also fit inside these cups – a gift card and some small chocolates would be another great gift idea.

I will list the dimensions below for easy reference, but please refer to the video for complete instructions. If you are receiving this post in an email, please click here for the video.

  • Basic Black 4 1/4″ x 6″, scored at 1/2″ on all sides
  • Basic Black 8 3/8″ x 1″ and 8 3/8″ x 1 1/4″, each scored along length at 1/4″
  • Basic Black (4) 3 1/4″ x 3 1/4″
  • Designer Paper 1″ x 12″ and 3/4″ x 12″, each scored at 1 3/4″ and 10 1/4″
  • Assorted pieces for cup band and labels

I mention a cutting file for the Brother Scan-n-cut in the video. (You do not need this to make the project – you can make all of the cuts with a trimmer and scissors.) I am happy to send this file to customers and team members for free – please email me at stampyourworld@gmail.com to request. Others are welcome to purchase it for $3 using the Paypal button below. Please note that this is a .cwprj file – a file for Canvas Worskspace.

Mini Keurig .cwprj file ~ $3


Thank you for your interest in my project! If you need any Stampin’ Up! products, please go to my online store, or use the carousel below to be directed to a specific product.

Place a $35 order with Host Code D7RXCP69 in September, and I will send you a package of Wonderful Snowflakes and a handmade card. This is my way of sharing the Stampin’ Rewards with you – I appreciate your business!!
Chris_buckeye_signature_rose_final

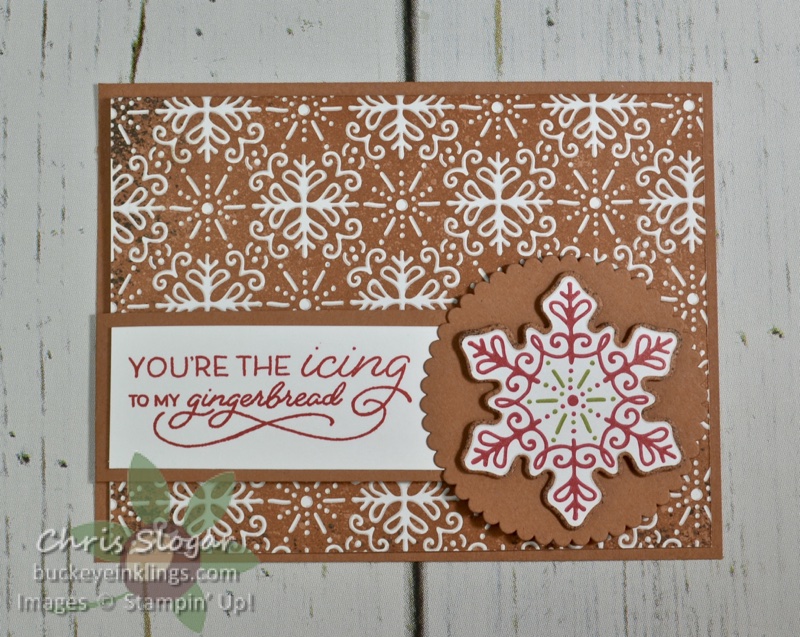
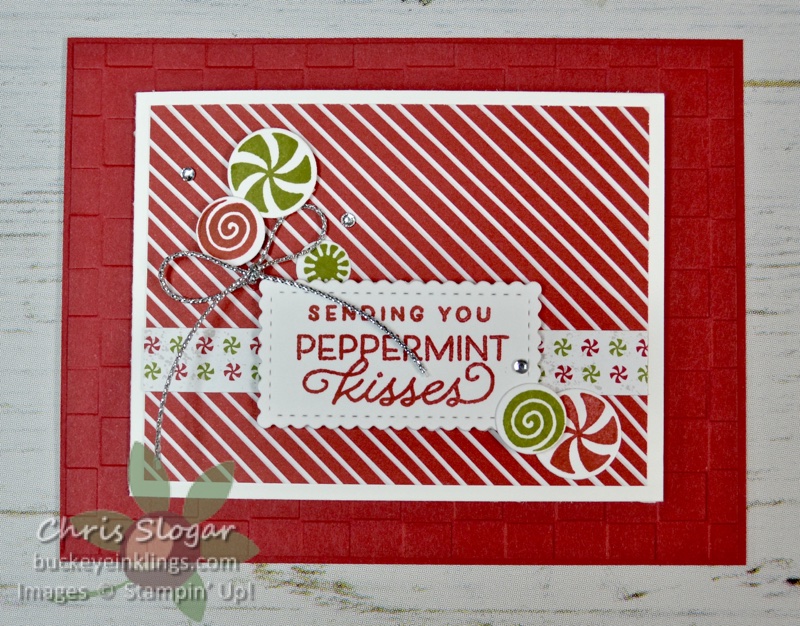
Gingerbread & Peppermint

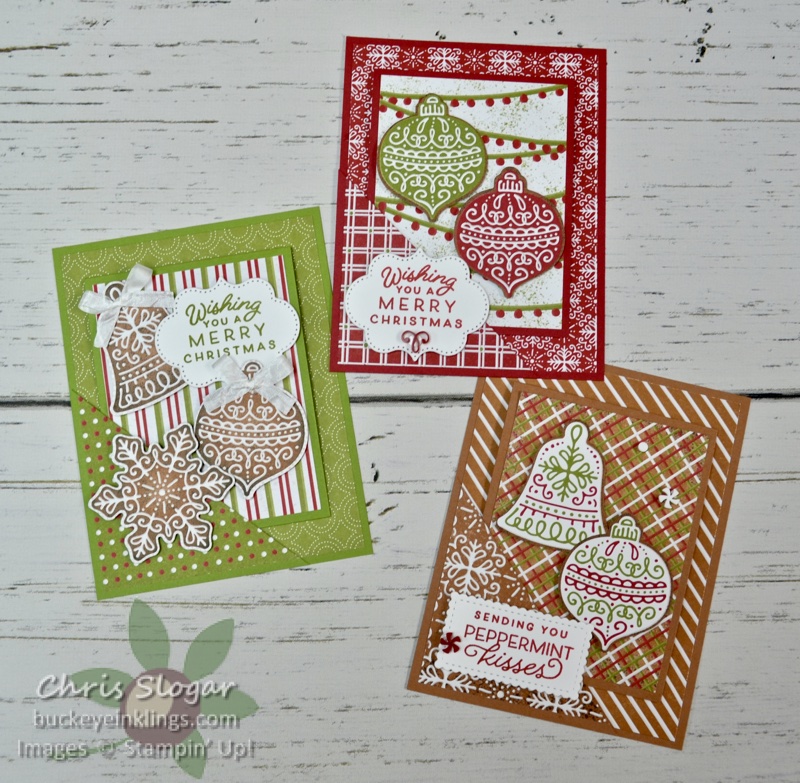
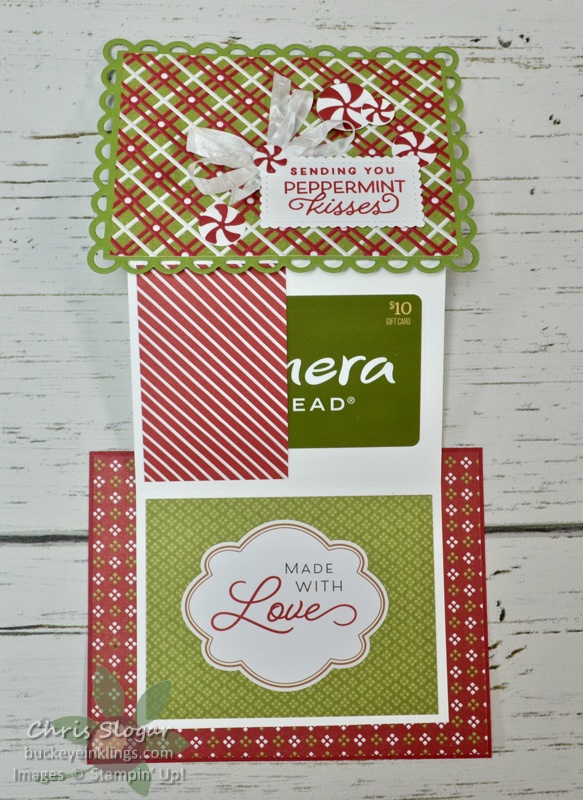
I used the Gingerbread & Peppermint Memories & More cards on all of the projects in last night’s Facebook Live. This gift card holder is a remake of the project shown below. Since the card front takes a 3″ x 4″ piece of designer paper, I knew the 3″ x 4″ Memories & More cards would make this card easier. I chose a striped card and accented with other items from the suite.

I am showing pictures and dimensions here for easy reference, but you may need to see the video for complete instructions. Please click here to see the video – and please join the Buckeye Inklings Stampers Group on Facebook to get notifications of all of my live videos.

The details for this card type can be found on my July 22 post (click here). I simply substituted the Memories & More card for the designer paper on the front, and I made the card in the opposite orientation, and it opens to the side.

Another recent project that lends itself to these Memories & More cards is this Corner Pocket Card…

The directions for this card can be found in my August 11 post (click here). I remade this card using both sizes of Memories & More cards.

I cut the 4″ x 6″ cards down to 4″ x 5 1/4″ for the mat on the card base, and I used the 3″ x 4″ cards for the folded card that pulls out of the pocket. The corner pocket and Christmas shapes are cut from the designer paper in this suite.

I also used a Memories & More card and a sticker on the inside of the folded card.

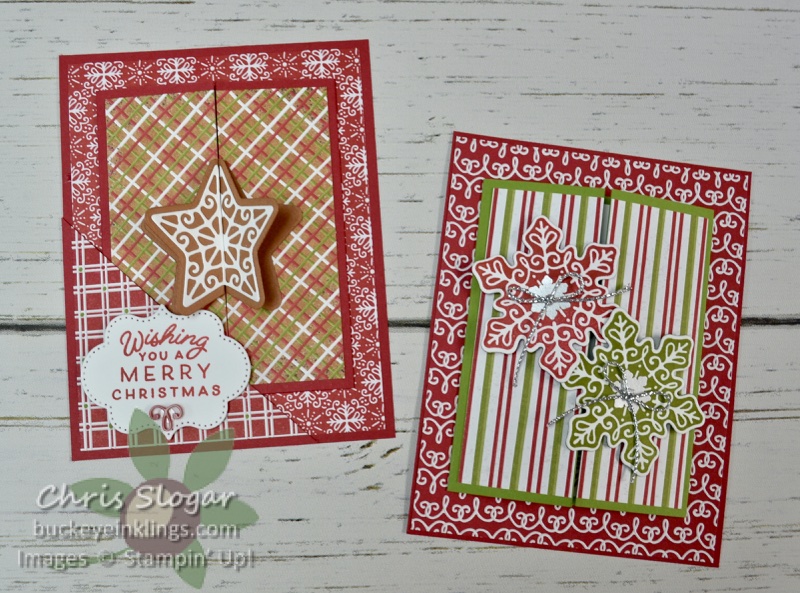
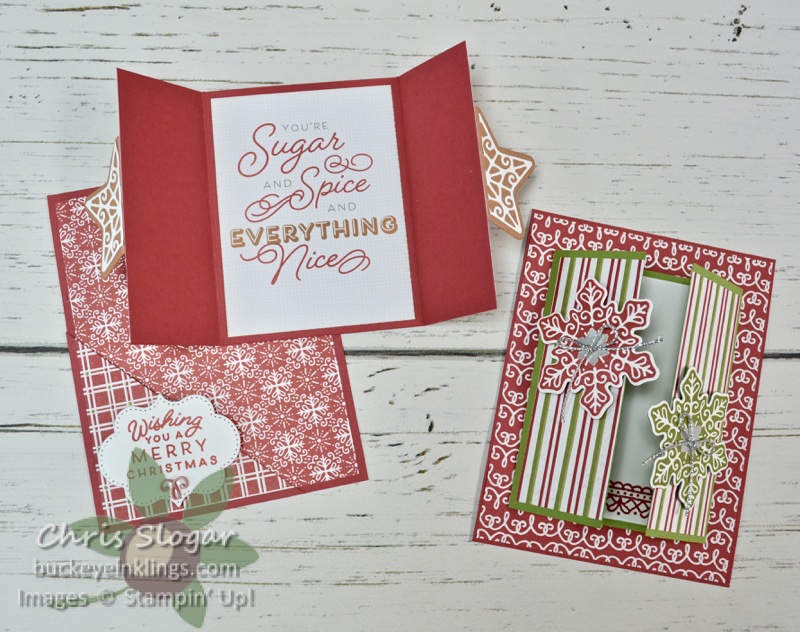
As an alternate to the folded card, I made a gate fold card that can also be tucked into the corner pocket (above picture, left). The gate fold can also be mounted on a card base (above picture, right). The base of the gate fold measures 4 1/4″ x 6 1/2″, scored at 1 5/8″ and 4 7/8″.

The gate fold is sized to hold a 3″ x 4″ Memories & More card – a full card on the inside, or a card cut into two equal halves on the front.

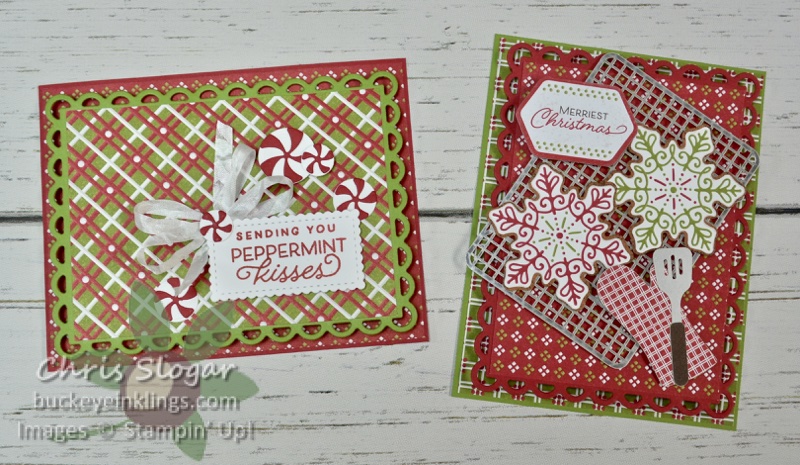
And finally, I modified a favorite Memories & More project from the past to make the cards shown above. The inspiration for these cards is shown below – a card with a trifold panel decorated with 3″ x 4″ Memories & More cards.

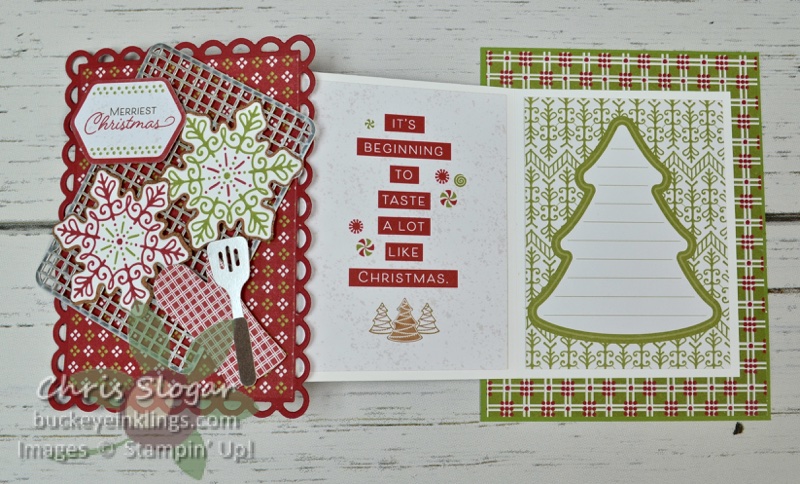
On my Gingerbread & Peppermint versions, I used a large die cut shape from the Scalloped Contours collection on the front of the trifold instead of a Memories & More card, but each inside looks the same as the original.

The card base measures 4 1/4″ x 5 1/2″, and in my Gingerbread and Peppermint versions, the mat on the card base measures 4 1/8″ x 5 3/8″.

The first one is in landscape orientation, and includes a pocket for a gift card. (The pocket is half of a 3″ x 4″ Memories & More card.).

The scalloped contour rectangle is covered with a piece of designer paper that measures 3 3/8″ x 4 5/8″. The trifold piece measures 4 1/4″ x 9 3/4″, scored at 3 1/4″ and 6 1/2″.

The second is in portrait orientation, and I have used two 3″ x 4″ Memories & More cards on the trifold section. The “cookies” on this card are cut from the designer paper, and the other pieces (cooling rack, oven mitt, spatula and greeting) are from the card pack. It’s so great to have the coordinating pieces to mix and match!

Thank you for your interest in my projects! I would appreciate your support in Likes, Shares, Follows and also purchases in my online store. I need your help to continue to present free project ideas.

Place a $35 order with Host Code D7RXCP69 in September, and I will send you a package of Wonderful Snowflakes and a handmade card. This is my way of sharing the Stampin’ Rewards with you – I appreciate your business!!
Chris_buckeye_signature_rose_final

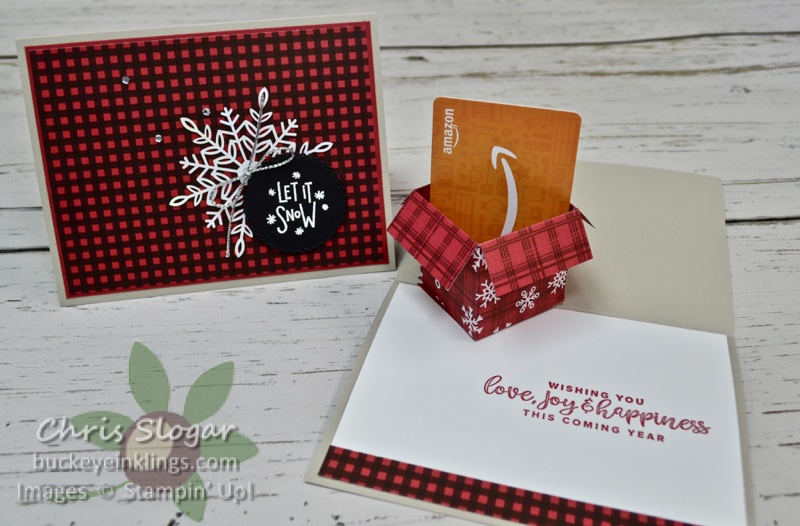
Pop-Up Box in a Card

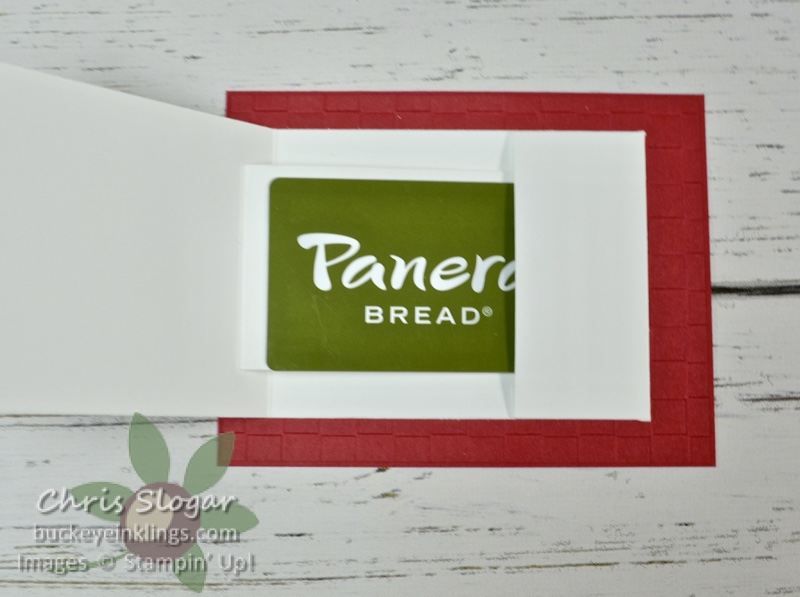
I showed this little gem last night on Facebook Live. The simple card front is hiding a box that pops up from the fold on the inside of this card. I added a sleeve in the box to secure a gift card.

I am showing pictures and dimensions here for easy reference, but you may need to see the video for complete instructions. Please click here to see the video – and please join the Buckeye Inklings Stampers Group on Facebook to get notifications of all of my live videos.

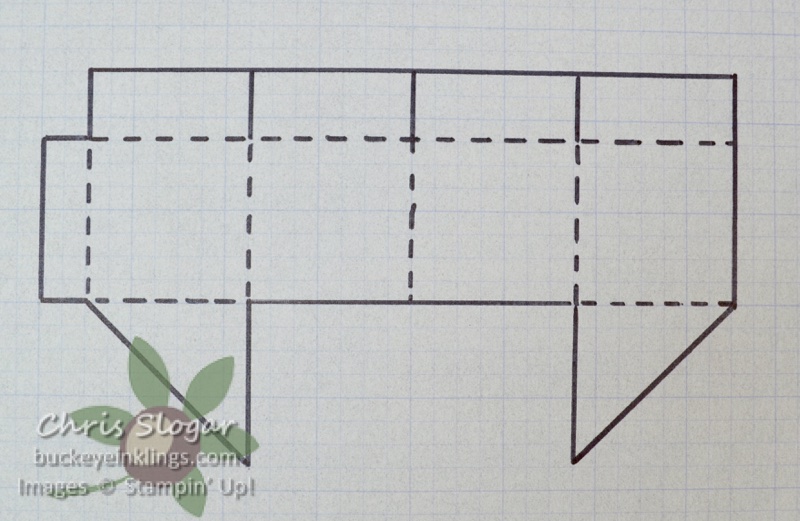
The box piece starts as a rectangle of designer paper that measures 7 1/2″ x 4 1/4″. It is scored at 1/2″, 2 1/4″, 4″, and 5 3/4″ along the 7 1/2″ side, and scored at 1 3/4″ and 3 1/2″ along the 4 1/4″ side. The scored rectangle is cut down to the shape shown below…

The designer paper piece that holds the gift card measures 3/4″ x 5 1/2″, scored at 1/2″, 2 3/4″ and 5″. Please check out the video for complete instructions.

Thank you for your interest in my project! If you need any Stampin’ Up! products, I would appreciate your support in Likes, Shares, Follows and also purchases in my online store. I need your help to continue to present free project ideas!

Place a $35 order with Host Code D7RXCP69 in September, and I will send you a package of Wonderful Snowflakes and a handmade card. This is my way of sharing the Stampin’ Rewards with you – I appreciate your business!!

Chris_buckeye_signature_rose_final

Cloche Dies

This is a card I made for a recent swap. I wanted to highlight the Cloche dies – there are so many cute elements in the collection! I paired it with greetings, colors, and paper from the Whimsy & Wonder Suite.

Thank you so much for checking out my project! If you need any of our products, please shop in my my online store or use the carousel below to be directed to a product used today.

Place a $35 order with Host Code JV62AHQD in August, and I will send you a spool of Black & White Gingham Ribbon and a handmade card. This is my way of sharing the Stampin’ Rewards with you – I appreciate your business!!
Chris_buckeye_signature_rose_final

Gift Card Pull Strip

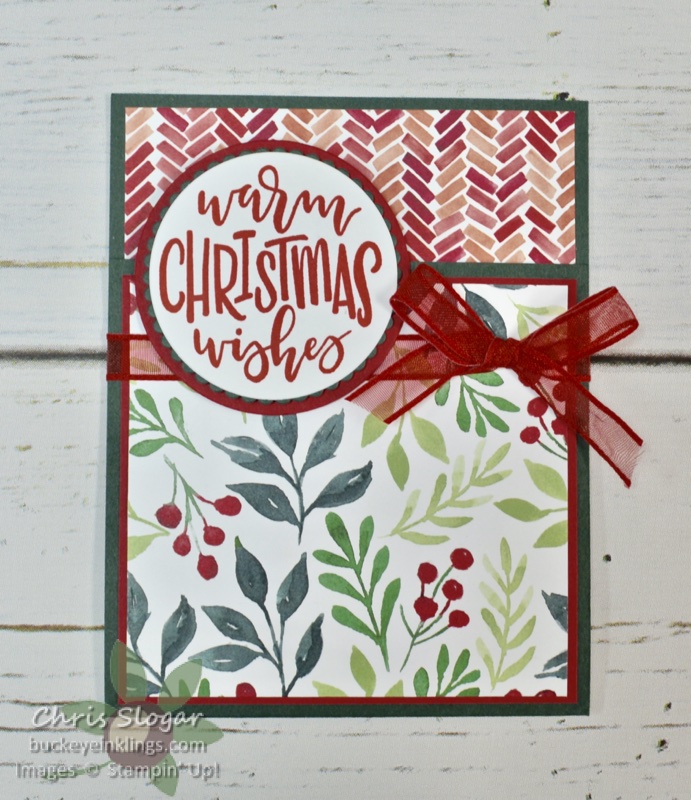
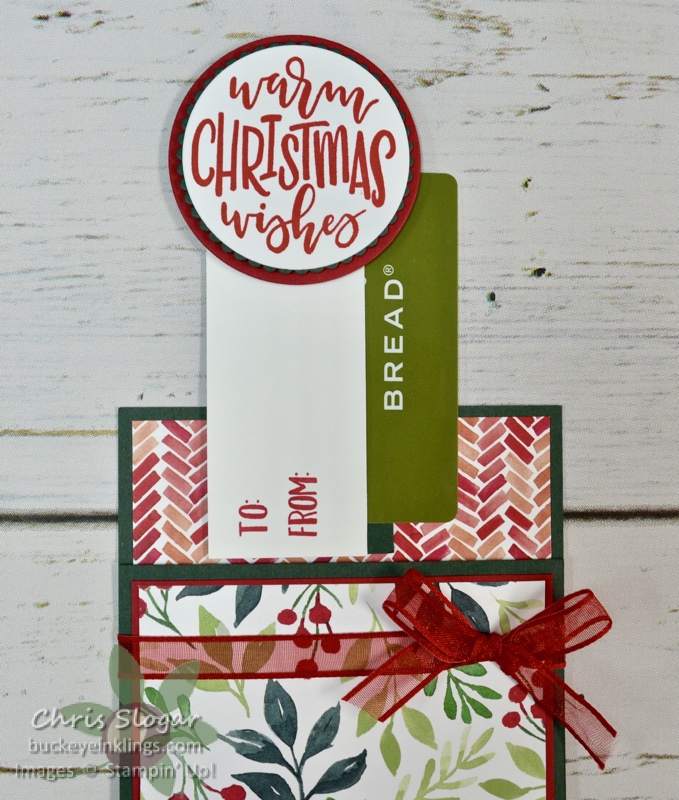
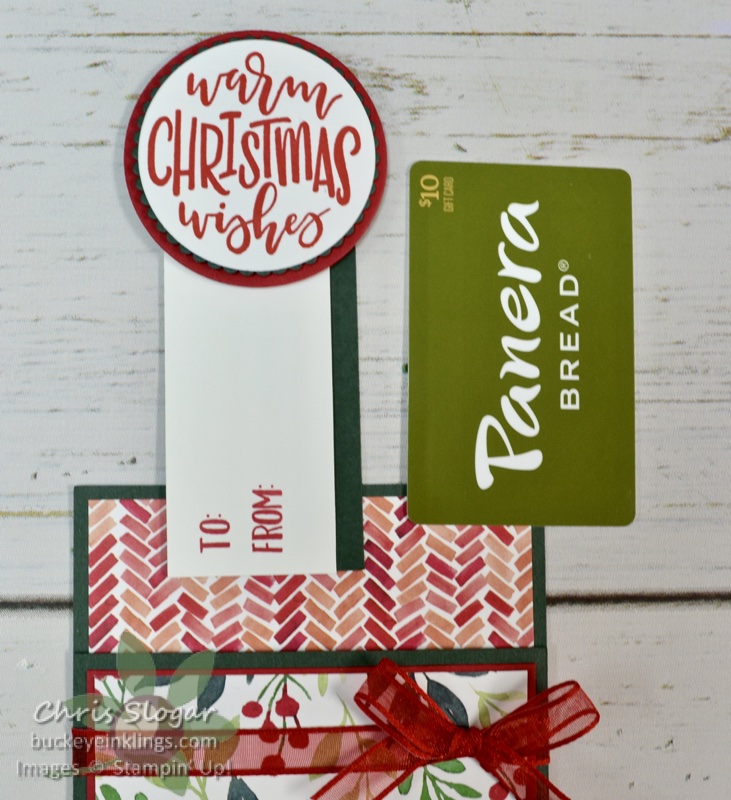
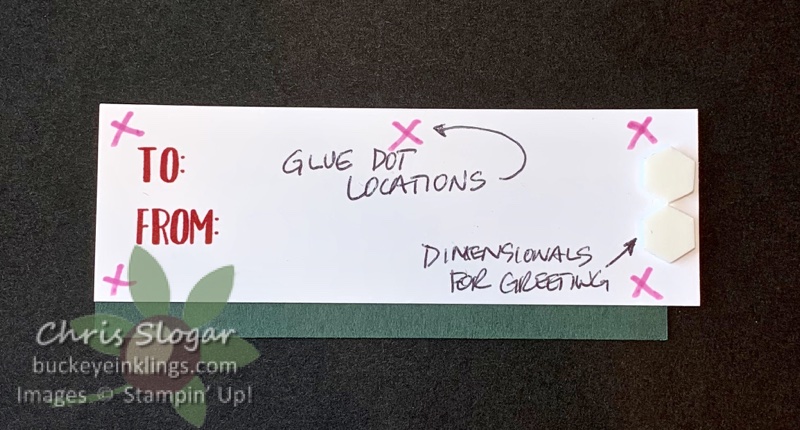
We made this gift card holder at a recent team event. I got the idea from Aubrey, one of the creative assistants at Stamping Jill. It is a pocket card, and the greeting piece pulls a gift card out of the pocket.

You can use any papers and focal point – I chose a greeting from Encircled in Warmth, and the “To:/From:” from Banner Year.

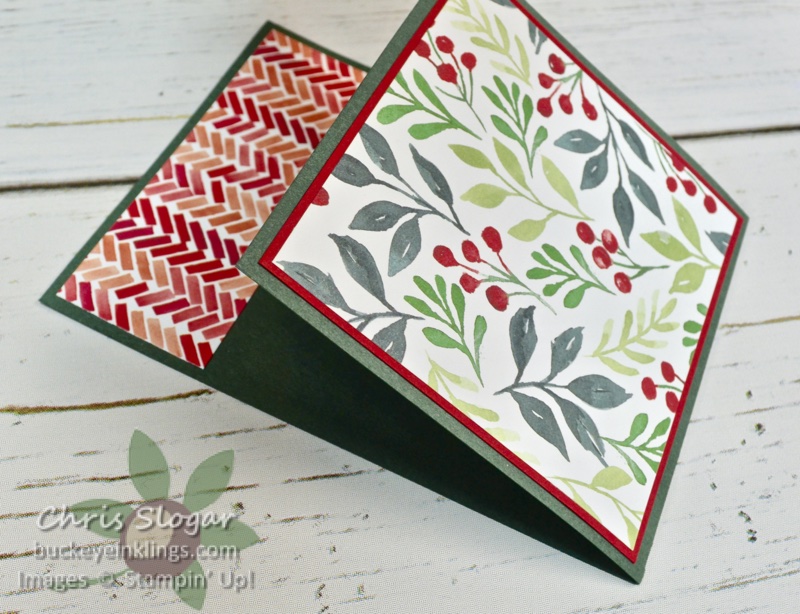
The base is simply folded up and tied shut with the ribbon – I didn’t even adhere the sides.

Dimensions are as follows:

  • Evening Evergreen 4 1/4″ x 9 1/2″, scored at 5 1/2″ and approx 2 1/4″ scalloped circle
  • Real Red 4″ x 3 3/4″ and approx 2 3/8″ circle
  • Designer Paper 3 7/8″ x 3 5/8″ and 1 1/2″ x 4″
  • Basic White circle, approx 2 1/8″
  • Strip Pieces – Evening Evergreen 1 3/4″ x 4 1/4″ and Basic White 1 1/2″ x 4 1/2″

The staggered width of the pieces that hold the gift card make it easy to slide in a gift card. The Basic White is a bit longer to hold the circle. The picture below shows how I assemble the strips, using glue dots between the pieces.

Thank you so much for checking out my project! If you need any of our products, please shop in my my online store or use the carousel below to be directed to a product used today.

Place a $35 order with Host Code JV62AHQD in August, and I will send you a spool of Black & White Gingham Ribbon and a handmade card. This is my way of sharing the Stampin’ Rewards with you – I appreciate your business!!
Chris_buckeye_signature_rose_final

Collar Fold Pocket Cards

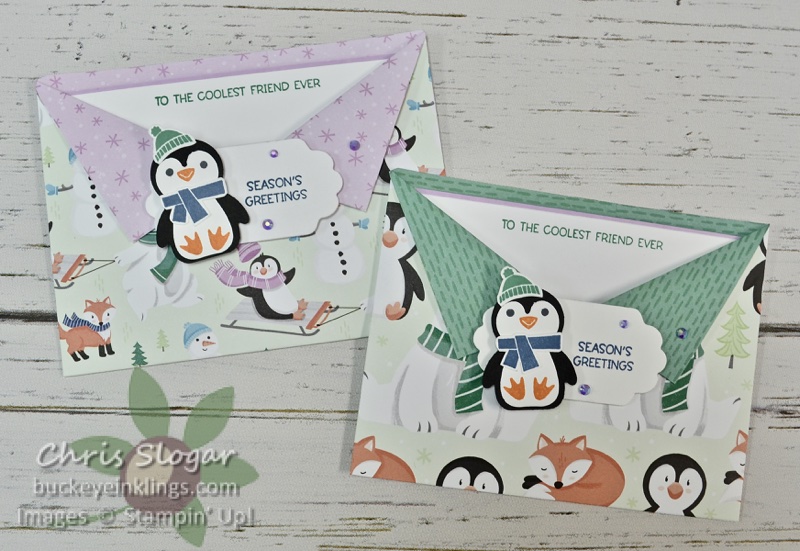
I made these very simple pocket cards last night on Facebook Live. Sale-a-bration is a great time to present projects that are heavy on designer paper since we are getting it for free! How lucky that we have a Sale-a-bration that offers holiday paper this year. The Penguin Playmates collection shown here is one of the “Free with $50” choices.

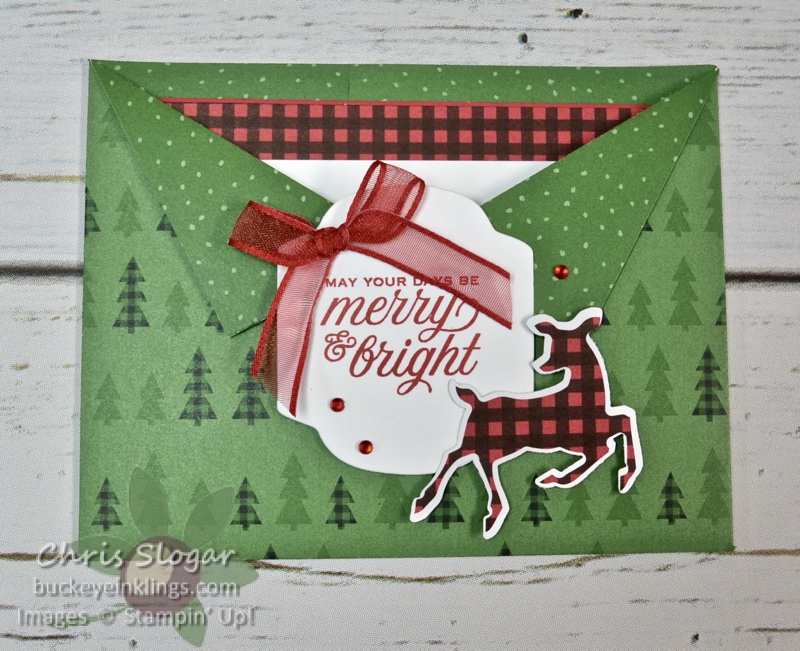
The Peaceful Prints collection used here is another “Free with $50” item.

I am showing pictures and dimensions here for easy reference, but you may need to see the video for complete instructions. Please click here to see the video – and please join the Buckeye Inklings Stampers Group on Facebook to get notifications of all of my live videos.

The overall size of the cards shown above is 4 1/4″ x 5 1/2″. The designer paper piece for the pocket base measures 4 3/4″ x 12″. The designer paper is scored along the bottom edge (watch directional prints) at 1/2″, and along the 12″ length at 3 1/4″ and 8 3/4″.

The collar folds are created with a cut at the halfway point of the long piece – at 6″, a cut that is 1 3/4″ deep will create the middle endpoint of each collar. The long designer paper piece overlaps with a seam at the back. The 1/2″ score line at the bottom of the piece defines the fold for a flap that creates the pocket bottom (cut away this 1/2″ section on both sides of the back). Please refer to the video for more detail.

The inner card is Basic White 5″ x 3 3/4″ on a cardstock mat 5 1/8″ x 3 7/8″.

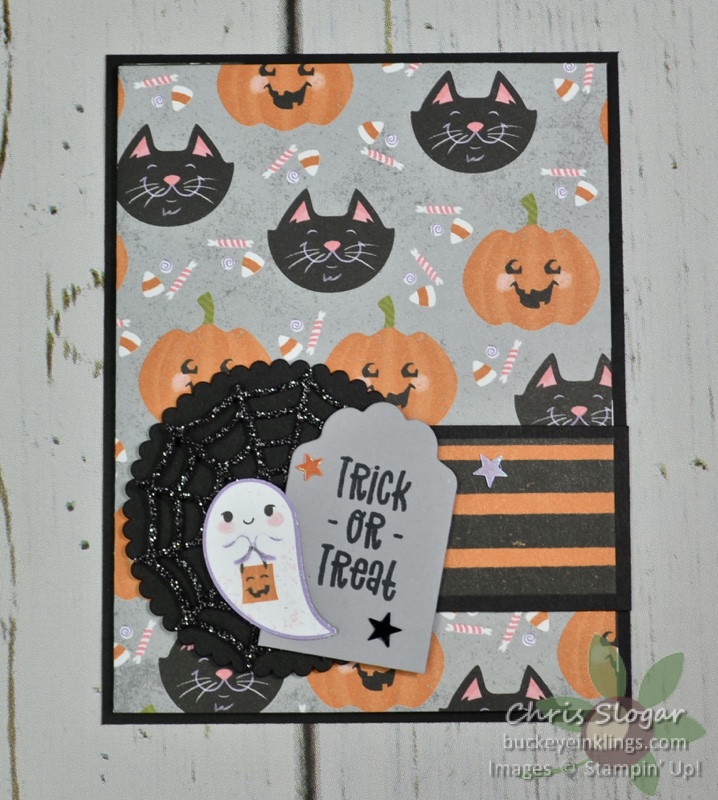
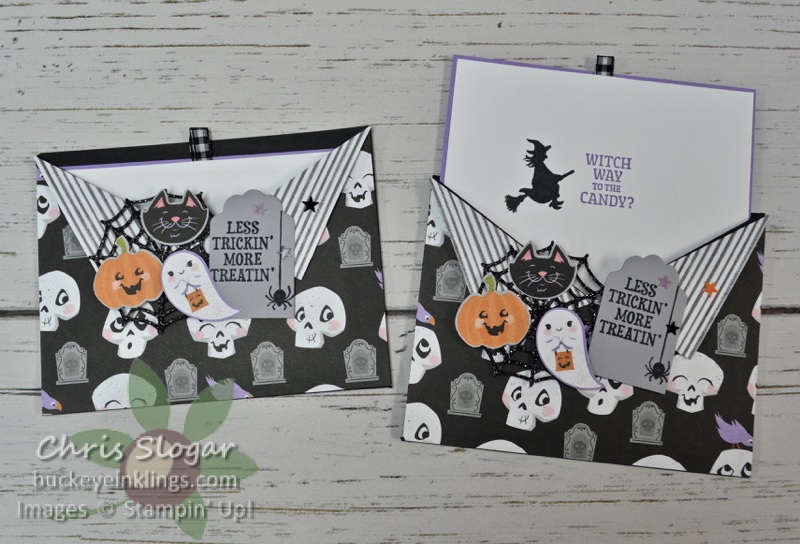
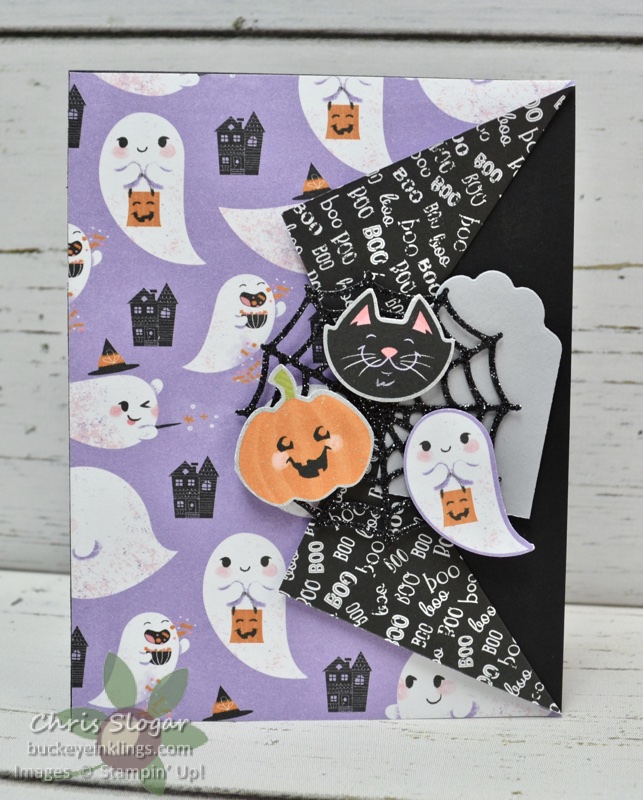
I modified the method so that I could also make this card with the 6″ square designer paper, Cute Halloween. In this case, the pocket is made from black cardstock, and the collar edge is created on a piece of designer paper. By the way, that cute tombstone is cut with one of the Seasonal Labels dies.

I will list the dimensions here for easy reference, but this is a bit tricky (not to mention backwards) from the previous example, so please refer to the video for full instructions.

  • Basic Black Cardstock 4 3/4″ x 11″, scored at 2 3/4″ and 8 1/4″ and also at 1/2″ along the length on one edge (to create the bottom )
  • Designer Paper 4 1/4″ x 5 1/2″, make a cut that is 1 3/4″ deep at midpoint (2 3/4″) along the top of the 5 1/2″ side
  • Basic White 5″ x 3 3/4″ on a cardstock mat 5 1/8″ x 3 7/8″

This designer paper collar piece is the same size that I would use for a regular card, like the one shown below. The only difference is that I have cut the directional paper in the opposite orientation. It is mounted on a black card base, 4 1/4″ x 11″, scored at 5 1/2″.

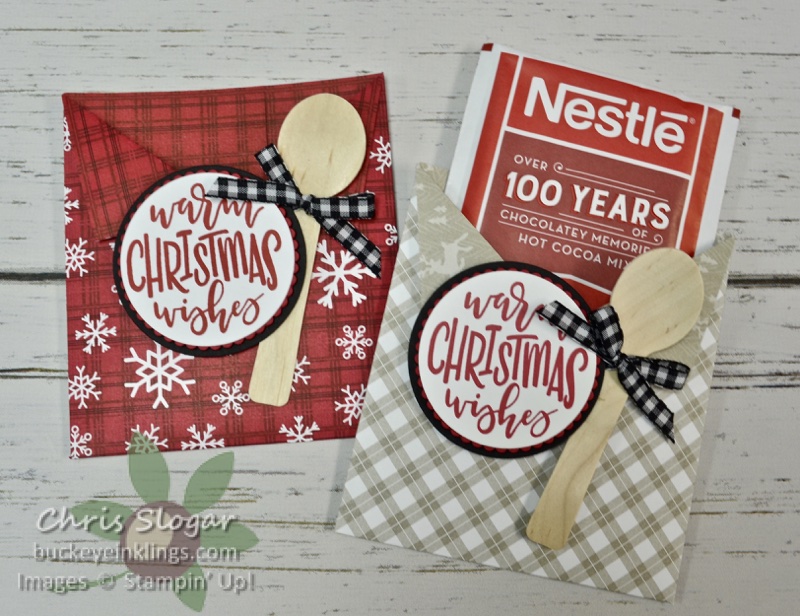
As I mentioned last night, I will be modifying the size of this pocket to fit holiday gifts and craft show items. The pocket is perfect for so many flat items, like this hot cocoa pouch. The designer paper for this project started at 5 1/4″ x 9 1/2″. It is scored at 2 5/8″ and 6 7/8″ along the 9 1/2″ length and at 1/2″ from the bottom edge. The cut for the collar is made 1 3/4″ deep at the midpoint along the top edge (4 3/4″).

This isn’t the only size I plan to make – I have some flat face mask packages and other drink mixes to package this way. I will modify the dimensions to fit – while this is a great layout for a pocket card, I think it is a also cute and easy way to “wrap” a little gift.

Thank you so much for checking out my projects! If you need any of our products, please know that your support in my online store helps to keep my business going. It is my goal to continue to present ideas freely.

Place a $35 order with Host Code JV62AHQD in August, and I will send you a spool of Black & White Gingham Ribbon and a handmade card. This is my way of sharing the Stampin’ Rewards with you – I appreciate your business!!
Chris_buckeye_signature_rose_final

Pretty Pillow Box Purses

I presented this project at our recent team event – it uses the Pretty Pillow Box dies to make a flat-bottomed purse that stands. I used the Harvest Meadow designer paper collection with Bumblebee Gingham ribbon.

My favor holds three Hershey Nuggets. It would be good for any small treats or even a lip balm. Full instructions are in the video at the end of the post.

It will be super-cute with any of our papers! Here, I have used the Gingerbread and Peppermint collection.

Thank you for checking out my projects today! If you need any of our fabulous products, please click here for the online store, or use the carousel below to go directly to a product used today. Your support in the store helps me to bring you project ideas for free 🙂

Place a $35 order with Host Code JV62AHQD in August, and I will send you a spool of Black & White Gingham Ribbon and a handmade card. This is my way of sharing the Stampin’ Rewards with you – I appreciate your business!!
If you are receiving this post in an email, please click here for the video.

Chris_buckeye_signature_rose_final

Corner Pocket Cards

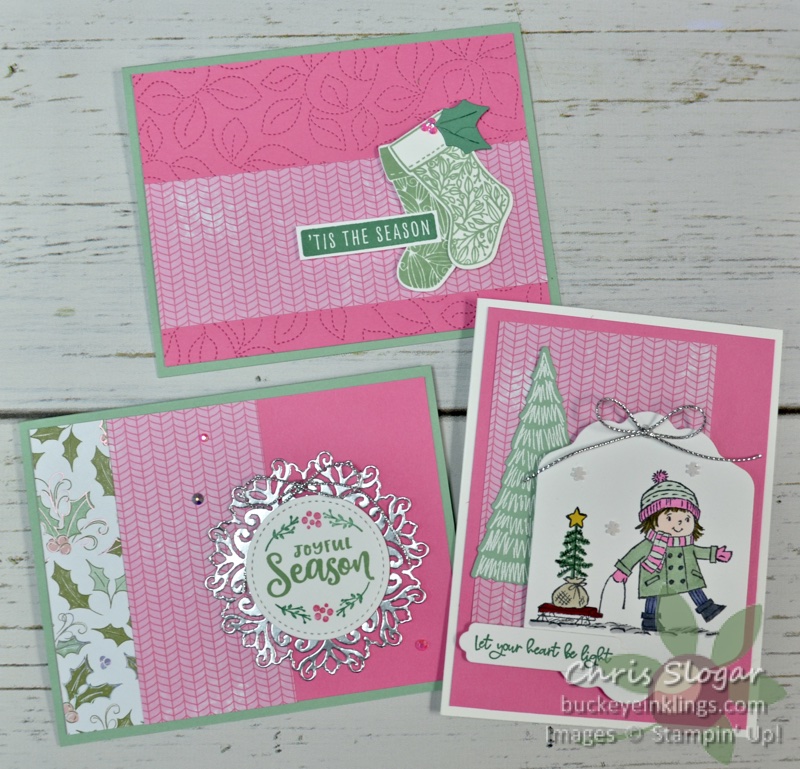
I made these two pocket cards on last night’s Facebook Live. The one on the left has a folded card in the pocket; the one on the right has a tag with a slot for a gift card. The products are from the Whimsy & Wonder Suite in our July-December 2021 Mini Catalog.

I am adding pictures and dimensions here for easy reference, but you may need to see the video for complete instructions. Please click here to see the video – and please join the Buckeye Inklings Stampers Group on Facebook to get notifications of all of my live videos.

I just love the non-traditional color combination in this suite! I focused on the Mint Macaron and Polished Pink for this version. Dimensions are as follows:

  • Mint Macaron 4 1/4″ x 5 1/2″ and 3″ x 4″
  • Designer Paper (card base and front of folded card) 4″ x 5 1/4″ and 2 7/8″ x 3 7/8″
  • Polished Pink 3 1/4″ x 8 1/2″, scored at 4 1/4″
  • Mint Macaron 3 1/2″ x 3 1/2″
  • Designer Paper 3 1/4″ x 3 1/4″
  • Basic White 3″ x 4″

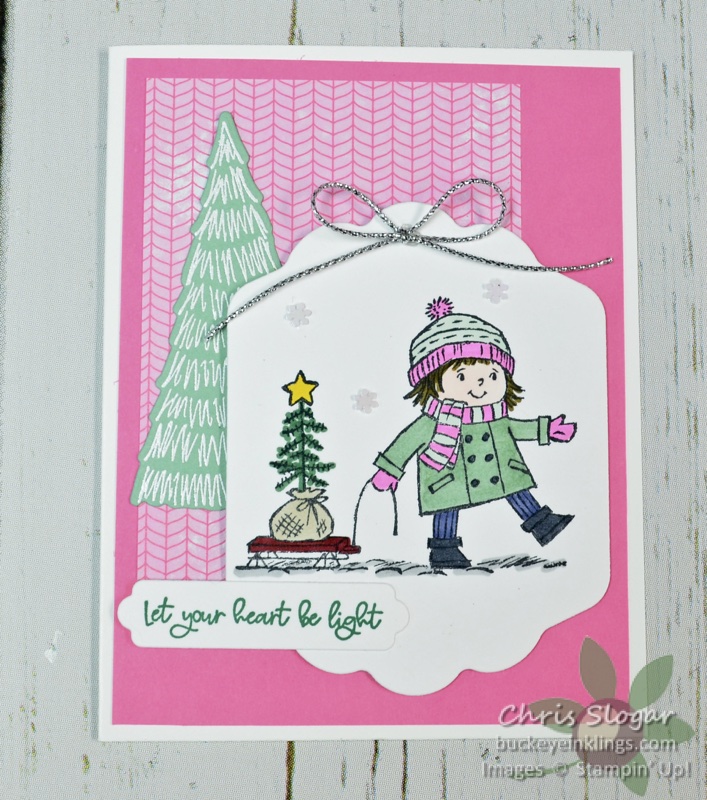
On my tag version, I added a slot to the back of the tag for a gift card. I used the long label die from the Meadow die collection for the slot, and a die from the Scalloped Contours collection for the tag.

The base and pocket pieces are the same as in the previous version. The designer paper on the tag measures 2 5/8″ x 4″.

Thank you for checking out my projects today! If you need any of our fabulous products, please click here for the online store, or use the carousel below to go directly to a product used today. Your support in the store helps me to bring you project ideas for free 🙂

Place a $35 order with Host Code JV62AHQD in August, and I will send you a spool of Black & White Gingham Ribbon and a handmade card. This is my way of sharing the Stampin’ Rewards with you – I appreciate your business!!
Chris_buckeye_signature_rose_final
WordPress theme: Kippis 1.15